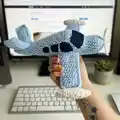
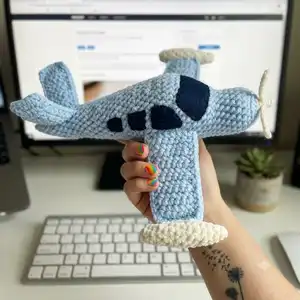
About This Plush Bonanza Beechcraft V-tail Amigurumi Pattern
This pattern creates a plush Bonanza Beechcraft V-tail toy crocheted from plush yarn with clear shaping for a triangle-to-fuselage build. It includes step-by-step rounds for the fuselage, tail, wings, engines, propeller holder and propellers. Window templates and sewing instructions are provided so you can finish the plane with neat details.
You will learn to crochet pieces in turning rows, join pieces together by crocheting the perimeter and complete the toy with felt windows. The pattern assumes basic crochet knowledge and does not include beginner stitch tutorials.
Why You'll Love This Plush Bonanza Beechcraft V-tail Amigurumi Pattern
I absolutely love this pattern because it turns a simple chain and single crochet into a charming plush airplane with clever shaping. I enjoy the triangular start for the fuselage — it creates a unique form that is satisfying to watch transform. The pattern balances structure and softness so the finished toy is cuddly yet holds its shape well. I also love that the details like felt windows and a sewn-on propeller give the plane personality and make it gift-ready.
Switch Things Up
I love how flexible this plane pattern is for customization; change colors to make different airlines or a personalized toy by using contrasting window felt and propeller colors.
You can make a miniature keychain-friendly version by using thinner yarn and a smaller hook, or scale it up by using bulky yarn and a larger hook for a cuddly plush version.
I often swap the plush yarn for textured cotton for a firmer toy that is easier to sew detailed felt windows onto; the propeller holder works well in contrasting yarn.
Try embroidering small details like registration numbers or stars on the wings for a custom touch and to practice simple surface embroidery on plush crochet.
For a safer toy for small children, glue felt windows only after confirming no small parts will detach, or embroider windows directly with yarn for no-glue finishing.
I sometimes add thin wire inside wing edges to create a slight poseable lift; if you do this, encase wire ends carefully inside the fabric to avoid sharp points.
If you want a vintage look, use cream and navy color combos and slightly smaller stuffing for a softer, slouchy airplane silhouette that looks handmade and loved.
I also recommend trying different propeller styles — crocheted blades, wooden buttons, or a stitched spiral — to change the character of the plane quickly.
Make a full fleet by varying yarn weights and color schemes; group them as a nursery mobile by hanging finished planes from embroidery hoops or a wooden mobile arm.
When sewing pieces on, I always pin and test placement visually before sewing; that lets me experiment with angles and symmetry until the placement looks right.
Common Mistakes & How to Fix Them
✗ Skipping the instruction to place increases in the exact center of the triangle can make the fuselage lopsided; find the center and count stitches to place increases symmetrically.
✗ Not stuffing while crocheting will make it hard to achieve the correct shape later; add filler gradually during shaping rounds to maintain consistent form.
✗ Cutting the thread too early when making pairs for tail and wings can make finishing difficult; leave the thread on the second part so you can crochet around the perimeter to sew them together.
✗ Crocheting with inconsistent tension results in mismatched piece sizes; keep a steady tension and check stitch counts frequently to match the pattern exactly.