About This Mini Pumpkin Man Amigurumi Pattern
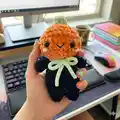
This pattern creates a tiny pumpkin-themed amigurumi with a textured velvet head, cute little body, arms, legs and a small stem. It uses continuous rounds, magic ring starts, increases and decreases to shape parts. The finished toy is small, soft, and perfect as a gift or seasonal decoration with simple facial embroidery and a bow option.
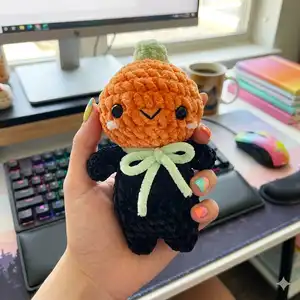
The pattern uses velvet yarn for a plush look and sport weight for contrast details, and it requires minimal sewing. Step-by-step rounds and clear assembly instructions make it easy to complete in a few hours.
Why You'll Love This Mini Pumpkin Man Amigurumi Pattern
I absolutely love this pattern because it turns simple stitches into a charming little character with big personality. I enjoy how the velvet yarn creates that plush pumpkin texture that feels lovely to hold. I also appreciate that the construction is compact — you can finish it in a short session and still have a satisfying handmade gift. Sewing the dents and adding tiny facial details lets me add my own touches, which makes every piece feel unique.
Switch Things Up
I love how easy it is to customize this Mini Pumpkin Man by switching yarn colors; try pastel orange and mint green for a softer look.
I often make a tiny keychain version by using thinner yarn and a smaller hook to create a mini sized pumpkin perfect for bags.
You can change the facial expression by moving the eyes slightly closer or further apart and varying the mouth shape for different personalities.
I sometimes replace safety eyes with embroidered eyes for a fully soft toy and to make it safe for small children.
For a rustic look I add a short loop of jute at the stem to hang it as autumn decor on doorknobs or branches.
Make the body in contrasting yarn textures instead of velvet for more definition between head and body; sport weight gives a nice contrast.
I like to add tiny accessories like a crocheted scarf, bow, or mini hat to give the pumpkin character and seasonal flair.
To make the pumpkin chunkier, use a bulkier velvet yarn and a larger hook, and to make it daintier use fingering yarn and a smaller hook.
Try embroidering stripes or tiny stars on the body to create themed pumpkins for holidays or as playful characters.
Experiment with the number of dents and their spacing to change the look of the pumpkin — five is standard here, but three or seven give different silhouettes.
Common Mistakes & How to Fix Them
✗ Not placing the eyes in the correct rounds can make the face sit off-center; insert the safety eyes between R7-R8 spaced five stitches apart while looking from the top so the face sits on the long side of the R1 oval.
✗ Forgetting to stuff as you go leads to lumps or under-stuffed sections; begin stuffing at the head after placing the eyes and continue stuffing gradually to maintain an even shape before closing.
✗ Cutting yarn too soon when making the legs can make joining difficult; after finishing the first leg cut the yarn, but when working the second leg do not fasten off so you can attach it directly by crocheting around both legs.
✗ Skipping stitch counting during increases and decreases creates uneven shaping; count your stitches after each increase or decrease round to ensure you match the stitch counts given for each round.
✗ Pulling the yarn too tightly when making the pumpkin dents may pucker the head; pull gently and adjust the tension as you form each dent so the pumpkin shape looks natural and even.