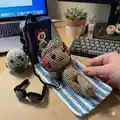
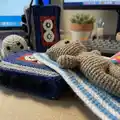
About This Groot Amigurumi Pattern
This pattern creates a small, detailed Groot amigurumi complete with crown, embroidered decorations, a smile and tiny headphones. Youll work in the round using simple increases and decreases, plus a few front/back loop techniques for shaping. The pattern includes step-by-step rounds and photographic guidance for assembly and finishing touches.
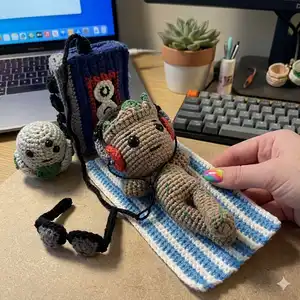
Perfect for intermediate crocheters who enjoy character work and finishing. The design uses fine yarn and small hooks to create a compact, expressive toy.
Why You'll Love This Groot Amigurumi Pattern
I absolutely love this pattern because it captures so much personality in a small amigurumi form. I enjoy the mix of simple rounds and little details like the crown leaves and headphones that make Groot feel unique. The shaping techniques are satisfying and teach useful skills for future toys I make. I also love how the embroidery brings the piece to life — it feels rewarding every time I add a new stitch.
Switch Things Up
I love how easy it is to customize this Groot: change the yarn color to make a pastel or neon version for a different look.
I often make a mini keychain by using thinner yarn and a 1.75mm hook for a tiny portable version.
To make a chunkier, cuddlier Groot, switch to bulky yarn and a larger hook and increase the stuffing for a plush feel.
I sometimes change the eye size or use embroidered eyes for a safer toy for small children.
Add tiny accessories: a scarf, tiny crocheted flower, or a miniature staff to give Groot a unique personality.
Embroider different patterns on the chest for seasonal themes—add orange and brown stitches for autumn or tiny hearts for a gift.
For a posable figure, consider inserting thin craft wire into the limbs before stuffing so you can adjust poses.
If you prefer less sewing, crochet the arms and legs longer and join them with mattress stitch to reduce the number of sewn seams.
I like to experiment with facial expression by moving the smile and eye placement slightly to create different moods.
Try substituting felt or safety nose details for different textures or sew on tiny beads for sparkly accents.
Common Mistakes & How to Fix Them
✗ Skipping stitch markers during rounds can make counting difficult and lead to uneven shaping; place a marker at the start of each round and recount often to stay accurate.
✗ Not stuffing as you go causes gaps or overstuffing later; stuff gradually while crocheting, especially before decreasing sections, to keep smooth shaping.
✗ Cutting threads too short leaves you unable to sew pieces securely; always leave at least 4 inches for sewing and weaving in ends.
✗ Ignoring front loop or back loop instructions will change the toy silhouette; follow BLO/FLO notes exactly for correct crown and leg shaping.
✗ Forgetting to place eyes in the specified row will misplace facial features; insert safety eyes at row 37 with 5sc between them as directed.