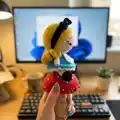
Bring a slice of Wonderland to life with this charming amigurumi set featuring Alice, the Cheshire Cat and the White Rabbit. The patterns guide you step-by-step, giving clear shaping, color-change tips and assembly notes so you can create playful, collectible characters. Perfect for gifting or decorating your crafting space, these designs mix simple motifs with fun personality details.
Progress Tracker
0% Complete
— Sitting Body (yarn A) :
Round 1 :
sc 7 into a magic loop (7)
Round 3 :
[sc 1, inc] 7x (21)
Round 4 :
[sc 1, inc, sc 1] 7x (28)
Round 5-7 :
sc 28 (3 rnds), change to yarn B (28)
Round 8-10 :
sc 28 (3 rnds) (28)
Round 11 :
[sc 5, dec] 4x (24)
Round 12 :
[sc 4, dec] 4x, stuff firmly (20)
Round 13 :
[sc 3, dec] 4x (16)
Round 14 :
[sc 2, dec] 4x (12)
Round 15 :
[sc 2, dec] 3x (9)
Round 16-20 :
sc 9 (5 rnds) (9)
Round 21 :
[sc 1, dec] 3x (6)
Info :
Break the yarn, weave in the last 6 sts, hide the remaining yarn (pic 1)
— 1st Leg - Standing Body (yarn C) :
Round 1 :
ch 4, start on the 2nd st from the hook, sc 2, (sc 3) on the last st, sc 1, inc (8)
Round 2 :
inc, sc 1, inc 3, sc 1, inc 2 (14)
Round 3-4 :
sc 14 (2 rnds) (14)
Round 5 :
sc 2, dec 5, sc 2, change to yarn A (9)
Round 6-11 :
sc 9 (6 rnds) (9)
— 2nd Leg - Standing Body (yarn C) :
Round 1-11 :
Repeat rnd 1-11 of the 1st Leg (9)
Info :
Do not break the yarn, join with the last st of the 1st leg, continue to crochet the Standing Body.
— Standing Body (yarn A) :
Round 12 :
sc 9 (on the 1st leg), sc 9 (on the 2nd leg) (18)
Round 13-15 :
sc 18 (3 rnds), change to yarn B (18)
Round 16 :
[sc 4, dec] 3x, stuff firmly (15)
Round 17 :
[sc 3, dec] 3x (12)
Round 18 :
[sc 2, dec] 3x (9)
Round 19-23 :
sc 9 (5 rnds) (9)
Round 24 :
[sc 1, dec] 3x (6)
Info :
Break the yarn, weave in the last 6 sts, hide the remaining yarn (pic 2)
— Head (yarn B) :
Round 1 :
sc 6 into a magic loop (6)
Round 3 :
sc 12 (8 rnds), ch 1, turn (12)
Round 10 :
(blo) [sc 1, inc] 6x (18)
Round 11 :
[sc 1, inc, sc 1] 6x (24)
Round 12 :
[sc 3, inc] 6x (30)
Round 13 :
[sc 2, inc, sc 2] 6x (36)
Round 14 :
[sc 2, inc, sc 2] 6x (36)
Round 15 :
[sc 5, inc] 6x (42)
Round 16 :
[sc 3, inc, sc 3] 6x (48)
Round 17-23 :
sc 48 (7 rnds) (48). Insert the 6mm eyes between rnd 18 & 19, 8 sts apart (you may prefer to insert eyes after finishing).
Round 24 :
[sc 3, dec, sc 3] 6x (42)
Round 25 :
[sc 5, dec] 6x (36)
Round 26 :
[sc 2, dec, sc 2] 6x, insert the Sitting/Standing Body inside the head & stuff firmly (30)
Round 27 :
[sc 3, dec] 6x (24)
Round 28 :
[sc 1, dec, sc 1] 6x (18)
Round 29 :
[sc 1, dec] 6x (12)
Info :
Break the yarn, weave in the last 6 sts, hide the remaining yarn (pic 8). Join yarn D on the 1st st of the flo on rnd 11 (pic 9)
— Dress (yarn D) :
Round 1 :
[sc 3, inc] 3x (15)
Round 2 :
[sc 1, inc, sc 1] 5x (20)
Round 3 :
[sc 3, inc] 5x (25)
Round 4 :
[sc 2, inc, sc 2] 5x (30)
Round 5-6 :
sc 30 (2 rnds) (30)
Round 7 :
(flo) [hdc 1, hdc inc] 15x (45)
Round 8-9 :
hdc 45 (2 rnds) (45)
Round 10 :
[sc 1, ch 1] 45x, slst on the 1st sc (90)
Info :
Break the yarn (pic 10-11). Join yarn A on the 1st st of the blo on rnd 7 (pic 12), continue to crochet:
Round 1 :
[hdc 1, hdc inc] 15x (45)
Round 2-3 :
hdc 45 (2 rnds) (45)
Round 4 :
[sc 1, ch 2] 45x, slst on the 1st sc (135)
Info :
Break the yarn (pic 13-14).
— Hair (yarn E) :
Round 1 :
sc 6 into a magic loop (6)
Round 3 :
[sc 1, inc] 6x (18)
Round 4 :
[sc 1, inc, sc 1] 6x (24)
Round 5 :
[sc 3, inc] 6x (30)
Round 6 :
[sc 2, inc, sc 2] 6x (36)
Round 7 :
[sc 5, inc] 6x (42)
Round 8 :
[sc 3, inc, sc 3] 6x (48)
Round 9-15 :
sc 48 (7 rnds) (48)
Round 16 :
sc 13, hdc 2, dc 5, hdc 2, sc 1, slst 1, sc 1, hdc 2, dc 5, hdc 2, sc 14 (48)
Round 17 :
[ch 10, start on the 3rd st from the hook, (hdc inc) 3x, hdc 5, slst on the next st] 6x, sc 5, hdc 3, dc 6, hdc 2, sc 1, slst 1, sc 1, hdc 2, dc 6, hdc 3, sc 6, [ch 10, start on the 3rd st from the hook, (hdc inc) 3x, hdc 5, slst on the next st] 6x (pic 17-18)
Info :
Break the yarn. Wear the hair on the head (pic 19-20-21). Insert the 6mm eyes between rnd 18 & 19, 8 sts apart. Use brown thread to embroider eyelashes & eyebrows.
— Bowtie (yarn C) :
Round 1 :
ch 25, start on the 3rd st from the hook, [sc 1, ch 1, skip 1 st] 11x, sc on the last st, ch 1, turn (24)
Round 2 :
[sc 1 on the chain-space of the last rnd, ch 1, skip 1 st] 11x, sc on the last st, ch 1, turn (24)
Round 3 :
Repeat rnd 2 (24)
Info :
Break the yarn with a really long rest, sew 2 edges together. Wrap the remaining yarn around the bowtie.
— Bowtie's band (yarn C) :
Round 1 :
ch 54, start on the 3rd st from the hook, hdc 52, slst on the 1st ch (52)
Info :
Break the yarn, sew 2 edges together, and then sew the bowtie to the band (pic 22).
— Arms (yarn B, X2) :
Round 1 :
sc 7 into a magic loop (7)
Round 2-3 :
sc 7 (2 rnds) (7)
Round 5-6 :
sc 6 (2 rnds), change to yarn D (6)
Round 7 :
ch 2, [(dc inc) in the same st] 6x, slst on the ch 2 (12)
Info :
Break the yarn, sew 2 edges together, then sew the arms on the body (pic 23).
— Apron (yarn A) :
Round 1 :
ch 7, start on the 2nd st from the hook, sc 6, ch 1, turn (6)
Round 2 :
sc 6, ch 1, turn (6)
Round 3 :
inc, sc 4, inc, ch 1, turn (8)
Round 4 :
sc 8, ch 1, turn (8)
Round 5 :
inc, sc 6, inc, ch 1, turn (10)
Round 6 :
sc 10, ch 1, turn (10)
Round 7 :
(we will crochet the border around the apron), sc 9, (sc 3) on the corner, sc 3, ch 31 (pic 25), start on the 2nd ch from the hook, slst 30, sc 2 (pic 26), ch 21, start on the 2nd ch from the hook, slst 20 (pic 27), slst 5 on the 1st rnd, ch 21, start on the 2nd ch from the hook, slst 20 (pic 28), sc 2, ch 31 (pic 25), start on the 2nd ch from the hook, slst 30, sc 4, (sc 3) on the corner, slst on the 1st st
Info :
Break the yarn, hide the remaining yarn (pic 29). Wear the apron on Alice (pic 30-31).
— Sitting Legs (yarn C, X2) :
Round 1 :
ch 6, start on the 2nd stitch from the hook, sc 4, (sc 3), continue to crochet on the other side of the foundation chain, sc 3, inc 1 (12)
Round 2 :
inc 1, sc 3, inc 3, sc 3, inc 2 (18)
Round 3-4 :
sc 18 (2 rnds) (18)
Round 5 :
sc 5, dec 4, sc 5, start stuffing (14)
Round 6 :
sc 3, dec 4, sc 3, change to yarn A (10)
Round 7-12 :
sc 10 (6 rnds), stuff firmly (10)
Info :
Break the yarn with a long rest, sew the legs on the sitting body (make sure the sitting body can touch the ground without falling)-pic 32.
— Mushroom (yarn F) :
Round 1 :
sc 5 into a magic loop (5)
Round 3 :
[sc 1, inc] 5x (15)
Round 4 :
[sc 2, inc] 5x (20)
Round 5 :
[sc 3, inc] 5x (25)
Round 6 :
[sc 4, inc] 5x (30)
Round 7 :
[sc 5, inc] 5x (35)
Round 8 :
[sc 3, inc, sc 3] 5x (40)
Round 9 :
[sc 7, inc] 5x (45)
Round 10 :
[sc 4, inc, sc 4] 5x (50)
Round 11 :
[sc 9, inc] 5x (55)
Round 12 :
[sc 5, inc, sc 5] 5x (60)
Round 13 :
[sc 11, inc] 5x (65)
Round 14 :
[sc 6, inc, sc 6] 5x (70)
Round 15 :
[sc 13, inc] 5x (75)
Round 16 :
[sc 7, inc, sc 7] 5x, change to yarn G (80)
Round 17 :
(blo) [sc 3, dec, sc 3] 10x (70)
Round 18 :
[sc 5, dec] 10x (60)
Round 19 :
[sc 2, dec, sc 2] 10x (50)
Round 20 :
[sc 3, dec] 10x, stuff firmly (40)
Round 21 :
[sc 1, dec, sc 1] 10x (30)
Round 22 :
[sc 3, dec] 6x (24)
Round 23 :
[sc 1, dec, sc 1] 6x, change to yarn H (18)
Round 24-28 :
sc 18 (5 rnds) (18)
Round 29-30 :
dec, sc 6, inc 2, sc 6, dec (2 rnds) (18)
Round 32 :
sc 5, [inc, sc 2] 3x, sc 4 (21)
Round 34 :
sc 6, [inc, sc 3] 3x, sc 3 (24)
Round 35-36 :
sc 24 (2 rnds), stuff firmly (24)
Info :
Break the yarn, weave in the last 6 sts (pic 37). Use yarn G to pull through 3 sts on rnd 23 to create dents (pic 39-41), tie a knot, cut and hide the remaining yarn. Use brown thread for lines and white thread to make French knots on top (pic 46-48).
— Cheshire Cat - Head (yarn A/B/C etc) :
Round 1 :
ch 8, start on the 2nd st from the hook, sc 6, (sc 3) in the same stitch, continue to crochet on the other side of the foundation chain, sc 5, inc (16)
Round 2 :
inc, sc 5, inc 3, sc 5, inc 2 (22)
Round 3 :
sc 1, inc, sc 5, [sc 1, inc] 3x, sc 5, [sc 1, inc] 2x (28)
Round 4 :
sc 2, inc, sc 5, [sc 2, inc] 3x, sc 5, [sc 2, inc] 2x (34)
Round 5 :
sc 3, inc, sc 5, [sc 3, inc] 3x, sc 5, [sc 3, inc] 2x (40)
Round 6 :
sc 2, inc, sc 7, [sc 2, inc, sc 2] 3x, sc 5, [sc 2, inc, sc 2] 2x (46)
Round 8 :
sc 5, inc, sc 5, [sc 5, inc] 3x, sc 5, [sc 5, inc] 2x (52)
Round 10 :
sc 21, inc 3, sc 24, inc 3, sc 1 (58)
Round 12 :
sc 21, [sc 1, inc] 3x, sc 24, [sc 1, inc] 3x, sc 1 (64)
Round 14 :
sc 21, [sc 1, inc, sc 1] 3x, sc 24, [sc 1, inc, sc 1] 3x, sc 1 (70)
Round 15-20 :
sc 70 (6 rnds) (70)
Round 21 :
[sc 5, dec] 10x (60)
Round 22 :
[sc 2, dec, sc 2] 10x (50)
Round 23 :
[sc 3, dec] 10x, stuff firmly (40)
Round 24 :
[sc 3, dec] 8x (32)
Round 25 :
[sc 1, dec, sc 1] 8x (24)
Info :
Break the yarn, sew the body on the head (pic 17). Use black thread to embroider teeth line & whiskers. Use darker pink yarn/thread to sew a line between the face.
— Cheshire Cat - Teeth (yarn C) :
Round 1 :
ch 30, start on the 2nd st from the hook, slst 1, sc 1, hdc 2, dc 3, tr 2, (tr inc) in the same st, tr 4, tr inc, tr 4, tr inc, tr 2, dc 3, hdc 2, sc 1, slst 1 (32)
Info :
Break the yarn with a long rest to sew later (pic 6). Use pins to locate the teeth on the face and sew the 1st & last st of the teeth on the face. Black thread will be used to fix the teeth later.
— Cheshire Cat - Eyes (yarn D, X2) :
Round 1 :
sc 7 into a magic loop (7)
Round 2 :
inc 7, slst on the 1st st (14)
Info :
Break the yarn, insert black safety eyes on the eyes, then insert the eyes between rnd 8 & 9 of the head (pic 8).
— Cheshire Cat - Nose (yarn A) :
Round 1 :
ch 6, start on the 2nd st from the hook, sc 4, (sc 3) in the last stitch, continue to crochet on the other side, sc 3, inc (12)
Round 2 :
inc, sc 3, inc 3, sc 3, inc 2 (18)
Round 3 :
sc 3, inc 2, sc 13 (20)
Round 4 :
sc 4, inc 2, sc 14 (22)
Info :
Break the yarn, sew the nose right below the eyes (pic 9). Use black thread to embroider the teeth line & whiskers (pic 10-11). Use darker pink yarn/thread to sew a line between the face (pic 12-13).
— Cheshire Cat - Whiskers (yarn A, X2) :
Round 1 :
ch 10, start on the 5th st from the hook, slst 1, [ch 4, slst on the next st] 5x
Info :
Break the yarn with a long rest to sew later. Use tapestry needle to sew the Whiskers from rnd 10-rnd 14 of the head, 2 sts apart from the face. Sew the right & left eyebrow above the eyes 3-4 rnds, 3 sts apart (pic 14-15).
— Cheshire Cat - Ears (yarn A, X2) :
Round 1 :
sc 3 into a magic loop (3)
Round 3 :
[sc 1, inc] 3x (9)
Round 4 :
[sc 1, inc, sc 1] 3x (12)
Round 5 :
[sc 3, inc] 3x (15)
Round 6 :
[sc 2, inc, sc 2] 3x (18)
Info :
Break the yarn, sew 2 edges together, then sew the ears on the head, 2 rnds behind the eyebrows (pic 16).
— Cheshire Cat - Body (yarn A) :
Round 1 :
sc 7 into a magic loop (7)
Round 3 :
[sc 1, inc] 7x (21)
Round 4 :
[sc 1, inc, sc 1] 7x (28)
Round 5 :
[sc 3, inc] 7x (35)
Round 6 :
[sc 2, inc, sc 2] 7x (42)
Round 7-9 :
sc 42 (3 rnds) (42)
Round 10-12 :
sc 42 (3 rnds) (42)
Round 13-14 :
sc 42 (2 rnds) (42)
Round 15 :
[sc 5, dec] 6x (36)
Round 16-17 :
sc 36 (2 rnds) (36)
Round 18 :
[sc 4, dec] 6x, stuff firmly (30)
Round 19-20 :
sc 30 (2 rnds) (30)
Round 21 :
[sc 3, dec] 6x (24)
Info :
Break the yarn, sew the body on the head (pic 17). Make sure the legs & body can touch the ground so Cheshire can sit on its own (pic 18-19).
— Cheshire Cat - Legs (yarn B, X2) :
Round 1 :
sc 8 into a magic loop (8)
Round 3 :
[sc 1, inc] 8x (24)
Round 4 :
sc 8, [Bobble (4 hdc on the same st), sc 2] 3x, sc 7 (24)
Round 6 :
sc 7, [sc 1, dec] 3x, sc 8 (21)
Round 7 :
sc 7, dec 3, sc 8 (18)
Round 8 :
sc 7, dec 2, sc 7, do not break yarn B, change to yarn A (16)
Round 10 :
[sc 5, inc] 2x, do not break yarn A, change to yarn B (14)
Round 12 :
[sc 3, inc, sc 3] 2x, change to yarn A (16)
Round 14 :
[sc 7, inc] 2x (18)
Info :
Break the yarn, stuff firmly, sew 2 legs on the body. Use black thread to embroider black lines between each Bobble on arms & legs (pic 20).
— Cheshire Cat - Arms (yarn B, X2) :
Round 1 :
sc 7 into a magic loop (7)
Round 3 :
[sc 1, inc] 7x (21)
Round 4 :
sc 6, [Bobble (4 hdc on the same st), sc 2] 3x, sc 6 (21)
Round 6 :
sc 6, [sc 1, dec] 3x, sc 6 (18)
Round 7 :
sc 6, dec 3, sc 6 (15)
Round 8 :
[sc 3, dec] 3x, do not break yarn B, change to yarn A (12)
Round 10 :
[sc 5, inc] 2x, do not break yarn A, change to yarn B (14)
Round 12 :
[sc 3, inc, sc 3] 2x, change to yarn A (16)
Round 14 :
[sc 7, inc] 2x (18)
Info :
Break the yarn, stuff firmly, sew 2 arms on the body (pic 23). Use black thread to embroider black lines between each Bobble on arms & legs (pic 20).
— Cheshire Cat - Tail (yarn B/A) :
Round 1 :
sc 4 into a magic loop (4)
Round 2 :
[sc 1, inc] 2x (6)
Round 3 :
[sc 1, inc] 3x (9)
Round 4 :
[sc 2, inc] 3x (12)
Round 5-12 :
continue increasing and shaping following the colour pattern in the table until rnd 12 (see pattern). Join yarn A on the 7th st on rnd 12, ch 1, sc 1 on the same st of the ch 1, sc 23, break yarn A (pic 31-32)
Round 16 :
Continue with yarn B on rnd 12, sc 36 (pic 33-34-35)
Round 17-18 :
sc 36 (2 rnds) (36)
Round 19-21 :
Repeat rnd 13-15 (3 rnds) (24)
Round 22-23 :
sc 36 (2 rnds) (36)
Round 24 :
[sc 4, dec] 6x, leave yarn B here, do not cut yarn B, we will continue to crochet later (30)
Round 25 :
join yarn A on the 12th st on rnd 24, ch 1, sc 1 on the same st of the ch 1, sc 7, break yarn A (8)
Round 26 :
join yarn A on the 9th st on rnd 24, ch 1, sc 1 on the same st of the ch 1, sc 13, break yarn A (14)
Round 27 :
join yarn A on the 6th st on rnd 24, ch 1, sc 1 on the same st of the ch 1, sc 19, break yarn A (20)
Round 28-29 :
Continue with yarn B on rnd 24, sc 30 (2 rnds) (30)
Round 30 :
[sc 3, dec] 6x, change to yarn A (24)
Round 31-32 :
sc 24 (2 rnds), stuff firmly (24)
Round 33 :
[sc 2, dec] 6x, change to yarn B (18)
Round 34-35 :
sc 18 (2 rnds) (18)
Round 36 :
[sc 1, dec] 6x, change to yarn A (12)
Round 37-38 :
sc 12 (2 rnds) (12)
Info :
Break the yarn, weave in the last 6 sts (pic 36). Use a small metal ring, pull the ring through the last st on the body's rnd 2 (pic 38). Use yarn A to sew the tail on the ring (pic 39-40), hide the remaining yarn.
This Alice in Wonderland amigurumi set captures whimsical characters with bright stripes, ruffles and tiny smiles. The designs are playful, packed with detail and perfect for collectors or gifting. Create a magical trio to display or give away — enjoy every stitch in Wonderland! 🧶✨