About This Tulip Model Placemat Pattern
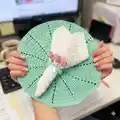
This pattern creates a round tulip model placemat with decorative leaves and tulip motifs along the edge. It uses double crochet fans, popcorn and picot techniques to form the floral details. You can adjust the size by repeating the expansion sequence until the desired diameter is reached. The finished piece makes a lovely table accent or gift.
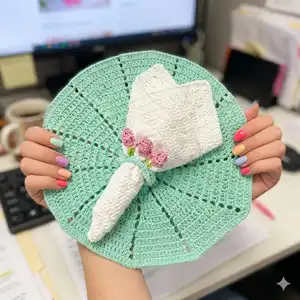
Worked from the center out using a magic ring and increasing rounds, the placemat finishes with green leaf details and crocheted tulips. Clear step-by-step rounds are included so you can follow along easily.
Why You'll Love This Tulip Model Placemat Pattern
I absolutely love this pattern because it transforms simple stitches into a delicate floral placemat that brightens any table. I enjoy how the repeating fan and increase sequence grows into a perfect circle, and the tulip and leaf details add a handcrafted, romantic touch. The design is flexible so I can change colors or size for different occasions. It always feels rewarding to finish a piece that looks elegant and handmade.
Switch Things Up
I love experimenting with color changes to make the tulips pop; try contrasting brights for the flowers and a neutral body for a bold look.
I often use a lighter sport-weight cotton and a smaller hook if I want a more delicate, lace-like placemat variation.
Want a chunkier, cozier placemat? I switch to a heavier cotton yarn and a larger hook to create a thicker, more substantial version.
I sometimes embroider a small stem or detail over the popcorn tulip after finishing to add depth and a handmade signature.
For a vintage look I choose muted pastels and cream, but for a modern table I pick saturated greens and a single bright tulip color.
I recommend trying a picot-only edge instead of leaves if you prefer a simpler, scalloped finish for your placemat.
I like to create matching napkin rings using the same tulip motif—just reduce the number of rounds and sew the ends to form a ring.
If you want a table set, I make a runner by creating a longer oval: start with the same center sequence and then add rows without increasing on the short sides.
I sometimes back my finished placemat with a thin interfacing or felt and secure it with fabric glue for extra stability and protection on the table surface.
I also enjoy mixing fiber types; a cotton-linen blend gives a soft sheen and slightly firmer drape, which can be lovely for special occasions.
Common Mistakes & How to Fix Them
✗ Starting the center too tightly can make the first rounds difficult to work into; leave a small tail and adjust the magic ring tightness so the center lays flat.
✗ Forgetting to chain for separation between fans causes uneven fan spacing; always add the separating chain exactly as stated to keep consistent fan gaps.
✗ Skipping the slip stitch to close a round will change your stitch count subtly; finish each round with the slip stitch in the third chain as directed to maintain shape.
✗ Not blocking the finished placemat can leave it slightly curled; gently block and steam or pin it flat to shape the rounds and tulip edges correctly.