About This The Festive Lights Amigurumi Pattern
This pattern teaches you how to crochet festive lightbulb amigurumi with a twist-in socket and coil cap. You will make the bulb body, a screw-style cap, and a snug socket to attach them to a crocheted cord. The design includes optional faces so you can personalize each bulb for a playful garland.
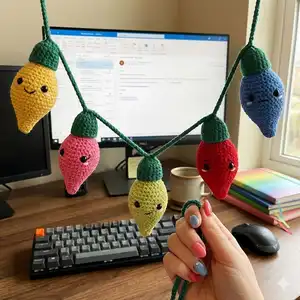
Worked in continuous rounds with simple increases and decreases, this pattern uses bulky blanket yarn for a soft, plush finish. Clear stitch counts and photos help you get a snug fit so bulbs twist into their sockets perfectly.
Why You'll Love This The Festive Lights Amigurumi Pattern
I absolutely love this pattern because it turns a simple crochet shape into a charming string of lights that bring instant cheer. I enjoy how quickly each bulb comes together—making a whole garland is satisfying and fast. The design is playful and customizable, so I often change colors and facial expressions to suit the season. Sharing these as gifts is one of my favorite ways to brighten someone's day.
Switch Things Up
I love customizing these bulbs by changing yarn colors and faces; you can create a themed garland in minutes by choosing seasonal palettes.
I often make mini versions by using a lighter weight yarn and a smaller hook for tiny keychain-friendly bulbs.
I sometimes swap the coil cap technique for a simple sewn-on cap if I want a flatter top for a different look.
I add embroidered cheeks, freckles, or glasses to give each bulb a unique personality that tells a little story.
I recommend experimenting with different socket spacing when chaining so the garland drapes exactly how you want it in your space.
I also like to use safety eyes for a bold look or embroider small eyes for a softer, child-friendly finish.
I occasionally insert a small bell or rattle inside a bulb for a playful sound when used as a toy ornament.
I sometimes add a loop of ribbon or yarn instead of the socket chain ends to create hanging ornaments for trees or doorknobs.
I suggest trying a metallic or sparkly yarn for the cap to give a festive shimmer while keeping the bulb in a solid plush yarn.
I enjoy creating color gradients across a group of bulbs to make an ombre garland that looks polished and cohesive.
Common Mistakes & How to Fix Them
✗ Skipping stitch markers when making the cap screw can cause you to lose the start and end points; place a contrasting marker in the first and last front loop as instructed to mark the screw coil.
✗ Forgetting to stuff the tip of the bulb before working later rounds results in a floppy point; start stuffing early and fill the tip firmly, then continue stuffing evenly as you go.
✗ Using different yarn types or hook sizes between pieces will change fit and size of bulbs and sockets; use the same blanket yarn and a 6 mm hook for consistent results.
✗ Not counting stitches at increases and decreases makes the shape uneven; count after each round, especially when rounds are grouped, and confirm the stitch counts in brackets.
✗ Closing the opening before finishing the cap coil can make insertion and finishing awkward; fasten off leaving a tail, create the coil with SLSTs as described, then close the opening and weave in ends.
✗ Attaching safety eyes too low or too high will affect the bulb's look; place eyes between rows 15 and 16 about five stitches apart as recommended for a balanced face.


