🧢 Beautiful ✨ Detailed πŸ’ Adorable

Sheep No Sew Amigurumi Pattern

Sheep No Sew Amigurumi Pattern
4.3β˜… Rating
2-3 Hours Time Needed
2.3K Made This
βœ‚οΈ

Intermediate Level

Ideal for those with basic crochet experience, featuring slightly more advanced stitches and techniques to expand your skills.

⏱️

Bite-Sized Project

Finishes in 2-4 hoursβ€”perfect for an afternoon of creative relaxation.

🧸

Cute Companion

An adorable friend to cherish, handcrafted with love to bring comfort and joy for years to come.

About This Sheep No Sew Amigurumi Pattern

This pattern creates a no-sew amigurumi sheep made with super bulky (#6) yarn for a soft, plush finish. You will crochet seamlessly from the body up to the head and switch colors to shape the face and limbs. The design includes instructions for sheep wool texture, ears, eye placement, and simple facial embroidery. Photos guide you through special stitches like bobble and working in the FLO/BLO.

Sheep No Sew Amigurumi Pattern crochet pattern - detailed view of completed project

The PDF also includes companion patterns for cow and pig using the same techniques and materials. Each animal uses super bulky yarn and 3.5mm hook for a consistent size and plush feel.

Why You'll Love This Sheep No Sew Amigurumi Pattern

I absolutely love this pattern because it turns simple stitches into an irresistibly cute companion that feels wonderful to hold. I enjoy the no-sew construction because it creates a seamless look and saves time at the finish. The bobble and looped 'wool' techniques add charming texture without complicated shaping. I also love that the pattern is versatile β€” small color changes create an entirely new character. Making these little animals always brightens my day and makes lovely handmade gifts.

Sheep No Sew Amigurumi Pattern step 1 - construction progress Sheep No Sew Amigurumi Pattern step 2 - assembly progress Sheep No Sew Amigurumi Pattern step 3 - details and accessories Sheep No Sew Amigurumi Pattern step 4 - final assembly and finishing

Switch Things Up

I love how easy it is to customize these patterns by changing yarn colors; try pastel tones for a softer look or bold high-contrast patches for the cow.

I often change yarn weight and hook size to create different sizes β€” a larger hook and bulky yarn makes a cuddly version while thinner yarn produces a tiny keychain-sized friend.

I add embroidered details like rosy cheeks or eyelashes for personality β€” a few satin stitches can totally change the expression.

Swap safety eyes for embroidered eyes for a baby-safe toy; use French knots or small stitched circles to keep it child-friendly.

Experiment with different bobble sizes by adjusting tension or using two loops for larger bobbles to create a fluffier wool effect.

I sometimes add tiny crocheted scarves, bows, or hats to make seasonal or gift-ready versions that feel more finished.

Try using a fuzzy or boucle yarn for the body while keeping the face in smooth yarn for a tactile contrast and extra cuddliness.

If you want a posable figure, insert a short length of craft wire into the limbs before stuffing to allow slight shaping of arms and legs.

I enjoy grouping them into sets β€” make a matching farm set (sheep, cow, pig) and display them together as a charming collection.

For a fun finishing touch, sew a small label or attach a tiny charm to make your handmade gift feel even more special.

Common Mistakes & How to Fix Them

βœ— Skipping stitch markers when working rounds with increases causes lost counts; place a marker at the start of every round and move it each round. βœ— Switching colors without securing tails can make loose ends visible; fasten off or carry yarn neatly and weave ends in as you go. βœ— Not stuffing gradually leads to lumps or an overfilled shape; add small amounts of fiberfill while shaping to maintain smooth curves. βœ— Working bobble or BO stitches too tightly will distort the texture; maintain even, slightly loose tension for bobbles to sit nicely. βœ— Forgetting to count after increases or decreases results in uneven shaping; count stitches after each increase/decrease round to confirm totals.

Sheep No Sew Amigurumi Pattern

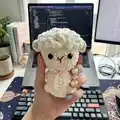
Make a sweet no-sew sheep amigurumi using super bulky yarn and simple techniques. This pattern walks you through crocheting from the body up to the head and adding wool, ears and facial details. Perfect for creating a soft, squishy companion to gift or display. Follow the step-by-step rounds and clear notes to finish a charming handmade toy.

Intermediate 2-3 Hours

Materials Needed for Sheep No Sew Amigurumi Pattern

β€” Main Fabric

  • 01
    Super Bulky yarn (Category 6) - White - approximately 40-60g for body and wool
  • 02
    Super Bulky yarn (Category 6) - Skin color (beige/cream) - approximately 20-40g for head/face
  • 03
    Super Bulky yarn (Category 6) - Black - small amount (10-20g) for cow spots or details
  • 04
    Super Bulky yarn (Category 6) - Brown - small amount (10-15g) for nose/horn details
  • 05
    Super Bulky yarn (Category 6) - Light pink and Pink - small amounts (10-30g) for pig body and nose
  • 06
    Small scraps of accent colors as needed for ears, hooves, or facial details

β€” Tools Required

  • 01
    Crochet hook size 3.5mm (E)
  • 02
    Stitch markers
  • 03
    Sewing needle / yarn needle for sewing and weaving ends
  • 04
    Scissors
  • 05
    Plastic safety eyes 10mm (2 pieces per toy)
  • 06
    Hot glue gun (optional for securing eyes or small pieces)
  • 07
    Polyester stuffing (fiberfill)
  • 08
    Small length of brown yarn for nose embroidery

Progress Tracker

0% Complete

β€” Sheep (Body up to Head) :

Round 1 :

6 SC in an MR (6)

Round 2 :

6 INC (12)

Round 3 :

(SC, INC) 6 times (18)

Round 4 :

(2 SC, INC) 6 times (24)

Round 5 :

8 SC, BO, 6 SC, BO, 8 SC (24)

Round 6 :

8 SC, SC into the stitch's BO, 6 SC, SC into the stitch's BO, 8 SC (24)

Round 7 :

24 SC (24)

Round 8 :

6 SC, BO, 10 SC, BO, 6 SC (24)

Round 9 :

6 SC, SC into the stitch's BO, 10 SC, SC into the stitch's BO, 6 SC (24)

Round 10 :

(SC, DEC) 8 times (16)

Info :

Change to skin color yarn

Round 11 :

FLO, (SC, INC) 8 times (24)

Round 12 :

(SC, INC) 12 times (36)

Round 13-18 :

36 SC (36)

Round 19 :

BLO, (2 SC, DEC) 9 times (27)

Info :

*Stuffing*

Round 20 :

BLO, (SC, DEC) 9 times (18)

Round 21 :

BLO, (SC, DEC) 6 times (12)

Round 22 :

BLO, 6 DEC (6)

Info :

Weave in the yarn end and cut

β€” Sheep's Wool :

Info :

Crochet in the FLO from row 21, and continue seamlessly from row 21 down to row 18. (3 ch, Slst) 93 times.

β€” Ears (Make 2) :

Info :

Use Skin color yarn. Crochet the ears onto the stitches at row 18.

Item Name (P1) :

2 Ch, 3 DC, 2 Ch, Slst in one st.

Info :

Attach eyes on rows 15 and 16, spaced 6 stitches apart. Use a short of brown yarn to embroider the nose.

β€” Cow (Body up to Head) :

Round 1 :

6 SC in an MR (6)

Round 2 :

6 INC (12)

Round 3 :

(SC, INC) 6 times (18)

Round 4 :

(2 SC, INC) 6 times (24)

Round 5 :

8 SC, BO, 6 SC, BO, 8 SC (24)

Round 6 :

15 SC, 4SC, 5 SC (24)

Round 7 :

13 SC, 8SC, 3SC (24)

Round 8 :

6 SC, BO, 6 SC, 4SC, BO, 3SC, 3SC (24)

Round 9 :

15SC, 4SC, 5SC (24)

Round 10 :

(SC, DEC) 8 times (16)

Round 11 :

FLO, (SC, INC) 8 times (24)

Round 12 :

(SC, INC) 12 times (36)

Round 13-15 :

36 SC (36)

Round 16 :

(2SC, DEC) 2 times, (2 SC, DEC) 7 times (27)

Round 17 :

9SC, 16SC, 2SC (27)

Round 18 :

12SC, 13SC, 2SC (27)

Round 19 :

12SC, 15SC (27)

Info :

*Stuffing*

Round 20 :

SC, DEC, (SC, DEC) 3 times, (SC, DEC) 5 times (18)

Round 21 :

(SC, DEC) 6 times (12)

Round 22 :

6 DEC (6)

Info :

Weave in the yarn end and cut

β€” Cow Ears (Make 2) :

Info :

Begin with white yarn. Make 5 chains start with the second chain from the hook: 3SC, 3SC in the last stitch, 2SC, INC

Info :

Attach the ear point straight from the arm going up with 2 SLST at R18-19. Make one piece like this with black yarn.

β€” Horn (Make 2) :

Info :

Begin with brown yarn. Crochet ears between R20-21. The starting point is straight from the ears going up.

Item Name (P1) :

Two horns between are 9 stitches: 3CH, DC, Picot, 2CH, and SLST in the next stitch. Cut the yarn.

β€” Cow Nose :

Info :

Use brown yarn. Make 5 chains start with the second chain from the hook: INC, 2SC, 4SC in the last stitch, 2SC, INC

Info :

Cut the yarn. Attach the nose in the head at R14-15. Attach the eyes in the head at R16, 5st apart.

β€” Pig (Head up to Body) :

Round 1 :

6 SC in an MR (6)

Round 2 :

6 INC (12)

Round 3 :

(SC, INC) 6 times (18)

Round 4 :

(2 SC, INC) 6 times (24)

Round 5 :

24SC (24)

Round 6 :

(3 SC, INC) 6 times (30)

Round 7 :

30SC (30)

Round 8 :

3SC, BO, 22SC, BO, 3SC (30)

Round 9 :

7SC, INC, 14SC, INC, 7SC (32)

Round 10-12 :

32SC (32)

Round 13 :

3SC, BO, 24SC, BO, 3SC (32)

Round 14 :

7SC, DEC, 14SC, DEC, 7SC (30)

Round 15 :

(3 SC, DEC) 6 times (24)

Round 16 :

(2 SC, DEC) 6 times (18)

Info :

*Stuffing*

Round 17 :

SC, DEC 6 times (12)

Round 18 :

DEC 6 times (6)

Info :

Weave in the yarn end and cut

β€” Pig Tail :

Info :

Use pink yarn. Crochet ears at R15. Make 10CH, start with the second chain from the hook: 9 SLST, SLST in the same stitch. Cut the yarn.

β€” Pig Ears (Make 2) :

Info :

Use light pink yarn. Crochet ears at R6: 2CH, DC in the same stitch, CH, Picot, DC in the next stitch, 2CH, SLST in the same stitch, 7 stitches apart.

β€” Pig Nose :

Info :

Use pink yarn. Make 4CH, start with the second chain from the hook: 2SC, INC in the last stitch, SC, INC.

Info :

Cut the yarn. Sew two white lines to create holes in the shape (as photo). Attach the nose in the head at R1-R2. Attach the eyes in the head at R3, apart 7 stitch.

Assembly Instructions

  • Attach safety eyes to the sheep between rounds 15 and 16, spaced 6 stitches apart, then embroider a small nose with a short length of brown yarn.
  • For the sheep wool, crochet (3 ch, slst) loops in the FLO from round 21 and continue seamlessly up to round 18 to create 93 loops, covering the top of the head.
  • Sew the cow nose (made from brown yarn chains) to rounds 14-15 and place eyes at round 16, spacing them 5 stitches apart for correct facial placement.
  • For the pig, sew the nose to rounds 1-2 and attach eyes at round 3, 7 stitches apart; attach ears at round 6 and secure the tail to round 15.
  • Attach ears for each animal by placing them at the indicated rounds (sheep row 18, cow row 18-19 with 2 SLST, pig at R6) and secure with matching yarn tails woven in tightly.

Important Notes

  • πŸ’‘Use stitch markers to keep track of the start of each round, especially during increases and decreases for correct shaping.
  • πŸ’‘Work bobble (BO) stitches with slightly looser tension so the texture sits naturally and does not distort surrounding stitches.
  • πŸ’‘Stuff gradually and firmly but not overly, especially before final decrease rounds so the shape remains smooth and proportional.
  • πŸ’‘When switching colors, secure and weave ends neatly on the inside to avoid loose tails showing on the finished amigurumi.

Thank you for using this patternβ€”your tiny sheep (and friends) are ready to love and display! These no-sew amigurumi are fast to make and full of charm, ideal for gifts or keeping. Share your finished pieces and tag for feedback. πŸ§ΆπŸ‘βœ¨

You ask,

we answer.

FAQs

What size will the finished piece be?

The finished amigurumi measures approximately 8-12 cm tall depending on your tension and the exact amount of stuffing used when working with super bulky yarn and a 3.5mm hook.

Can I use different yarn weights for this pattern?

Yes, you can use different yarn weights, but this will affect the final size; use an appropriate hook for the chosen yarn and expect the finished toy to be larger or smaller.

Do I need prior crochet experience for this pattern?

This pattern is rated intermediate due to techniques like bobble stitches, working into FLO/BLO and color switching, so basic knowledge of crochet stitches is recommended.

How long does this project typically take to complete?

Most crocheters complete a single animal in 2-3 hours, though time will vary with experience, yarn, and whether you make added details such as embroidered noses or extra accessories.