🧢 Beautiful ✨ Detailed πŸ’ Adorable

Sweet Unicorn Amigurumi Pattern

Sweet Unicorn Amigurumi Pattern
4.9β˜… Rating
5-7 Hours Time Needed
3.4K Made This
βœ‚οΈ

Intermediate Level

Ideal for those with basic crochet experience, featuring slightly more advanced stitches and techniques to expand your skills.

⏱️

Weekend Treat

Takes 5-7 hours, making it an enjoyable project to finish over a couple of days.

🐰

Whimsical Buddy

Playful characters full of personality, designed to spark imagination and become cherished playtime favorites.

About This Sweet Unicorn Amigurumi Pattern

This pattern teaches you how to crochet a sweet unicorn amigurumi complete with a spiraled horn, curly hair strands, and tiny floral embellishments. You will work in continuous rounds to shape the head, body, limbs, ears and horn, then attach colorful mane and flowers for a unique finish. Photographer-backed images in the pattern show assembly and placement to help you get great results.

Sweet Unicorn Amigurumi Pattern crochet pattern - detailed view of completed project

The pattern uses a small hook for tight stitches and recommends 2.5 mm or a hook that fits your yarn. Detailed sections include hair strands, queue, flowers and step-by-step finishing instructions.

Why You'll Love This Sweet Unicorn Amigurumi Pattern

I absolutely love this pattern because it balances simple amigurumi construction with delightful decorative details that really bring the unicorn to life. I enjoy making the curly hair strands and arranging the tiny flowers β€” they add so much personality and are very satisfying to sew on. The pattern gives clear round-by-round shaping so I can focus on finishing touches rather than guessing stitch counts. Every finished unicorn feels handmade and special, and I love gifting them to friends and family.

Sweet Unicorn Amigurumi Pattern step 1 - construction progress Sweet Unicorn Amigurumi Pattern step 2 - assembly progress Sweet Unicorn Amigurumi Pattern step 3 - details and accessories Sweet Unicorn Amigurumi Pattern step 4 - final assembly and finishing

Switch Things Up

I love how easy it is to customize this unicorn by changing yarn colors for a different look; pastel or bright palettes both work beautifully.

I often make a larger version by using a thicker yarn and a bigger hook to create a cuddly, huggable unicorn.

For a tiny keychain version, use fine yarn and a smaller hook to reduce the size dramatically and add a keyring before finishing the head.

I sometimes add embroidered freckles or a tiny mouth for more personality instead of leaving the face plain.

Try different flower sizes and placements to create seasonal themes β€” autumn tones, spring pastels, or festive colors make unique gifts.

I like to alternate two colors in the mane strands for a striped effect; you can also braid three strands together for a new texture.

If you want posable limbs, consider adding a thin wire inside the arms and legs before stuffing lightly to keep them adjustable.

Swap the horn yarn to metallic or sparkly yarn for a magical finish that catches the light and makes the unicorn extra special.

Use small beads or pearls in the center of the flowers for an elegant touch, securing them tightly with thread so they are child-safe if needed.

I recommend experimenting with different stuffing amounts to change the firmness β€” softer stuffing for a plush feel, firmer for decorative display pieces.

Common Mistakes & How to Fix Them

βœ— Skipping stitch markers during continuous rounds can make it hard to identify the start of a round; place a marker at the beginning of each round to maintain correct stitch counts. βœ— Forgetting to stuff as you go causes gaps or lumps later; stuff the body and head gradually, adding more stuffing with each section to keep an even shape. βœ— Switching colors without securing ends will leave loose tails; weave in or secure color changes as you go to keep the inner work tidy and easy to close. βœ— Not pinning parts before sewing can result in misaligned features; pin arms, legs, ears and horn in place and check symmetry before permanently stitching them down.

Sweet Unicorn Amigurumi Pattern

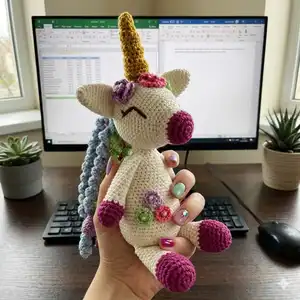
Create a charming Sweet Unicorn amigurumi with clear, photo-backed instructions you can follow step by step. This pattern combines simple rounds with lively hair strands and floral details to make a playful, gift-ready unicorn. You will enjoy shaping, sewing and customizing the mane and flowers to make each unicorn unique.

Intermediate 5-7 Hours

Materials Needed for Sweet Unicorn Amigurumi Pattern

β€” Main Fabric

  • 01
    Yarn - main yarn for body (Main Color: White)
  • 02
    Accent yarn - Fuchsia (A)
  • 03
    Accent yarn - Mustard (B)
  • 04
    Hair strands - blue, green, dark pink, light pink, orange
  • 05
    Note: use a yarn that suits a 2.5 mm hook (yarn weight recommended by your yarn label)

β€” Tools Required

  • 01
    Crochet hook size 2.5 mm (or size that fits your yarn)
  • 02
    Scissors
  • 03
    Polyester stuffing
  • 04
    Tapestry needle for sewing and weaving ends
  • 05
    Stitch marker
  • 06
    Pins for assembly

Progress Tracker

0% Complete

β€” Body :

Round 1 :

6 sc in a magic ring

Round 2 :

6 sc inc (12 sc)

Round 3 :

1 sc into sc next inc (18 sc )

Round 4 :

2 sc into sc next inc(24 sc)

Round 5 :

3 sc into sc next inc(30 sc)

Round 6 :

4 sc into sc next inc(36 sc)

Round 7 :

5 sc into sc next inc(42 sc)

Round 8 :

6 sc into sc next inc(48 sc)

Round 9 :

Only in blo sc into sc(48 sc)

Round 10-18 :

(9 rings)sc into sc (48 sc)

Round 19 :

(6 times)6 sc into sc next dec(42 sc)

Info :

Fill the body tightly. Keep filling as you go.

Round 20 :

sc into sc (42 sc)

Round 21 :

(6 times)5 sc into sc next dec(36 sc)

Round 22-24 :

(3 times)sc into sc(36 sc)

Round 25 :

(6 times)4 sc into sc next dec(30 sc)

Round 26-29 :

(4 ring) sc into sc(30 sc)

Round 30 :

(6 times)3 sc into sc next dec(24 sc)

Round 31-33 :

(3 rings)sc into sc(24 sc)

Round 34 :

(6times)2 sc into sc next dec(18 sc)

Round 35 :

sc into sc(18 sc)

Round 36 :

(6 times)1 sc into sc next dec(12 sc)

Round 37-39 :

(3 rings)sc into sc(12 sc)

Info :

Finish FO. Leave a long thread end to sew.

β€” Head :

Info :

A Color

Round 1 :

6 sc in a magic ring

Round 2 :

6 inc (12 sc)

Round 3 :

1 sc into sc next inc (18 sc)

Round 4 :

5-(2 ring)sc into sc(18 sc)

Info :

Switch to main color

Round 6-8 :

(3 ring)sc into sc (18 sc)

Round 9 :

(6 times)2 sc into sc next inc(24 sc)

Round 10 :

(6 times)3 sc into sc next inc(30 sc)

Round 11 :

(6 times)4 sc into sc next inc(36 sc)

Round 12 :

(6 times)5 sc into sc next inc(42 sc)

Round 13 :

(6 times)6 sc into sc next inc(48 sc)

Round 14 :

(6 times)7 sc into sc next inc(54 sc)

Round 15-26 :

(12 rings)sc into sc(54 sc)

Round 27 :

(6 times)7 sc into sc next dec(48 sc)

Round 28 :

(6 times)6 sc into sc next dec(42 sc)

Round 29 :

(6 times)5 sc into sc next dec(36 sc)

Round 30 :

(6 times)4 sc into sc next dec(30 sc)

Round 31 :

(6 times)3 sc into sc next dec(24 sc)

Round 32 :

(6 times)2 sc into sc next dec(18 sc)

Round 33 :

(6 times)1 sc into sc next dec(12 sc)

Round 34 :

(6 times)sc dec(6 sc)

Info :

Finish FO. Leave a long thread end to sew.

β€” Ears :

Info :

(Make 2) Main Color

Round 1 :

6 sc in a magic ring

Round 2 :

(4 times)1 sc into sc next inc(10 sc)

Round 3 :

sc into sc(10 sc)

Round 4 :

(4 times)2 sc into sc next inc(14 sc)

Round 5 :

(2 times)7 sc into sc next inc(16 sc)

Round 6 :

(2 times)8 sc into sc next inc(18 sc)

Round 7-17 :

(11 rings)sc into sc (18 sc)

Round 18 :

Straighten. Dip the crochet in both layers. (9 sc) fo. Leave a long thread end for sewing.

β€” Legs :

Info :

(Make 2) A Color

Round 1 :

6 sc in a magic ring

Round 2 :

6 sc inc (12 sc)

Round 3 :

1 sc into sc next inc(18 sc)

Round 4-8 :

(5 rings)sc into sc (18 sc)

Info :

Switch Main Color

Round 9-21 :

(13 rings)sc into sc(18 sc)

Round 22 :

Straighten. Dip the crochet in both layers. (9 sc) fo. Leave a long thread end for sewing.

β€” Arms :

Info :

(Make 2) A Color

Round 1 :

6sc in a magic ring

Round 2 :

6 sc inc (12 sc)

Round 3-5 :

(3 rings)sc into sc(12 sc)

Info :

Switch Main Color

Round 6-26 :

(21 rings)sc into sc (12 sc)

Round 27 :

Straighten. Dip the crochet in both layers. (6 sc) fo. Leave a long thread end for sewing.

β€” Hair Strands & Queue & Flowers :

Info :

MAIN COLOR

Round 1 :

6 sc in a magic ring

Round 2 :

6 sc inc (12 sc)

Round 3 :

(6 times)1 sc into sc next inc (18)

Round 4 :

(6 times)2 sc into sc next inc(24)

Round 5 :

(6 times)3sc into sc next inc(30)

Round 6 :

(6 times)4 sc into sc next inc(36)

Round 7 :

(6 times)5 sc into sc next inc(42)

Info :

Finish FO. Leave a long thread end to sew.

Item Name (P1) :

HAIR STRANDS (Make 12) 30 ch. Ch into 80 cr

Item Name (P1) :

QUEUE (Make 6) 15 ch. Ch into 40 cr

Item Name (P1) :

FLOWERS (Make 3) 1- 10 sc in a magic ring 2- sc into sc (10 sc) Finish FO. Leave a long thread end to sew.

β€” Horn :

Info :

B COLOR

Round 1 :

6 sc in a magic ring

Round 2-4 :

(3 ring)sc into sc (6 sc)

Round 5 :

(2 times)2 sc into sc next inc(8)

Round 6 :

sc into sc(8 sc)

Round 7 :

(2 times)3 sc into sc next inc (10)

Round 8 :

(2 times)4 sc into sc next inc(12)

Round 9 :

sc into sc (12 sc)

Round 10 :

(2 times)5 sc into sc next inc (14 sc)

Round 11-15 :

(5 ring)sc into sc(14 sc)

Info :

Stuff the horn tightly. Finish FO. Leave a long thread end to sew.

Assembly Instructions

  • Sew the arms to the sides of the body. Sew to ring 34 for correct placement and secure with whipstitch.
  • Sew the legs together and position them at the base of the body; sew between rings 1-5 to join for stability.
  • Sew the ears to the sides of the head with 10 sc in between ring 27 to keep spacing symmetrical.
  • Sew the horn between the two ears. Sew the flowers in front of the horn and attach hair strands around the top and back of the head.

Important Notes

  • πŸ’‘Use a 2.5 mm hook or the size that gives you a tight fabric; tight stitches prevent stuffing from showing through.
  • πŸ’‘Stuff parts firmly but evenly as you go β€” especially the head and horn β€” to maintain smooth shaping and avoid lumps.
  • πŸ’‘Pin and check placement of ears, horn and limbs before sewing to ensure symmetry and correct spacing.
  • πŸ’‘Leave long thread ends when finishing parts so you have enough length to sew pieces securely into place.

This Sweet Unicorn pattern is perfect for gifting or decorating a nursery, bringing whimsical charm into any home. Make a colorful mane and tiny flowers to match your style and watch each unicorn come to life. Handcrafted joy in every stitch β€” happy crocheting! 🧢✨

You ask,

we answer.

FAQs

What size will the finished piece be?

The finished amigurumi measures around 20 cm in circumference and about 10 cm in length using the recommended hook and yarn.

Can I use different yarn weights for this pattern?

Yes, you can use different yarn weights, but this will affect the final size; choose an appropriate hook for your yarn and adjust stuffing accordingly.

Do I need prior crochet experience for this pattern?

This pattern is rated intermediate, so basic knowledge of single crochet, increases and decreases is recommended for best results.

How long does this project typically take to complete?

Most crocheters complete this project in 5-7 hours, depending on experience and how quickly you sew and finish the decorative details.