๐Ÿงถ Beautiful โœจ Detailed ๐Ÿ’ Adorable

Superman Amigurumi Pattern

Superman Amigurumi Pattern
4.3โ˜… Rating
5-7 Hours Time Needed
2.9K Made This
โœ‚๏ธ

Intermediate Level

Ideal for those with basic crochet experience, featuring slightly more advanced stitches and techniques to expand your skills.

โฑ๏ธ

Weekend Treat

Takes 5-7 hours, making it an enjoyable project to finish over a couple of days.

๐Ÿงธ

Cute Companion

An adorable friend to cherish, handcrafted with love to bring comfort and joy for years to come.

About This Superman Amigurumi Pattern

This pattern creates a handmade superhero amigurumi with a removable cloak and embroidered chest crest. You will crochet separate parts โ€” legs, body, head, arms, hair, logo and cloak โ€” and assemble them for a polished finish. The instructions list every round so you can follow along exactly and achieve a neat result.

Superman Amigurumi Pattern crochet pattern - detailed view of completed project

Perfect for gifting or display, the finished doll has clear color changes and small details for personality. Photos and assembly notes help you position the crest, hair and sleeves accurately.

Why You'll Love This Superman Amigurumi Pattern

I absolutely love this pattern because it combines classic amigurumi shaping with playful superhero details that bring the doll to life. I enjoy how the removable cloak and embroidered logo let me customize each version with different colors and expressions. Working the separate pieces feels rewarding โ€” you can see the character come together step by step. I also love teaching stitch techniques through a fun project, and this pattern is a great way to expand your amigurumi skills while making something delightful.

Superman Amigurumi Pattern step 1 - construction progress Superman Amigurumi Pattern step 2 - assembly progress Superman Amigurumi Pattern step 3 - details and accessories Superman Amigurumi Pattern step 4 - final assembly and finishing

Switch Things Up

I love offering ideas to customize this pattern; try changing the color scheme to create different heroes or characters.

I sometimes swap the yarn weight and hook size to make a mini or a jumbo version of the doll; smaller yarn and a 1.75โ€“2.0 mm hook create a tiny keychain-friendly toy.

I often embroider different letters or symbols for the crest so each doll has its own personality and theme.

I like adding felt accessories like tiny capes, belts, or masks glued or stitched in place for more texture and variation.

I recommend experimenting with eye placement for different expressions โ€” moving the safety eyes up or down slightly changes the look dramatically.

I also try adding blush with a small bit of yarn paint or pastel for a softer, more finished face on some dolls.

I will sometimes use different stitch patterns for the cloak edge, such as picot or reverse single crochet, to add decorative trim.

I like to use embroidery to alter the mouth or eyebrows for a range of moods โ€” playful, serious, or surprised.

I occasionally add wire inside the arms for poseability, but be sure you secure and cover the wire safely before gifting.

I enjoy making matching mini accessories like a tiny bag or badge that coordinate with the dollโ€™s crest and colors.

Common Mistakes & How to Fix Them

โœ— Skipping the stitch marker when joining legs into the body can cause misalignment; place a marker at the join and count stitches carefully when you bring the legs together. โœ— Forgetting to stuff the legs and body as you go will make assembly difficult and shapes uneven; stuff gradually and consistently during the rounds indicated. โœ— Using inconsistent tension across color changes causes seams and uneven rounds; keep your tension steady and switch colors cleanly at the last pull-through. โœ— Not leaving long thread ends when instructed leads to frustrating sewing later; always leave a long tail where the pattern requests it so you can sew parts securely and invisibly. โœ— Placing safety eyes after too much stuffing can distort placement and spacing; install safety eyes between the recommended rounds and make sure there are eight stitches between them for proper alignment.

Superman Amigurumi Pattern

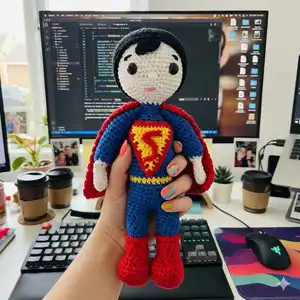
Make your own charming superhero amigurumi with this complete crochet pattern designed for intermediate crocheters. You will create a cuddly doll with a removable cloak, embroidered crest, and detailed hair using simple amigurumi techniques. The pattern includes full rounds for legs, body, head, arms, logo, hair and cloak plus clear joining instructions to assemble your hero. Perfect as a handmade gift or a colorful addition to your amigurumi collection.

Intermediate 5-7 Hours

Materials Needed for Superman Amigurumi Pattern

โ€” Main Fabric

  • 01
    Yarn - main colors listed in pattern: Main Color: Cream, Color A: Blue, Color B: Red, Color C: Yellow, Color D: Red

โ€” Tools Required

  • 01
    Crochet hook size 2.5 mm (or size that fits your yarn)
  • 02
    Scissors
  • 03
    Polyester stuffing
  • 04
    Tapestry/yarn needle for sewing
  • 05
    Stitch marker(s)
  • 06
    Pins for assembly
  • 07
    Safety eyes (install between rounds 14-15)

Progress Tracker

0% Complete

โ€” Abbreviations :

Info :

blo - back loop. ch - chain. cr - crochet. dc - double crochet. dc3tog - double crochet three together. dec - decrease. flo - front loop. hdc - half double crochet. FO - Fasten Off. inc - increase. rnd(s) - round(s). sc - single crochet. sc3tog - single crochet three together. slst - slip stitch. st - stitch. tr - treble stitch. (...) - number in parentheses indicates the number of stitches at the end of the round. [...] - repeat instructions x times or to the end of the round. (...) - work the stitches all into the same stitch.

โ€” Materials :

Info :

Yarn. 2.5 mm hook size or a size that fits your yarn. Scissors, stuffing, tapestry needle, stitch marker and pins. Main Color: Cream Color A: Blue B: Red C: Yellow D: Red.

Info :

Finished size: Around 20 cm in circumference, about 10 cm in length.

โ€” Legs & Body :

Round 1-6 :

sc in a mr

Round 2 :

sc inc(12)

Round 3 :

(6 times)1 sc into sc next inc(18)

Round 4 :

6 sc into sc(6 sc inc)6 sc into sc(24)

Round 5-7 :

(3 ring)sc into sc(24)

Round 8 :

6 sc into sc(6 sc dec)6 sc into sc(18)

Round 9 :

7 sc into sc(4 sc dec)7 sc into sc(14)

Info :

Stuff the legs. keep stuffing as you go.Fill the legs. Keep filling as you go.

Round 10-14 :

(5 ring)sc into sc(14)

Round 15 :

in blo sc into sc(14) A color-

Round 16 :

in flo sc into sc(14)

Round 17-23 :

(7 ring)sc into sc(14)

Round 24 :

Bring the legs together. sc into sc(28)

Round 25-29 :

(5 ring)sc into sc(28)

Round 30-31 :

(2ring)sc into sc(28)

Round 32 :

2 sc inc sc into sc(30)

Round 33-42 :

(10 ring)sc into sc(30)

Round 43 :

(6 times)3 sc into sc next dec(24)

Round 44 :

sc into sc(24)

Round 45 :

(6 times)2 sc into sc next dec(18)

Info :

Stuff the body tightly. Keep filling as you go.

Round 46-47 :

(2 ring)sc into sc(18)

Round 48 :

(6 times)1 sc into sc next dec(12)

Round 49-51 :

(3 ring)sc into sc(12)

โ€” Head :

Round 52 :

(6 times)1 sc into sc next inc(18)

Round 53 :

(6 times)2 sc into sc next inc(24)

Round 54 :

(6 times)3 sc into sc next inc(30)

Round 55 :

(6 times)4 sc into sc next inc(36)

Round 56 :

(6 times)5 sc into sc next inc(42)

Round 57 :

(6 times)6 sc into sc next inc(48)

Round 58-65 :

(8 ring)sc into sc(48)Install the safety eyes between rnd 14-15. there should be 8 sc between them.

Round 66 :

(6 times)6 sc into sc next dec(42)

Round 67 :

(6 times)5 sc into sc next dec(36)

Round 68 :

(6 times)4 sc into sc next dec(30)

Round 69 :

(6 times)3 sc into sc next dec(24)

Round 70 :

(6 times)2 sc into sc next dec(18)

Round 71 :

(6 times)1 sc into sc next dec(12)

Round 72 :

6 sc dec fo.

โ€” Arms :

Round 1-6 :

sc in a mr

Round 2 :

sc inc(12)

Round 3 :

6(4 ring)sc into (12)

Round 7 :

(4 times)1 sc into sc next dec(8)

Round 8 :

2 ch turn 2 ch into sc sc into sc(8)

Round 9 :

(4 times)1 sc into sc next inc(12)

Info :

A color-fill the sleeves

Round 10-24 :

(15 ring)sc into sc(12)

Round 25 :

Straighten it. Dip the awl into both layers. 6 sc fo. Leave a long thread end to sew.

โ€” Logo :

Round 1-3 :

ch turn ch into sc(2 sc)

Round 2 :

1 sc inc sc into sc(3)turn

Round 3 :

1 sc inc sc into sc(4)turn

Round 4 :

1 sc inc sc into sc(5)turn

Round 5 :

1 sc inc sc into sc(6)turn

Round 6 :

1 sc inc sc into sc(7)turn

Round 7 :

1 sc inc sc into sc(8)turn

Round 8 :

1 sc inc sc into sc(9)turn

Round 9 :

1 sc inc sc into sc(10)turn

Round 10 :

1 sc inc sc into sc(11)turn

Round 11 :

1 sc inc sc into sc(12)fo.

Info :

B color-Make 35 sc around the triangle. Leave a long thread end to sew. 16 ch for the letter S.

โ€” Hair :

Round 1-6 :

sc in a mr

Round 2 :

sc inc(12)

Round 3 :

(6 times)1 sc into sc next inc(18)

Round 4 :

(6 times)2 sc into sc next inc(24)

Round 5 :

(6 times)3 sc into sc next inc(30)

Round 6 :

(6 times)4 sc into sc next inc(36)

Round 7 :

(6 times)5 sc into sc next inc(42)

Round 8 :

(6 times)6 sc into sc next inc(48)

Round 9-13 :

(5 ring)sc into sc(48)

Round 14 :

7 ch turn 7 ch into 6 sc.sc into sc(48)fo.Leave a long thread end to sew.

โ€” Cloak :

Round 1 :

22 ch turn ch into sc(22)1 ch turn

Round 2 :

sc into cr(22)1 ch turn

Round 3 :

cr into cr(22)1 ch turn

Round 4 :

1 cr inc cr into cr(23)1 ch turn

Round 5 :

1 cr inc cr into cr(24)1 ch turn

Round 6 :

1 cr inc cr into cr(25)1 ch turn

Round 7 :

1 cr inc cr into cr(26)1 ch turn

Round 8 :

1 cr inc cr into cr(27)1 ch turn

Round 9 :

1 cr inc cr into cr(28)1 ch turn

Round 10 :

1 cr inc cr into cr(29)1 ch turn

Round 11 :

1 cr inc cr into cr(30)fo.Clean the thread end.

โ€” Joining Parts :

Info :

sew the hair to the head

Info :

rnd 50-sew the sleeves sideways

Info :

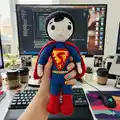
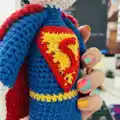
Sew the crest to the superman's chest.

Assembly Instructions

  • Sew the hair to the head using the long thread end left on the hair piece, matching the head curve for a neat seam.
  • At round 50 sew the sleeves sideways into the arm openings and secure with small whipstitches so the sleeves sit flat and even.
  • Sew the crest (triangle and embroidered S) to the center of the chest, using the long thread end left on the crest and pins to position it before stitching.
  • Install the safety eyes between rounds 14-15 of the head, ensuring there are 8 stitches between the eyes before securing the safety backs.

Important Notes

  • ๐Ÿ’กUse stitch markers to keep track of rounds and the start of each round, especially when joining legs and during color changes.
  • ๐Ÿ’กStuff the legs and body gradually as you crochet to maintain even shaping; overstuffing or waiting until the end can distort the piece.
  • ๐Ÿ’กLeave long thread ends when instructed so you can sew parts together neatly without adding new yarn.
  • ๐Ÿ’กClean and hide thread ends after completing pieces like the cloak for a tidy finish and secure joins before final sewing.

This adorable superhero amigurumi is a fun project that brings classic charm and playful details to life. ๐Ÿงถ The removable cloak and embroidered crest allow for easy customization and gift-ready presentation. ๐ŸŽ Enjoy every stitch as your tiny hero comes together โ€” happy crocheting and imaginative play! โœจ

You ask,

we answer.

FAQs

What size will the finished piece be?

The finished amigurumi measures about 20 cm in circumference and about 10 cm in length as stated in the pattern.

Can I use different yarn weights for this pattern?

Yes, you can change yarn weight, but this will affect the final size; adjust your hook accordingly to maintain the stitch gauge and shape.

Do I need prior crochet experience for this pattern?

This pattern is rated Intermediate and assumes familiarity with single crochet, increases, decreases, magic ring, and basic assembly techniques.

How long does this project typically take to complete?

Most crocheters finish this project in about 5-7 hours, depending on experience level and how quickly you assemble and embroider the details.