About This Christmas Bells Amigurumi Pattern
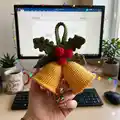
This pattern creates a delightful hanging pair of Christmas bells with detailed holly leaves and three red berries. It uses DK weight yarn and a small hook to produce neat, firm stitches ideal for ornaments. The pattern includes clear round-by-round instructions plus close-up photos to guide assembly. Youll finish with a charming seasonal decoration ready to hang or gift.
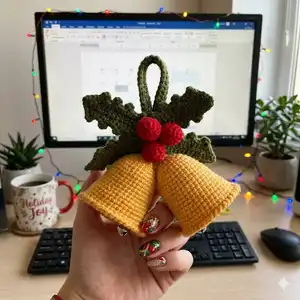
Worked in continuous spirals, the bells are finished with a crab (reverse) stitch edge for a polished look. Step-by-step assembly instructions show how to attach bells, leaves, berries, and the hanging loop.
Why You'll Love This Christmas Bells Amigurumi Pattern
I absolutely love this pattern because it captures classic holiday charm in a compact, handmade ornament I enjoy gifting. I enjoyed designing the little holly leaves and berries to add a pop of color and texture. I find the crab (reverse) stitch gives the bells a neat, professional edge that really elevates the finished piece. I also appreciate how the pattern uses simple motifs and assembly to create a layered, festive result that is satisfying to make.
Switch Things Up
I love customizing this pattern by changing the colors to match different holiday themes; try metallic or jewel tones for a more elegant look.
I sometimes swap the DK yarn for worsted weight and a larger hook to create a chunkier, more visible bell for mantel displays.
I add tiny embroidered veins to the leaves or embroider a small message on the back of the leaf cluster for personalization.
I replace the metal tambourine with a wooden bead or a small jingle bell for a different sound and aesthetic.
I make mini versions with lighter yarn to create a garland of tiny bells that look adorable across a mantel or banister.
I experiment with adding ribbon bows between the bells or hanging a small charm from the loop to make them gift-ready.
I sometimes use sparkly or gradient yarns for the berries to give a special shimmer and visual interest.
I recommend trying felt or stitched details on the leaves for a mixed-material look that stands out on a tree.
I also create sets in complementary colors to make matching place card holders or napkin rings for holiday tablescapes.
I enjoy making multiple sets at once and changing small details like the crab stitch color or clapper style to create a varied, handmade collection.
Common Mistakes & How to Fix Them
✗ Crocheting too loosely can make stuffing show through the stitches; maintain a tight, consistent tension and check gauge by ensuring no stuffing is visible.
✗ Skipping the crab (reverse) stitch finishing row will leave the bell edge looking unfinished; work the crab stitch row exactly as directed to create a neat rim.
✗ Not securing the tambourine/bell clapper properly can cause it to fall out; pull the clapper thread through the bell eye firmly and knot securely before hiding ends.
✗ Forgetting to place and hide long tails during assembly results in visible threads; weave and tie all tails at the back and trim closely after securing.