🧶 Beautiful ✨ Detailed 💝 Adorable

Starfish Amigurumi Pattern

Starfish Amigurumi Pattern
4.2★ Rating
2-3 Hours Time Needed
4.0K Made This
✂️

Beginner Friendly Level

Perfect for those just starting their crochet journey, with clear instructions and simple techniques

⏱️

Bite-Sized Project

Finishes in 2-4 hours—perfect for an afternoon of creative relaxation.

🎁

Tiny Treasure

Small, sweet, and gift-worthy creations that fit perfectly in the palm of your hand with detailed charm.

About This Starfish Amigurumi Pattern

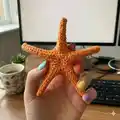
This pattern teaches you how to crochet two sizes of a starfish (thin and large) using simple rounds and basic stitches. It includes full round-by-round instructions, abbreviations, and step-by-step shaping tips to give the starfish a firm sculpted form. Photographs show construction and shaping to help you follow along easily. The final piece is a decorative, lightly stuffed amigurumi-style starfish.

Starfish Amigurumi Pattern crochet pattern - detailed view of completed project

Both sizes start from a small five-stitch central ring and form five arms with chain foundations and increasing stitches. Shaping uses a glue-and-water mix so you can set a crisp, realistic shape for display.

Why You'll Love This Starfish Amigurumi Pattern

I absolutely love this pattern because it transforms a few simple stitches into a charming sea creature with personality. I enjoy the quick satisfaction of making a full starfish in just a couple of hours, and the shaping step always makes the final piece feel handcrafted and unique. I designed the pattern to be forgiving for beginners but flexible enough for makers to experiment with texture and color. Sharing little coastal treasures like this always sparks joy for me and for the people who receive them.

Starfish Amigurumi Pattern step 1 - construction progress Starfish Amigurumi Pattern step 2 - assembly progress Starfish Amigurumi Pattern step 3 - details and accessories Starfish Amigurumi Pattern step 4 - final assembly and finishing

Switch Things Up

I love how easy it is to customize this pattern — change the yarn color to create reef-inspired or pastel starfish.

You can use thicker cotton or even sport weight yarn with a larger hook to make bigger, more cuddly starfish.

I often switch to a metallic or variegated cotton for subtle shimmer and extra visual interest on the arms.

Try adding embroidered details like tiny dots or lines on the arms to give each starfish a unique personality.

I sometimes stitch on small seed beads before shaping to add texture and sparkle to the shell.

For a softer, fabric-like feel skip the glue shaping and simply wet-and-shape; it gives a gentler curve to the arms.

I also like to make a set of three sizes and display them together as wall decor or a table centerpiece.

Change the arm length by adjusting the chain foundation in Round 3 — fewer chains for stubby arms, more chains for long spindly ones.

I recommend experimenting with glue-to-water ratios; 2:1 gives flexibility while 1:1 makes the piece stiffer for lasting sculptural shapes.

If you want a hanging ornament, stitch a small loop into the center back before finishing and fasten it off securely.

Common Mistakes & How to Fix Them

✗ Using a large hook because it feels faster; use a much smaller hook (1.5 mm suggested) to get tight, neat stitches and defined arms. ✗ Skipping stitch markers or not marking round starts; place a marker in the first stitch of each round to avoid losing track when forming arms. ✗ Overworking the chain foundation for each arm which causes uneven lengths; count chain stitches carefully and keep tension consistent for balanced arms. ✗ Using too much glue when shaping and not squeezing excess; carefully remove surplus glue-water mixture and gently shape to avoid limp or sticky fabric.

Starfish Amigurumi Pattern

Create delicate crochet starfish with this clear, photo-assisted pattern. You can make two sizes — thin and large — using 100% cotton and a very small hook for crisp stitches. The pattern includes shaping tips using a glue-and-water method so your starfish keep a sculpted, natural look. Perfect for gift projects, decor, or ocean-themed crafts.

Beginner Friendly 2-3 Hours

Materials Needed for Starfish Amigurumi Pattern

— Main Fabric

  • 01
    100% cotton yarn (recommended for small crochet work)
  • 02
    Madame Tricote "Camilla" (100% cotton, 50g = 125m)
  • 03
    Additional suitable yarn examples: Kartopu "Organica", Anchor "Creativa Fino", Schachenmayr "Catania"

— Tools Required

  • 01
    Crochet hook size 1.5 mm (recommended)
  • 02
    Alternative hooks to try: 1.75 mm or 2.00 mm if 1.5 mm is uncomfortable
  • 03
    Scissors
  • 04
    Needle to weave in ends
  • 05
    Stitch markers
  • 06
    White glue (for shaping)
  • 07
    Water (to dilute glue)
  • 08
    Rubber gloves (optional for shaping)

Progress Tracker

0% Complete

— Materials :

Infos :

For crocheting: 100 % cotton yarn. Crochet hook. Scissors. (Needle to weave in ends). I used: Madame Tricote "Camilla", (100% cotton, 50g=125m). 1,5 mm hook. For shaping: White glue. Water. Rubber gloves (optional).

— Crochet Abbreviations :

Infos :

CH - CHAIN. SL ST - SLIP STITCH. SC - SINGLE CROCHET. HDC - HALF DOUBLE CROCHET. DC - DOUBLE CROCHET. ST(S) - STITCH(ES). (6) - NUMBER OF STITCHES YOU SHOULD HAVE AT THE END OF THE ROUND.

— Tips and Tricks :

Infos :

For nice and tight stitches use crochet hook couple of sizes smaller than indicated on yarn label. You might want to use stitch marker and place it in the first stitch of each round or row to mark the beginning of it.

— Thin starfish :

Round 1 :

5 sc in a magic ring (5)

Round 2 :

2 sc in each st (10)

Round 3 :

* ch 15, sl st in 2nd ch from hook, sl st in next, sc in next 3 sts, hdc in next 4 sts, dc in last 5 sts; skip next sc of rnd 2 and sl st in next; repeat from * 4 more times;

Round 4 :

sc in each st all around skipping only last and first sts of each arm (see photos below)

Round 5 :

sl st in each st all around.

Info :

Fasten off and weave in yarn ends.

— Large starfish :

Round 1 :

5 sc in a magic ring (5)

Round 2 :

2 sc in each st (10)

Round 3 :

* ch 15, sl st in 2nd ch from hook, sl st in next, sc in next 3 sts, hdc in next 4 sts, dc in last 5 sts; skip next sc of rnd 2 and sl st in next; repeat from *4 more times;

Round 4 :

sc in each st all around skipping only last and first sts of each arm

Round 5 :

sc in each st all around

Round 6 :

sl st in each st all around.

Info :

Fasten off and weave in yarn ends.

— Shaping the starfish :

Infos :

In a cup mix 2 parts of water with 1 part of glue. Immerse the crocheted starfish into the glue and water mixture (wear rubber gloves if necessary) until it’s fully wet. Carefully squeeze out excess glue-water mix. Start shaping it by gently pulling at legs of the starfish and pinching them slightly together and giving it a desired shape. For thin starfish I used the "wrong" side of crochet as an outside of the fish. For large starfish use "right" side. Continue until you are satisfied with the shape. Leave it to dry on a towel.

— Few more tips and tricks :

Infos :

I use for most of my small crochet work 100% cotton yarn which has 125 m of yarn per 50 grams. Many brands have this weight. Some examples: Madame Tricote "Camilla", Kartopu "Organica", Anchor "Creativa Fino", Schachenmayr "Catania" and there are many more. Yarn label calls for 3,0 mm hook for these yarns but I recommend to use as small hook as you possibly can. I usually work with 1,5 mm. If this feels too uncomfortable then try a bit larger hook like 1,75 mm or 2,00 mm. The smaller the hook, the tighter the stitches and the prettier an end result. But it has to feel comfortable! Crocheting always has to be fun not a struggle. Let’s talk some more about shaping. I use regular white glue. It’s available all over the world. I mix either 2 parts of water to 1 part of glue or 1:1 if I want my end result to be even stiffer. If you have sensitive skin please wear rubber gloves while using glue mix. If you like the feel of cotton yarn and don’t want to add any stiffness to your shell you can just wet it in water, give it a desired shape and leave it to dry. I encourage you to experiment and find the way what suits you best! Finally let’s talk about further embellishing your work. I have used watercolors or diluted acrylic paint to add some extra color to my sea creatures. I’ve also experimented with adding some glitter and sealing it with some varnish. Or hand stitched on some seed beads (must be done before shaping with glue).

Assembly Instructions

  • Fasten off and weave in yarn ends after finishing rounds to secure your work.
  • Immerse the completed starfish into the glue-and-water mix, remove excess liquid, then shape the arms by gently pinching and pulling until you achieve the desired look.
  • Place the starfish on a towel to dry flat; position the arms and pin if necessary until fully dry to hold the shape.
  • When shaping with glue, wear rubber gloves if you have sensitive skin and squeeze out excess glue-water mix carefully before final shaping.

Important Notes

  • 💡Use stitch markers to keep track of the beginning of each round, especially when forming the five arms.
  • 💡Work with a very small hook (1.5 mm recommended) for tight stitches; try slightly larger hooks only if necessary for comfort.
  • 💡Mix glue and water in ratios (2:1 or 1:1) depending on how stiff you want the starfish to be, and always remove excess mix before drying.

This starfish pattern is a delightful little coastal project that yields charming decorative pieces you can display or gift. The two sizes let you create a coordinated set or mix colors for playful decor. With simple stitches, clear shaping steps, and photo guidance, you’ll enjoy making these seaside treasures. 🧶✨

You ask,

we answer.

FAQs

What size will the finished piece be?

Size varies with yarn and hook choice; using the recommended 100% cotton yarn and 1.5 mm hook the thin starfish is small and delicate while the large starfish is slightly bigger — perfect for decorations or small gifts.

Can I use different yarn weights for this pattern?

Yes, you can use different yarn weights but this will change the finished size and the look; choose an appropriate hook for your yarn and expect looser stitches with thicker yarns.

Do I need prior crochet experience for this pattern?

This pattern is beginner friendly but assumes you know basic stitches like chain, single crochet, half double crochet and double crochet, and how to work in a magic ring.

How long does this project typically take to complete?

Most crocheters finish one starfish in about 2-3 hours, depending on size, skill level, and time spent on shaping and drying.