About This Stanley the Strawberry Amigurumi Pattern
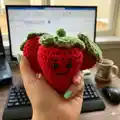
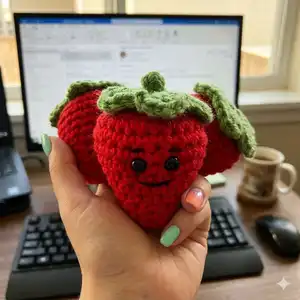
This pattern creates a tiny, charming strawberry amigurumi named Stanley, approximately 2.5 inches tall when completed. It uses worsted weight yarn and a single G hook, worked in continuous rounds to maintain a seamless look. You will learn simple increases, invisible decreases, and a small leaf motif to finish the top.
Great for quick makes, gifts, or practicing amigurumi basics. Includes clear rounds, finishing instructions, and optional safety eye placement.
Why You'll Love This Stanley the Strawberry Amigurumi Pattern
I absolutely love this pattern because it transforms basic stitches into an instantly charming character with very little time investment. I enjoy how small changes in color and facial placement can give Stanley so much personality. The pattern is thoughtfully written to be beginner-friendly, yet satisfying to make for more experienced crocheters as well. I take joy in the finishing steps — closing the top and adding a little stem always makes the piece come alive. Making a tiny strawberry like this is a wonderful way to practice tension control and finishing techniques in a compact project.
Switch Things Up
I love experimenting with colors for this pattern; try pale pinks or peach for a softer, pastel strawberry look.
I often change the yarn weight and hook to create different sizes — bulky yarn with a larger hook makes a chunky plush version.
I sometimes embroider freckles or tiny seed details with a contrasting thread to give Stanley extra character.
For a keychain, add a small metal ring and shorten the stem; this makes a portable, giftable charm.
I like substituting safety eyes with French knots or embroidered eyes for a completely soft, baby-safe toy.
To make a hanging ornament, crochet a longer stem loop and stuff lightly so the strawberry hangs nicely.
I occasionally attach a tiny crocheted leaf or bow for seasonal variants like Valentine or spring-themed strawberries.
If I want a flat-backed version, I decrease earlier and make the back slightly flattened so it sits nicely on surfaces.
I recommend trying textured stitches for the leaf section to add visual interest, such as puff stitches or bobbles for mini seeds.
Don't be afraid to mix fibers — cotton gives a firmer shape while acrylic provides stretch and softness, depending on the finish you prefer.
Common Mistakes & How to Fix Them
✗ Skipping the stitch marker in continuous rounds leads to losing track of the round start; place and move a marker at the first stitch of every round to stay aligned.
✗ Forgetting to stuff as you go can create lumps and make shaping difficult; stuff gradually and evenly at the indicated points to maintain a smooth shape.
✗ Placing safety eyes too low or uneven will make the face look off center; insert safety eyes between rounds 8 and 9 and check symmetry before securing.
✗ Pulling the yarn tail too tight when closing the top can distort the strawberry's shape; weave the tail through the back loops slowly and adjust tension as you tighten to preserve shape.
✗ Not weaving in the join tail properly causes a visible hole at the top; use a tapestry needle to weave through the back loops of rnd 14 and continue through the top until fully closed.