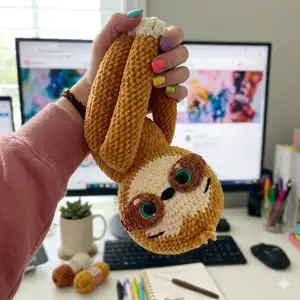
Make your own cuddly Samantha the Sloth with this beginner-friendly amigurumi pattern. You will work in spiral rounds using simple stitches and clear photo tips to help you along. The pattern includes step-by-step instructions for the head, eye patches, body, arms, legs and finishing details so you can create a lovable sloth to cherish or gift. Perfect for anyone who enjoys plush crochet projects with charming details.
Progress Tracker
0% Complete
— Tips :
Yarn Under :
1. Insert the hook in the next stitch. 2. Yarn under the hook and pull through. 3. Complete a single crochet stitch as usual. Yarn over and draw through all loops.
Invisible Decrease :
1. Insert the hook under the front loop of the first single crochet stitch. Do not yarn over. 2. Insert the hook under the front loop of the second stitch and pick it up onto the hook. 3. Yarn over and draw through the first two loops. Yarn over and draw through all loops.
Closing an Opening (using a crochet hook) :
1. Insert the crochet hook from the inside going out through the next front loop only and pull the yarn through. 2. Repeat in each front loop around the opening. 3. Pull tight and hide the yarn tail (with a yarn needle or a crochet hook).
How to Crochet Both Sides Together :
1. Flatten the opening of the piece. Insert the crochet hook through both sides of the piece. 2. Work the number of stitches needed. 3. Both sides are now joined.
Invisible Fasten Off :
1. Finish the last round, cut the yarn leaving a long yarn tail and pull it through. 2. With a yarn needle, skip the next stitch and insert the needle in the next stitch from the outside going in. 3. Insert the needle in the back loop only of the last stitch, still from the outside going in. 4. Gently pull on the yarn tail to complete and hide the tail.
Magic Ring :
A magic ring is a way to begin crocheting in round by crocheting the first round into an adjustable loop and then pulling the loop tight. Alternatively, you can chain 2, crochet n single crochet stitches into the second chain from hook.
— Head :
Info :
You will be working around the foundation chain for the face. Start with Cream yarn.
Round 1 :
ch 10, inc in the 2nd ch from the hook, sc 7, sc 4 in the last ch. Working on the other side of the ch : sc 7, inc. (22)
Round 2 :
inc x2, sc 7, inc x4, sc 7, inc x2 (30)
Round 3 :
(sc 4, inc) x6 (36)
Round 4 :
sc 2, inc (sc 5, inc) x5, sc 3 (42)
Round 5 :
sc 6, inc, sc 3 | *change for main color: sc 2 | *go back to cream color: sc, inc, (sc 6, inc) x4 (48)
Info :
Cut the cream yarn and continue with main color (do not worry about the color change, it will be hidden by the eye patch!)
Round 6 :
sc 3, inc, sc 5 | *main color: sc 2, inc, sc 3 | *cream color: sc 4, (inc, sc 7) x3, inc, sc 4 (54)
Round 7 :
(sc 8, inc) x6 (60)
Round 8 :
sc 4, inc, (sc 9, inc) x5, sc 5 (66)
Rounds 9-20 :
sc around (12 rounds total) (66)
Round 21 :
sc 4, dec, (sc 9, dec) x5, sc 5 (60)
Round 22 :
(sc 8, dec) x6 (54)
Round 23 :
sc 3, dec, (sc 7, dec) x5, sc 4 (48)
Round 24 :
(sc 6, dec) x6 (42)
Round 25 :
sc 2, dec, (sc 5, dec) x5, sc 3 (36)
Round 26 :
(sc 4, dec) x6 (30)
Info :
Start stuffing and continue as you go.
Round 27 :
sc, dec, (sc 3, dec) x5, sc 2 (24)
Round 28 :
(sc 2, dec) x6 (18)
Round 29 :
(dec, sc) x6 (12)
Info :
Finish stuffing. Do not close the opening just yet and continue to the Eye Patch section.
— Eye Patch (x2) :
Info :
You will be working around the foundation chain for the face. With the darker color.
Round 1 :
Ch 9, starting in the 3rd ch from the hook: dc-inc, dc-inc, dc, hdc 3, sc 4 in the last ch. Working on the other side of the ch: sc 4, hdc, hdc-inc. (19)
Round 2 :
dc-inc, hdc-inc, hdc 4, sc, sl st 3 (end of the round here) (12)
Info :
Images 1-2. Place one eye patch with the right side of the stitches facing and the other eye patch with the wrong side facing. Insert the eyes into the last chain (where you made 4 sc) and secure them. Images 2-5. Embroider the cheeks under the eyes with pink yarn. Tie a knot to secure it. Images 6-9. Embroider a white line to the outer side of the eyes. Tie a knot to secure it.
Info :
*Every time that you will have to insert the needle, do it by the opening at the back of the head. Once the embroidery is done, bring the needle back through the opening and tie 2 knots.
Info :
Face shaping (with a strand of worsted weight yarn of a similar color) *only if you are using safety eyes, skip this step if you are embroidering the eyes or using felt eyes*: Insert the needle and bring it out between rounds 2-3, on one side. Insert the needle one st to the side and repeat on the other side of the face. Bring the needle at the back, pull on the strands and tie 2-3 knots to deepen the sts.
Embroider Nose :
Embroider the nose (with Parfait Chunky yarn in dark grey or black): Insert two sewing pins on both sides of the magic ring to mark the sides of the nose. Insert the needle and push it out through one pin. Insert the needle through the other pin et push it out through the first point. Repeat about 3 times or until you are happy with the look of it. Bring the needle at the back.
Info :
Sew the eye patches to the face: Images 18-21. The inner part as close as possible to the nose and the outer part between rounds 6-7 (do not forget to hide the color change).
Info :
Embroider the eyebrows (with dark grey or black worsted weight yarn): Push the needle out between rounds 5-6, slightly above the eye patch. Insert the needle between rounds 6-7, slightly lower. Repeat for the other eyebrow. Close the opening at the back of the head (see 'Tips' section).
Info :
Add some hair (with 3 strands of main color of 6" (15cm) each): Insert your hook between rounds 8-9 and add a strand. Repeat for a total of 3 strands and cut the yarn short enough so it stays upright.
— Body :
Round 3 :
(sc, inc) x8 (24)
Round 4 :
(sc 3, inc) x6 (30)
Round 5 :
sc, inc, (sc 4, inc) x5, sc 3 (36)
Round 6 :
(sc 5, inc) x6 (42)
Round 7 :
sc 2, inc, (sc 6, inc) x5, sc 4 (48)
Rounds 8-16 :
sc around (9 rounds total) (48)
Round 17 :
sc 2, dec, (sc 6, dec) x5, sc 4 (42)
Round 18 :
(sc 5, dec) x6 (36)
Info :
Image 31. Stuff the body and make an invisible fasten off (see 'Tips' section). Image 32. Sew the body to the head.
— Arms (x2) :
Info :
*Read the tip at the bottom of the page. With main color.
Round 2 :
(inc, sc) x3 (9)
Round 3 :
(sc 2, inc) x3 (12)
Rounds 4-5 :
sc around (2 rounds) (12)
Round 6 :
(sc 3, inc) x3 (15)
Rounds 7-30 :
sc around (15) *You can make the arms as long as you want by making more or less rounds of 15 stitches.
Round 31 :
(sc 3, dec) x3 (12)
Info :
Do not cut the yarn for now and make the fingers (version A). You can make the arms and legs in 2 different ways: Version A follow the pattern and make the fingers. Version B (faster and easier): start with cream color and change for main color at the end of round 4. Skip the finger part.
— Add the fingers (with cream yarn) :
Info :
Make sure that the last st of the arm is on one side, not in the middle (see video). Insert your hook between rounds 4-5 and join cream yarn. Ch 6, starting in the 2nd ch from the hook: sl st 5 (first finger). Sl st in the next st of the arm. Repeat to make 2 more fingers. Cut the yarn, and leave a yarn tail of about 6" (15 cm).
Attach fingers :
Using the yarn tail, insert the needle through the last st (where you sl st) and push it out through the middle of the magic ring. Insert the needle at the tip of one outer finger. Then, at the tip of the outer finger and finally at the tip of the middle finger. Insert the needle through the middle of the magic ring and push it out in the arm. Bring the other yarn tail through the same st, tie 2 knots and hide the yarn tails.
Close opening :
Stuff the arm if it was not already, and close the opening by making 6 sc through both sides (see 'Tips' section). Sew the first arm to the body (wait for the second arm): in line with the eye closer to the back (white line), the top of the arm should be 1 round lower than the neck. If you want the arms to stay straight when you lift the sloth, sew following the black dotted line.
— Legs (x2) :
Info :
*Possible to make Version A or B. With main color.
Round 3 :
(sc 3, inc) x3 (15)
Rounds 4-5 :
sc around (2 rounds) (15)
Round 6 :
(sc 4, inc) x3 (18)
Rounds 7-26 :
sc around (18)
Round 27 :
(sc 4, dec) x3 (15)
Info :
Do not cut the yarn for now and make the fingers (for Version A). Stuff the leg and close the opening with 7 sc.
— Assembly :
Info :
Images 48-49. Sew the first leg 1 round lower than the arm. Image 50. Sew the other arm and leg to the back of the body, in line with the back of the head (white line). Optional: sew pieces of Velcro to the tip of the limbs or sew the limbs together.
Round :
Congratulations! Your sloth is now assembled and ready.
— Pierre the Baby Sloth (Alternate pattern notes) :
Info :
Pages include a smaller/baby sloth (Pierre) version using similar techniques. Materials: Premier Yarns - Parfait Chunky; Two 14mm safety eyes; 5.00mm (H) hook; leftover yarn in white, pink and black; polyester fiberfill; yarn needle; scissors; stitch marker; optional: 8 pipe cleaners & some Velcro.
Pierre Head - Round 1 :
mr of 6 sc (6)
Pierre Head - Round 2 :
inc x6 (12)
Pierre Head - Round 3 :
(sc, inc) x6 (18)
Pierre Head - Round 4 :
(inc, sc 2) x6 (24)
Pierre Head - Round 5 :
sc 3, inc, sc | *change to main color: sc 2 | *change to cream: inc, (sc 3, inc) x4 (30)
Pierre Head - Round 6 :
sc, inc, (sc 4, inc) x5, sc 3 (36)
Pierre Head - Round 7 :
(sc 11, inc) x3 (39)
Pierre Head - Rounds 8-12 :
sc around (5 rounds total) (39)
Pierre Head - Round 13 :
(sc 11, dec) x3 (36)
Pierre Head - Round 14 :
sc, dec, (sc 4, dec) x5, sc 3 (30)
Pierre Head - Round 15 :
(sc 3, dec) x6 (24)
Info :
Start stuffing and continue as you go.
Pierre Head - Round 16 :
(dec, sc 2) x6 (18)
Pierre Head - Round 17 :
(sc, dec) x6 (12)
Pierre Head - Round 18 :
dec x6 (6)
Info :
Finish stuffing. Do not close the opening just yet and continue to the Eye Patch section following the Pierre-specific eye patch instructions (Ch 5 starting in 2nd ch for a smaller patch).
Make this adorable Samantha the Sloth to brighten your shelf or give as a heartfelt handmade gift. The pattern is friendly to beginners and packed with photo tips that make tricky steps easy to follow. Create different color versions and personalize the facial details for a unique friend you�ll love. 🧶🐾✨