๐Ÿงถ Beautiful โœจ Detailed ๐Ÿ’ Adorable

Round Bag with Raffia Yarn Pattern

Round Bag with Raffia Yarn Pattern
4.8โ˜… Rating
5-7 Hours Time Needed
4.1K Made This
โœ‚๏ธ

Beginner Friendly Level

Perfect for those just starting their crochet journey, with clear instructions and simple techniques

โฑ๏ธ

Weekend Treat

Takes 5-7 hours, making it an enjoyable project to finish over a couple of days.

๐Ÿงถ

Stylish Touch

An elegant detail to elevate any look, combining traditional techniques with contemporary design sensibilities.

About This Round Bag with Raffia Yarn Pattern

This pattern shows you how to crochet a round bag from raffia yarn with step-by-step photos and clear written instructions. You will create a flat decorative circle base, reinforce it with rigilene boning, crochet a structured side, and add a fabric lining and flap. The finished bag is approximately 7 inches (18 cm) in diameter and has a durable, professional finish.

Round Bag with Raffia Yarn Pattern crochet pattern - detailed view of completed project

Included are materials and tool lists, abbreviations, detailed rounds for each section, and assembly notes to help you finish a polished bag. Video links are provided for working with raffia and for making the strap I-cord.

Why You'll Love This Round Bag with Raffia Yarn Pattern

I absolutely love this pattern because it transforms simple raffia yarn into a refined accessory with great structure and character. I appreciate the step-by-step photos that make each stage easy to follow, even for newer crocheters. The use of rigilene boning and a sewn lining gives me confidence the bag will hold its shape and last longer. I also enjoy that the strap can be crocheted or attached as a ready-made strap, giving creative flexibility. It feels rewarding to turn basic materials into a durable, stylish piece you can wear proudly.

Round Bag with Raffia Yarn Pattern step 1 - construction progress Round Bag with Raffia Yarn Pattern step 2 - assembly progress Round Bag with Raffia Yarn Pattern step 3 - details and accessories Round Bag with Raffia Yarn Pattern step 4 - final assembly and finishing

Switch Things Up

I love experimenting with different yarns in this pattern, so I often try paper cord or cotton cord instead of raffia for a different texture and extra durability.

If you want a larger bag I change yarn weight and hook size; using a bulkier yarn and larger hook will give a chunkier, roomier bag.

For a tiny coin purse version, I use thinner raffia or two strands held together and reduce the number of increase rounds to keep the base small.

I sometimes replace the sewn lining with a decorative fabric pocket to create interior organization, adding a zipper pocket for security.

Change the closure style to a magnetic snap or a decorative button loop instead of the valve and button for a different look.

Make the strap adjustable by using a longer I-cord with a slider, or attach a leather strap for a mixed-media finish.

I like to add embellishments like crocheted flowers, beads, or embroidered initials to personalize the bag for gifts.

Try alternative colors: ombre raffia, variegated cord, or contrasting trims for a bold statement piece.

To make the bag extra sturdy, insert a thin plastic disc between the lining and base or glue a thin cardboard base covered with fabric.

I often braid multiple thin straps together or combine chain and crocheted sections for a fashion-forward strap variation.

Common Mistakes & How to Fix Them

โœ— Not straightening raffia before crocheting leads to uneven texture and difficulty working; straighten or steam the raffia as recommended before starting. โœ— Joining rigilene boning without winding raffia tightly can cause visible gaps; cut the boning, wind yarn snugly, and fix with PVA glue every inch. โœ— Skipping the back-loop only instructions for the side makes the bag edge bulky and less neat; insert the hook in the back loop and jumper only when instructed. โœ— Forgetting to pull the working loop to the level of the hook results in a twisted canvas; pull the working loop to the right level and tighten after crocheting each stitch. โœ— Not steaming and shaping the circle after rounds causes a wavy base; steam the circle with an iron and shape with your hands to flatten and set.

Round Bag with Raffia Yarn Pattern

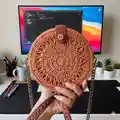
Make a stylish round crochet bag using raffia yarn with this clear, photo-supported pattern. You will learn how to create a sturdy circular base, add a reinforced side with rigilene boning, and finish with a lined interior and strap attachments. The pattern is beginner-friendly and perfect if you want a handmade summer bag with durable structure.

Beginner Friendly 5-7 Hours

Materials Needed for Round Bag with Raffia Yarn Pattern

โ€” Main Fabric

  • 01
    Raffia yarn (for example, Ispie) 1 skein, 250 meters
  • 02
    Rigilene boning, 5-6 mm, 60 inches (1 1/2 meters) - cut segments for circle and side
  • 03
    Lining fabric: 2 circles, diameter 6 5/8 inches (17 cm) - for two bag parts
  • 04
    Valve/flap with button (1 piece)
  • 05
    Shoulder strap 39-47 inches (100-120 cm) with 2 snap hooks (or crocheted I-cord)

โ€” Tools Required

  • 01
    Crochet hook N3 - 3 mm
  • 02
    Scissors
  • 03
    Sewing needle and thread
  • 04
    PVA glue
  • 05
    Iron (for steaming and shaping)
  • 06
    Rigilene boning 5-6 mm
  • 07
    2 snap hook rings, 20 mm
  • 08
    Valve with button (flap)
  • 09
    Pins for assembly (optional)
  • 10
    Sewing machine (optional for lining)

Progress Tracker

0% Complete

โ€” Crochet the base (circle) :

Info :

Crochet the chain with 3 CH.

Round 1 :

Crochet 15 DC in the 3rd loop from the hook. Crochet SlSt in the 1st DC. Crochet ECS: pull out the loop on 19/32 inches (1 1/2 cm), scroll the hook towards yourselves, holding the loop on the hook with your finger. Pull the hook under the 1st DC, pull out the loop. There are 2 loops on the hook now. Crochet 2 loops. Or crochet 3 CH. ECS there is the 1st DC of the row.

Round 2 :

1Inc*15 = 30, SlSt, ECS. Pull the end through all the stitches of the 1st row from the wrong side. Tighten, strengthen, hide and cut the end of the thread.

Round 3 :

(1 DC, 1Inc)*15 = 45, SlSt, ECS.

Round 4 :

(2 DC, 1Inc)*15 = 60, SlSt. ECS with 2 yarn over (imitation TRC, or 4 CH).

Round 5 :

CH, begin crochet the TRC. Pull the hook on the 2 jumpers of the ECS after the 1st yarn over, then yarn over again, then skip the stitch of the previous row, pull the hook trough the next loop of the previous row, crochet the 1st yarn over, crochet the loop with jumpers, crochet the 2nd yarn over and crochet the last 2 loops. Crochet the next element: TRC, in the same loop, where the previous TRC was crocheted. Crochet the yarn over. Make the yarn over, skip the stitch of the previous row. Crochet the yarn over. Crochet 2 loops, crochet the yarn over, crochet 2 loops. CH, DC in the middle of the element. Repeat to the end of the row. There are 30 elements in this row. SlSt, ECS.

Round 6 :

(3 DC, 1 Inc)*21, 5 DC = 110. SlSt, CH.

Info :

Steam the circle with an iron. Stretch the circle, shape with hands.

Preparing the rigilene boning :

Take the segment of the rigilene boning, equal to the diameter of the circle + 1-2 inches (3-5cm). Cut in half lengthwise. Wind the straightened raffia yarn around the rigilene boning. Fix with PVA glue every 1 inches (2-3 cm).

Round 7 :

Crochet in the rigilene boning, (10 SC, 1Inc)*10 = 120. Strengthen the last row. The circle should be flat without waves.

Info :

Steam the circle again. Cut the thread, pull out the end in the loop. Insert the hook under 1st loop, pull the end. Pull the end back. Strengthen the end on the wrong side.

Info :

Diameter of the circle is about 7 inches (18 cm).

Valve (P1) :

Sew on the valve. Sew on the valve so that the button is 1 3/4 inches (4 1/2 cm) above the edge of the circle. Strengthen the end and fix the seam with PVA glue.

Lining (P1) :

Sew in the lining. Cut out the circle from fabric of the same diameter. Tuck the edge by 3-5 mm, sew on a sewing machine or by hand. Sew the lining to the base by the edge, retreating 3-5 mm. Make a several securing stitches around the perimeter. Strengthen and hide the thread.

โ€” Crochet the side part :

Info :

Insert the hook on the back loop and jumper only. Crochet CH. Crochet in the end of the thread in this row.

Round 8 :

120 SC on the back loop and jumper only. Bend the row at an angle of 90 degrees.

Info :

Crochet CH: insert the hook under 1st SC, pull the loop. Take out the hook and insert the hook between the legs of the last SC. Pull the loop and crochet 2 loops together.

Info :

Next, crochet the split single stitch. For that, insert the hook between the legs of each stitch, to split the stitch from the face and from the wrong side.

Recommendation :

Pull the working loop to the level of the hook and to the right, so that the canvas will not twisted. Tighten the working loop after crocheting.

Round 9 :

120 SC, CH.

Round 10 :

120 SC, CH.

Round 11 :

120 SC, CH.

Round 12 :

120 SC, CH. Steam the side part of the bag with an iron.

Info :

Take the segment of the rigilene boning, equal to the perimeter of the side part + 1-2 inches (3-5cm). Cut in half lengthwise. Wind the straightened raffia yarn around rigilene boning. Fix with PVA glue every 1 inch (2-3 cm).

Round 13 :

Crochet in the rigilene boning. 120 SC. Tighten and straighten the rigilene boning around the perimeter. Steam the side part of the bag with an iron, again.

Info :

Pull the loop under 1st SC, pull out on the wrong side under last SC. Crochet the base trim SlSt in the each loops. Cut the end. Pull the end under 1st SlSt, pull back on the wrong side. Strengthen and hide the end.

Info :

Steam the side part of the bag with an iron again. Then, shape with hands. Similarly, crochet the second part of the bag.

โ€” Assembly :

Info :

Join the 2 parts of the bag with the edges. Leave 5 1/2 inches (14 cm) from the valve. Insert the hook in the loops of the previous row of both parts of the bag. Pull out the loop. Again, insert the hook in the loops of the previous row of both parts of the bag. Pull out the next loop, crochet SlSt. Crochet in the end of the thread. Each time, insert the hook, first in one part, then in the other. Crochet SlSt, leave 5 1/2 inches (14 cm) on the other side of the valve. Strengthen and hide the end of the thread on the wrong side.

Info :

Sew in the lower part of the valve. Strengthen the end of the thread and fix with PVA glue.

Info :

Insert the snap hook rings in the places where the connecting seam ends.

Info :

Fasten the shoulder strap to the snap hook rings. Link to the video, how to crochet the I-cord: https://youtu.be/035NbnktLtU

Info :

Congratulations! Your cute bag is ready. Follow the designer on YouTube and Instagram for more patterns and video tutorials.

Assembly Instructions

  • Join the two crocheted bag parts by inserting the hook into loops of the previous row of both parts and make slip stitches, leaving 5 1/2 inches (14 cm) free from the valve for the opening; insert the hook first in one part, then in the other each time to maintain even seaming.
  • Sew the valve (flap) on securely so the button sits approximately 1 3/4 inches (4 1/2 cm) above the edge of the circle, strengthen the stitches and fix with PVA glue for durability.
  • Sew the lining to the base by tucking the fabric edge 3-5 mm and stitching around the perimeter, then make several securing stitches and hide the thread on the wrong side.
  • Insert the snap hook rings at the places where the connecting seam ends and fasten the shoulder strap to the rings; tighten and secure all attachments with extra stitches and glue where appropriate.

Important Notes

  • ๐Ÿ’กStraighten raffia yarn before starting; steam or fluff according to yarn brand for consistent tension and texture.
  • ๐Ÿ’กWind rigilene boning with raffia yarn and fix with PVA glue every inch to avoid gaps and ensure the boning is fully covered.
  • ๐Ÿ’กUse back loop and jumper only where instructed for a neat bend between the base and side and to prevent twisting.

Thank you for trying this Round Raffia Bag pattern โ€” I hope it brings you joy and a lovely finished accessory! ๐Ÿงต This pattern includes step-by-step rounds, photos, and helpful video links to guide you through finishing and assembling your bag. ๐Ÿงถ Happy crocheting and enjoy carrying your handmade creation with pride! โœจ

You ask,

we answer.

FAQs

What size will the finished piece be?

The finished bag measures approximately 7 inches (18 cm) in diameter and about 2 3/8 inches (6 cm) in width when using the recommended raffia yarn and a 3 mm hook.

Can I use a different yarn instead of raffia?

You can use other cord or thick paper yarns but the structure and look will change; make a gauge swatch and adjust rigilene boning and hook size as needed.

Do I need to add rigilene boning?

Rigilene boning gives the bag its flat, stable shape; it is recommended for the circular base and for the side perimeter to prevent waves and maintain structure.

How long does this project typically take to complete?

Most crocheters complete this project in 5-7 hours, depending on experience, finishing details, and whether you make a crocheted strap or use a ready-made strap.