About This Pixie Pocket Pouch Pattern
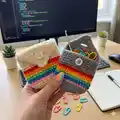
This Pixie Pocket Pouch creates a small, functional crochet pouch with rainbow stripe detailing and a buttoned flap. Youll work the pouch from the bottom up in joined rounds, then switch to a continuous spiral for the body and finish the flap in rows. The pattern uses basic single crochet stitches and a back-loop-only round to give a tidy edge. It is quick to make and uses only small scraps for colorful stripes.
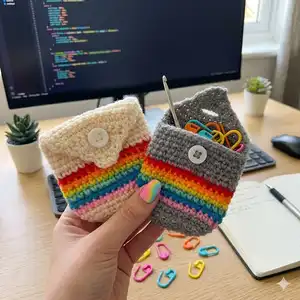
Ideal for storing stitch markers, earbuds or small treasures, this pouch is compact and portable. The button flap keeps items secure and adds a cute finishing touch.
Why You'll Love This Pixie Pocket Pouch Pattern
I absolutely love this pattern because it is quick to make and uses small scraps of yarn to create a delightful rainbow effect. I enjoy how the simple single crochet stitches produce a sturdy little pouch that feels useful and charming. Working the body in a continuous spiral gives a smooth, seamless finish that I find very satisfying. The flap and button detail add personality while keeping the construction straightforward.
Switch Things Up
I love changing up the colour sequence to make each pouch unique; try pastel shades for a soft vibe or jewel tones for a bold look.
If you want a bigger pouch, I often use thicker yarn and a larger hook to create a chunkier, roomier version.
To make a micro keychain version, use fingering yarn with a smaller hook and add a keyring at the top before closing the base.
I sometimes add a fabric lining to the pouch for extra structure and to protect delicate items inside.
Swap the button for a snap or magnetic closure for a sleeker finish, or add a loop closure for a handmade look.
Try embroidering a small motif on the flap for personalization—initials or tiny hearts look lovely.
I like to add a crocheted strap or wristlet if I want to carry the pouch on the go; attach it securely to the side seam.
Play with stitch texture by substituting rows with half double crochet or a seed stitch for a different surface feel.
Use ombre yarn or variegated yarn for the stripes to create a blended colour effect without changing yarns each round.
Embellish with beads or small tassels for a boho look, or keep it minimal with simple stripes for everyday use.
When I give pouches as gifts, I often match the button colour to the recipient's favorite hue for a thoughtful touch.
For durability, consider reinforcing the buttonhole area with a few extra rows or a small patch of fabric behind the flap.
Common Mistakes & How to Fix Them
✗ Skipping the chain one note at the beginning can cause mis-counted rows; remember that the chain one does not count as a stitch so always begin counting from the next stitch.
✗ Joining rounds inconsistently can create an obvious seam or gap; work joined rounds until round 10 exactly as instructed and make tidy slip stitch joins to keep the edge neat.
✗ Forgetting to switch to BLO for round 3 will change the pouch edge and look; be sure to work round 3 in the back loop only so the stripe edge sits correctly.
✗ Ending your spiral on the wrong corner will put the flap on the wrong side; end on the corner right BEFORE the side you want to be the front to position the flap correctly.
✗ Not pinning the button before sewing may result in misplacement and a flap that will not fit; hold and pin the button in place first to test the fit then sew securely.