About This Mini Pumpkin Man Amigurumi Pattern
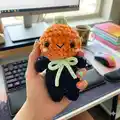
This pattern creates a tiny Pumpkin Man amigurumi made with plush velvet yarn in orange, black and light green. It uses continuous rounds and basic single crochet shaping to form a pumpkin head and a simple body with legs and arms. The pattern includes instructions for adding pumpkin dents, a tiny stem, facial details and an optional bow.
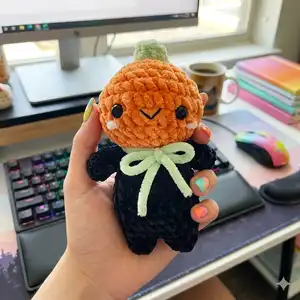
You will learn to crochet the head, body, legs, arms and stem, then assemble and finish with embroidered details. Ideal for making quick gifts or seasonal decorations with minimal tools.
Why You'll Love This Mini Pumpkin Man Amigurumi Pattern
I absolutely love this pattern because it turns simple stitches into a character with tons of personality using just a few materials. I enjoy how the pumpkin dents and tiny stem add such charm with minimal extra work. I find the plush velvet yarn gives a luxurious, soft finish that feels great to hold. I also love that it is quick to make and perfect for experimenting with colors and tiny accessories.
Switch Things Up
I love how easily you can customize this Mini Pumpkin Man with different yarns and colors to create new personalities.
You can swap the velvet yarn for a lighter sport or DK yarn to make a smaller or firmer version, adjusting the hook accordingly.
Try using variegated yarn for the head for a mottled pumpkin effect that looks handmade and rustic.
Change the stem color and shape to make a whimsical or realistic pumpkin top, or embroider tiny leaf details around the stem.
Make a whole family by using the same pattern in different sizes: use thinner yarn for minis and chunky yarn for large, cuddly pumpkins.
I often add little crocheted accessories like hats, scarves or tiny bows to give each pumpkin a unique style.
For a spooky twist, turn the face into a jack-o-lantern by embroidering triangular eyes and a jagged mouth with sport yarn.
Use safety eyes for durability, or embroider eyes for baby-safe toys and softer faces suitable for small children.
Try adding a loop or keyring to the head to convert the pumpkin into a festive bag charm or ornament for seasonal decor.
If you want more texture, switch to a textured stitch for the body or add a surface crochet line detail instead of embroidered lines.
I sometimes stuff with lavender or a scented sachet to make a fragrant little gift that smells like autumn.
Experiment with placement of eyes and blush to create different expressions—shifting eyes slightly changes personality dramatically.
Common Mistakes & How to Fix Them
✗ Skipping stitch markers during rounds causes you to lose track of the beginning of each round; place a marker and move it after each round to maintain correct stitch counts.
✗ Understuffing the head makes the pumpkin look flat and shapeless; stuff gradually and firmly to maintain a round pumpkin shape without overstuffing.
✗ Forgetting to align the eyes correctly will shift facial features off-center; insert safety eyes between R7-R8, five stitches apart, and check placement from the top before securing.
✗ Not creating the pumpkin dents early may make them harder to define later; follow the dent sewing instructions before fully closing and sewing the head to the body.
✗ Cutting yarn tails too short leaves you without an adequate sewing tail; always leave a long tail when fastening off so you can sew pieces together cleanly.