🧢 Beautiful ✨ Detailed πŸ’ Adorable

Frog Prince Amigurumi Pattern

Frog Prince Amigurumi Pattern
4.3β˜… Rating
5-7 Hours Time Needed
3.8K Made This
βœ‚οΈ

Intermediate Level

Ideal for those with basic crochet experience, featuring slightly more advanced stitches and techniques to expand your skills.

⏱️

Weekend Treat

Takes 5-7 hours, making it an enjoyable project to finish over a couple of days.

🧸

Cute Companion

An adorable friend to cherish, handcrafted with love to bring comfort and joy for years to come.

About This Frog Prince Amigurumi Pattern

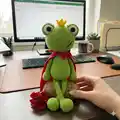
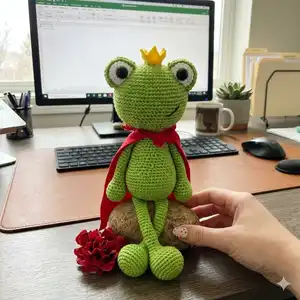
This pattern creates a sweet Frog Prince amigurumi with a rounded head, tapered body, long legs, and a tiny crown. It uses worsted weight yarn and includes separate pieces for eyes and eyelids to give a realistic look. The instructions are written in rounds and guide you through stuffing and assembly for a polished finished toy.

Frog Prince Amigurumi Pattern crochet pattern - detailed view of completed project

Designed for intermediate crocheters, the pattern includes clear stitch counts and shaping details. You will receive step-by-step rounds for every piece plus assembly directions to put your frog together neatly.

Why You'll Love This Frog Prince Amigurumi Pattern

I absolutely love this pattern because it turns simple crochet rounds into a character full of personality. I enjoy the way the separate eyelids and eyes create a friendly, expressive face. I also love that the long legs and tiny crown give the frog character and charm. The pattern is structured so I can follow each round exactly, which makes assembly satisfying and the finished toy even more rewarding.

Frog Prince Amigurumi Pattern step 1 - construction progress Frog Prince Amigurumi Pattern step 2 - assembly progress Frog Prince Amigurumi Pattern step 3 - details and accessories Frog Prince Amigurumi Pattern step 4 - final assembly and finishing

Switch Things Up

I love to customize this frog by changing color palettes; try mint green with cream accents for a vintage feel or bright green with neon accessories for a playful look.

I often make a mini version by switching to a DK or sport weight yarn and a smaller hook to create keychain-sized frogs.

For a chunkier, cuddlier frog, I switch to bulky yarn and a larger hook β€” it makes the legs and body more plush and toy-friendly.

I sometimes add embroidered freckles or a stitched smile using black embroidery thread to give the frog a unique expression.

Swap the safety eyes for embroidered eyes if you need a child-safe version; you can embroider pupils and highlights for personality.

Make the crown more elaborate by using metallic yarn or by sewing on tiny beads to the points for a jeweled effect.

Instead of sewing a cape, try crocheting one in place or use felt for a no-sew cape to add texture and color contrast.

I also experiment with different stuffing levels to adjust poseability; slightly less stuffing in the limbs makes them easier to fold and pose.

Change the eyelid size or placement to alter the frog's expression β€” a lower eyelid gives a sleepy look, while higher placement makes it wide-eyed and surprised.

Try creating a whole frog family in different sizes and colors to make a charming set β€” vary yarn weight, hook size, and eye size for personality differences.

Common Mistakes & How to Fix Them

βœ— Skipping stitch markers when working continuous rounds causes you to lose track of round starts; place a stitch marker at the first stitch of each round and move it up as you go to avoid mistakes. βœ— Not stuffing gradually leads to lumps and uneven shaping; stuff in small amounts frequently and shape as you go to maintain a smooth silhouette. βœ— Forgetting to count stitches after increases or decreases results in wrong stitch counts; count your stitches at the end of each round and especially after shaping rounds to correct errors early. βœ— Pulling your tension too tight while making small pieces like eyes and eyelids creates stiff, distorted pieces; work with relaxed, consistent tension for even stitches and easier assembly. βœ— Rushing assembly without pinning causes uneven placement of features; pin eyes, eyelids, arms and legs in place first, check symmetry, then sew securely to ensure a neat finish.

Frog Prince Amigurumi Pattern

Make your own charming Frog Prince amigurumi with this detailed crochet pattern. You will create a cuddly frog with expressive eyes, eyelids, a tiny crown, and posable limbs using worsted weight yarn. The pattern includes clear, step-by-step rounds for head, body, eyes, eyelids, arms, legs, crown and assembly instructions so you can finish a delightful handmade companion. Perfect as a gift or a fun project to expand your amigurumi skills.

Intermediate 5-7 Hours

Materials Needed for Frog Prince Amigurumi Pattern

β€” Main Fabric

  • 01
    Worsted Weight yarn (#4), approximately 150g main color (Color A: Green)
  • 02
    Accent yarns approximately 50g total (Color B: White, Color C: Yellow)
  • 03
    Black embroidery thread for facial details
  • 04
    Optional fabric or felt for cape (if making cape)

β€” Tools Required

  • 01
    Crochet hook size 3.25 mm (mentioned on cover for finished size)
  • 02
    Crochet hook size F / 3.75 mm (listed in materials)
  • 03
    18 mm safety eyes (2 pieces)
  • 04
    Scissors
  • 05
    Sewing needle for assembly
  • 06
    Stitch marker
  • 07
    Polyester fiberfill stuffing
  • 08
    Pins for assembly
  • 09
    Black embroidery thread and needle

Progress Tracker

0% Complete

β€” Notes :

Infos :

Do not join rounds unless stated, work in a continuous spiral. Use a stitch marker to mark the beginning of each round. All stitches are worked in both loops unless stated otherwise in the pattern.

β€” Head :

Round 1 :

Make 6 sc into a magic ring= 6

Round 2 :

Increase in each st around= 12

Round 3 :

(sc, inc) x 6= 18

Round 4 :

sc, inc, (2 sc, inc) x 5, sc= 24

Round 5 :

(3 sc, inc) x 6= 30

Round 6 :

2 sc, inc, (4 sc, inc) x 5, 2 sc= 36

Round 7 :

(5 sc, inc) x 6= 42

Round 8 :

3 sc, inc, (6 sc, inc) x 5, 4 sc= 48

Round 9 :

(7 sc, inc) x 6= 54

Round 10 :

4 sc, inc, (8 sc, inc) x 5, 4 sc= 60

Round 11 :

(9 sc, inc) x 6= 66

Round 12-19 :

sc in each st around

Round 20 :

(9 sc, dec) x 6= 60

Round 21 :

4 sc, dec, (8 sc, dec) x 5, 4 sc= 54

Round 22 :

(7 sc, dec) x 6= 48

Round 23 :

3 sc, dec, (6 sc, dec) x 5, 3 sc= 42

Round 24 :

(5 sc, dec) x 6= 36

Round 25 :

2 sc, dec, (4 sc, dec) x 5, 2 sc= 30

Round 26 :

(3 sc, dec) x 6= 24

Round 27 :

(2 sc, dec) x 6= 18

Info :

F/O

β€” Body :

Round 1 :

Make 6 sc into a magic ring= 6

Round 2 :

Increase in each st around= 12

Round 3 :

(sc, inc) x 6= 18

Round 4 :

(2 sc, inc) x 6= 24

Round 5 :

(3 sc, inc) x 6= 30

Round 6 :

(4 sc, inc) x 6= 36

Round 7 :

(5 sc, inc) x 6= 42

Round 8 :

(6 sc, inc) x 6= 48

Round 9-15 :

Sc in each st around

Round 16 :

(6 sc, dec) x 6= 42

Round 17-18 :

Sc in each st around

Info :

Start stuffing the body

Round 19 :

(5 sc, dec) x 6= 36

Round 20-21 :

Sc in each st around

Round 22 :

(4 sc, dec) x 6= 30

Round 23-25 :

Sc in each st around

Round 26 :

(3 sc, dec) x 6= 24

Round 27-29 :

Sc in each st around

Round 30 :

(2 sc, dec) x 6= 18

Round 31-32 :

Sc in each st around

Info :

F/O and leave a long tail for sewing

β€” Eyes (Make 2) :

Round 1 :

Make 6 sc into a magic ring= 6

Round 2 :

Increase in each st around= 12

Round 3 :

(sc, inc) x 6= 18

Round 4-6 :

sc in each st around

Info :

Place the safety eyes between rounds 5 and 6. F/O and leave a long tail for sewing

β€” Eyelids (Make 2) :

Round 1 :

Make 6 sc into a magic ring= 6

Round 2 :

Increase in each st around= 12

Round 3 :

(sc, inc) x 6= 18

Round 4 :

(2 sc, inc) x 6= 24

Round 5 :

(3 sc, inc) x 6= 30

Round 6-9 :

Sc in each st around

Info :

Fold the eyelid in half and sc it closed. F/O and leave a long tail for sewing

β€” Arms (Make 2) :

Round 1 :

Make 6 sc into a magic ring= 6

Round 2 :

Increase in each st around= 12

Round 3 :

(sc, inc) x 6= 18

Round 4-6 :

sc in each st around

Infos :

Start stuffing the arms. 7. (4 sc, dec) x 3= 15

Round 8 :

(3 sc, dec) x 3= 12

Round 9 :

(2 sc, dec) x 3= 9

Info :

Stop stuffing the legs

Round 10-27 :

sc in each st around

Info :

Fold the arms in half and sc the opening closed. F/O and leave a long tail for sewing

β€” Legs (Make 2) :

Round 1 :

Make 6 sc into a magic ring= 6

Round 2 :

Increase in each st around= 12

Round 3 :

(sc, inc) x 6= 18

Round 4 :

(2 sc, inc) x 6= 24

Round 5 :

(3 sc, inc) x 6= 30

Round 6-9 :

Sc in each st around

Info :

Start stuffing the legs

Round 10 :

(2 sc, dec) x 4, 14 sc= 26

Round 11 :

(sc, dec) x 4, 14 sc= 22

Round 12 :

Dec x 4, 14 sc= 18

Round 13 :

(sc, dec) x 6= 12

Round 14 :

(2 sc, dec) x 3= 9

Info :

Stop stuffing the legs

Round 15-35 :

sc in each st around

Info :

Fold the legs in half and sc the opening closed. F/O and leave a long tail for sewing

β€” Crown :

Info :

With Color C: Ch 12

Round 1 :

sl to to 1st ch to make a ring

Round 2-3 :

sc in each st around

Round 4 :

ch 3, sl st in 2nd ch from hook, sc in next chain, sc in next st on crown. Repeat 5 more times to have 6 points

Info :

F/O and leave a long tail for sewing

β€” Assembly :

Step 1 :

Sew the eyes onto the head.

Step 2 :

Sew the eyelids around the eyes.

Step 3 :

Sew the head onto the body.

Step 4 :

Sew the arms and legs onto the body.

Step 5 :

Sew the crown in between the eyes onto the head.

Info :

For the cape I used a no sew tutorial here http://www.littlepinkmonsters.com/no-sew-superhero-cape/

Assembly Instructions

  • Sew the eyes onto the head and secure the safety eyes between rounds 5 and 6 of the eye pieces.
  • Sew the eyelids around the eyes, folding each eyelid in half and single crocheting closed, then position and sew around each eye.
  • Sew the head onto the top opening of the body using the long tail, matching stitch placement for a neat seam and stuffing the neck area to shape.
  • Attach the arms and legs to the body by pinning in place first, then sew securely with a yarn needle using the long tails; ensure symmetry and even spacing for a balanced pose.
  • Sew the crown between the eyes onto the head, using the long tail to position and secure it; consider adding small beads to the crown for decoration.

Important Notes

  • πŸ’‘Use a stitch marker to mark the beginning of each round and move it up as you crochet to keep track of rounds.
  • πŸ’‘Stuff pieces gradually and check shape often; overstuffing can distort the toy while understuffing will make it limp.
  • πŸ’‘Pin all parts in place before sewing to ensure correct positioning, symmetry, and a professional finish.
  • πŸ’‘Weave in ends as you go to make finishing quicker and cleaner when assembly is complete.

This Frog Prince pattern brings a playful royal friend to your handmade collection. Create a lovable frog with big eyes, eyelids, long legs, and a tiny crown for charming details. Whether you gift it or keep it, this amigurumi will add smiles and handmade warmth to any shelf. πŸ§ΆπŸ‘‘

You ask,

we answer.

FAQs

What size will the finished piece be?

The finished amigurumi measures approximately 17 inches from bottom to top of head when using worsted weight yarn and the hook size recommended in the pattern.

Can I use different yarn weights for this pattern?

Yes, you can use different yarn weights, but the final size and proportions will change; choose a suitable hook for your yarn and be aware eyes and safety parts may be different sizes.

Do I need prior crochet experience for this pattern?

This pattern is rated intermediate and requires familiarity with continuous rounds, increases, decreases, and basic assemblyβ€”some experience with amigurumi is recommended.

How long does this project typically take to complete?

Most crocheters complete this project in 5-7 hours, though time will vary based on experience level, detail work, and assembly time.

What size safety eyes are recommended?

18 mm safety eyes are listed in the materials and are placed between rounds 5 and 6 of the eye pieces for the intended look.