🧢 Beautiful ✨ Detailed πŸ’ Adorable

French Countryside Blanket Pattern

French Countryside Blanket Pattern
4.1β˜… Rating
12-15 Hours Time Needed
2.1K Made This
βœ‚οΈ

Beginner Friendly Level

Perfect for those just starting their crochet journey, with clear instructions and simple techniques

⏱️

Multi-Day Project

A rewarding 12+ hour journeyβ€”perfect for dedicated crafters who love detailed work.

πŸ€—

Soft Hug

Gentle, plush, and full of warmth, creating a sense of comfort and coziness wherever they find a home.

About This French Countryside Blanket Pattern

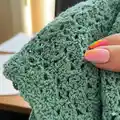
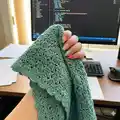
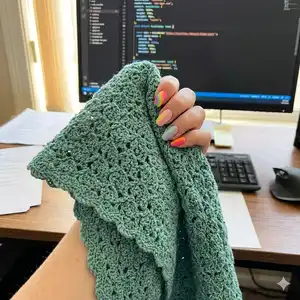
This pattern creates a medium-size textured blanket worked in the Paris Stitch for a lovely raised, lacy texture. It uses DK / Light (3) weight yarn and is written in US terminology with photo references to help placement. The pattern includes instructions for the blanket body and a two-round border to finish the edges neatly.

French Countryside Blanket Pattern crochet pattern - detailed view of completed project

The pattern is designed for a 48 x 50 inch blanket using 9 x 100g skeins of the recommended yarn. Clear tables are provided to customize starting chains and number of rows for other sizes.

Why You'll Love This French Countryside Blanket Pattern

I absolutely love this pattern because it creates a beautiful textured fabric without complicated stitches, making it relaxing to work on. I enjoy how the Paris Stitch produces a subtle lacy look that still keeps the blanket cozy and warm. The repeat structure is very satisfying β€” once you learn the rhythm, the rows fly by. I also appreciate that the border is written so that the last row of the blanket becomes the first side of the border, which makes finishing neat and consistent. Finally, I love that the pattern includes tables to customise width and length, so you can easily adapt the design to any size.

French Countryside Blanket Pattern step 1 - construction progress French Countryside Blanket Pattern step 2 - assembly progress French Countryside Blanket Pattern step 3 - details and accessories French Countryside Blanket Pattern step 4 - final assembly and finishing

Switch Things Up

I love how easily this pattern can be customized in color and size; try stripes by alternating skeins every 10 rows for a fresh look.

Want a smaller baby blanket? Use fewer starting chains from Table 1 and stop when you reach a baby-friendly length from Table 2.

If you prefer a chunkier blanket, switch to a bulky yarn and a larger hook for a super cozy result β€” but remember to make a swatch and expect a larger finished size.

For a finer, delicate version, use a lighter yarn and smaller hook to make a pretty lapghan or decorative throw.

I often add a contrast-color border by working the Paris Stitch border in a brighter shade to frame the blanket and add visual interest.

Try substituting a wool blend for extra warmth in winter throws, or a cotton blend for a breathable summer blanket β€” the texture of the Paris Stitch shows nicely in both.

To make a set, create matching cushions using the same stitch pattern on smaller starting chains and a few fewer rows.

If you want a reversible texture, experiment with swapping Paris Stitch rows for simple sc rows every 8-10 rows to create bands of different textures.

I also like to embroider a small motif or initials into a corner after blocking for a personalized touch.

Finally, play with borders β€” a wider scalloped edge or picot row after the slip-stitch round can change the finished style quickly and beautifully.

Common Mistakes & How to Fix Them

βœ— Skipping the initial chain count adjustment for different sizes; consult Table 1 and choose a starting chain that is a multiple of 4 + 2 to achieve the correct width. βœ— Not making a gauge swatch before starting with a substitute yarn; make a swatch to check gauge and adjust hook size so the final blanket size matches your target. βœ— Forgetting to omit the last dc in the final row before the border; ensure you follow the Last Row instruction exactly to make the border placement work correctly. βœ— Placing Paris stitches in the wrong side spaces during the border; follow the photo guidance to identify the correct smaller spaces and count carefully to place Paris stitches evenly. βœ— Not turning the work correctly when starting the border sides; turn the blanket as instructed so each side is oriented correctly for placement of corner and side Paris stitches.

French Countryside Blanket Pattern

Make a cozy, textured French Countryside Blanket using the easy-to-follow Paris Stitch. This pattern guides you through creating a medium-sized blanket with full stitch instructions, border details, and photo-referenced placement tips. Perfect for adding a handmade touch to your home or gifting to someone special. You'll enjoy the subtle lacy texture and approachable repeats that make this a relaxing project.

Beginner Friendly 12-15 Hours

Materials Needed for French Countryside Blanket Pattern

β€” Main Fabric

  • 01
    Ouma Ralie Feels Like Cashmere from Kismet Yarns - 9 x 100g in Seafoam Green (main yarn used in sample)
  • 02
    Weight: Light (3) / DK - 273 yards / 250 meters per 100g skein (approx)
  • 03
    Suggested substitutes: Rico Essentials Acrylic Antipilling DK (Light 3), King Cole Cherished Baby DK, Stylecraft Bambino DK, Lion Brand Jeans, Lion Brand Mandala Ombre, Lion Brand Jamie, Lion Brand Vanna's Style, Schachenmayr Original Soft and Easy, Schachenmayr Bravo, Red Heart Baby Hugs Light, Scheepjes Softfun, Scheepjes Colour Crafter, Scheepjes Softfun Denim
  • 04
    Fibers: 100% Acrylic (as used in the yarn substitution list)

β€” Tools Required

  • 01
    Crochet hook size 4.5mm (H) - used for the pattern
  • 02
    Optional crochet hook size US G / 4mm (alternative mentioned in yarn substitutions)
  • 03
    Knitting needle size US 4-7 or 3.5-4.5mm (spec sheet mentions for yarn specification)
  • 04
    Scissors
  • 05
    Yarn needle / tapestry needle for weaving in ends
  • 06
    Stitch markers
  • 07
    Measuring tape or ruler

Progress Tracker

0% Complete

β€” Special Stitches :

Info :

Paris Stitch: Each (2 dc, ch 2, sc) makes one Paris Stitch

Info :

CORNER: For the CORNER, make: (dc, ch 1) x 3, dc, sl st in the indicated st

β€” Instructions :

β€” Blanket :

Info :

Instructions are written for a medium size blanket, consult Table 1 on page 3 for number of starting chains for other blanket sizes.

Info :

With a 4.5mm H, make 222 ch

Row 1 :

(RS) 2 dc in 4th ch from H (photo 1-2), ch 2, sc in next ch (photo 2-3), *skip 2 ch, 2 dc in next ch, ch 2, sc in next ch*, rep from * to * until last ch, dc in last ch (photo 4-5), turn [ 55 Paris Stitches]

Row 2 :

ch 2, *(2 dc, ch 2, sc) in ch2-sp (photo 6-7)*, rep from * to * until end of row, dc around turning ch (photo 8-9)

Info :

Repeat Row 2 until your desired length (the blanket in the photo has 103 rows). Last Row should be made with RS facing:

Last Row :

(RS) rep Row 2, but don't make the last dc in turning ch,

β€” Border :

Info :

The border will consist of one round of Paris stitches and one round of slip stitches. The last row made for the body of the blanket, will count as the first side (top side) of the border, detailed instructions with photo's will help you to place the stitches for the other 3 sides of the blanket.

Round 1 :

Left Side: The first corner will be made in the first dc of the 2 dc indicated by the purple arrow in the photo 10 (the red arrow indicates where you normally would have made the last dc of the row, which is omitted in the last row): for the CORNER, make: (dc, ch 1) x 3, dc, sl st in the indicated st (photo 11), turn so that the left side is now on top (photo 12), locate the space on the left side made by the last dc at the end of each row (it is the smaller (third) space, not the big space, indicated by the white arrows in photo 12), make a Paris st in each of these spaces until the next corner (it works out as 1 Paris st for every 2 rows, photo 13), don't make a Paris st in the last sp, make a CORNER in the last sp (photo 14-15)

Round 1 (Bottom) :

turn so that the bottom is now on top, make a Paris st in the bottom of the same ch where the 2 dc of row 1 was made (photo 16-17) until the next corner, make a CORNER in the ch2-sp at the end of this side (photo 18-19)

Round 1 (Right Side) :

locate the space indicated by the arrows in photo 20-21 (it is the dc at the end of each row, one of the smaller spaces), make a Paris st in each of these spaces (photo 21, it works out as very third space) until the end of this side, make a CORNER in the last space before the ch2-starting-chain of the top row (photo 22-23),

Round 2 :

sl st in the BLO of each st around (insert your H from the top into each st, photo 24-26, the first 2 sl sts will be in the ch2-starting-chain, see arrows in photo 27), fasten off.

Info :

Weave in yarn ends.

Assembly Instructions

  • Treat the last row of the blanket body as the top side of the border and begin the border from that side, placing the first corner in the first dc of the two-dc pair indicated in the photos.
  • Work the left side border by turning the blanket so the left side is on top and make Paris stitches in the smaller spaces created by the last dc at the end of each row, placing one Paris stitch for every two rows until the next corner.
  • Work the bottom border by turning the blanket so the bottom is on top and make Paris stitches along the bottom chain space where row 1’s 2-dc were made, then place a corner in the ch2-space at the end of that side.
  • Work the right side border by placing Paris stitches in the small end-of-row spaces (one Paris stitch for about every third row depending on your starting chain), then make the final corner before returning to the top side.
  • Round 2: Slip stitch in the back loops only of each stitch around; insert the hook from the top into each stitch and join as you go, fasten off and weave in all yarn ends securely.

Important Notes

  • πŸ’‘This pattern is written in US terminology and photos are placed at the end of the document to help you place stitches correctly.
  • πŸ’‘The pattern stitch works in multiples of 4 + 2; use Table 1 for starting chains and Table 2 for number of rows when customizing size.
  • πŸ’‘Make a gauge swatch if substituting yarns; small differences in yarn thickness will change final blanket size.
  • πŸ’‘The border will add approximately 1.5 cm / 1/2 inch per side (about 3 cm / 1 inch total to the width).

This French Countryside Blanket pattern helps you create a beautiful textured throw that feels like a soft hug. The Paris Stitch gives delicate texture while staying cozy and easy to work. Make it in the recommended Seafoam Green or choose your favorite color to match your home. 🧢😊🧡

You ask,

we answer.

FAQs

What size will the finished piece be?

The finished blanket is approximately 48 inches x 50 inches (123 cm x 127 cm) when made with the specified yarn and hook size.

Can I use different yarn weights for this pattern?

Yes, you can use different yarn weights, but this will change the finished size; make a gauge swatch and consult Table 1 & Table 2 or adjust starting chains and row count accordingly.

Do I need prior crochet experience for this pattern?

This pattern is rated Beginner Friendly; basic crochet skills like chain, double crochet, single crochet and slip stitch are required and clear photos help with stitch placement.

How long does this project typically take to complete?

Most crocheters can finish this medium blanket in about 12-15 hours, but time will vary by experience, yarn choice, and how many breaks you take.

How do I change the blanket size?

Use Table 1 to choose a starting chain closest to your desired width (a multiple of 4 + 2) and Table 2 to estimate how many rows to crochet for your desired length.