About This Freestyle Beanie Pattern
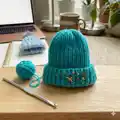
This Freestyle Beanie pattern teaches you how to make a simple rectangular beanie worked in rows, then seamed and shaped at the top for a clean finish. It is highly adaptable — choose your yarn weight, adjust the height, and add pom-poms, buttons, embroidery, or flowers. The pattern highlights working HDC in the back loop for a ribbed look, and offers seaming and finishing tips to achieve a polished result. Great for quick gifts and personalizing your handmade wardrobe.

Follow the instructions to create a fitted beanie with a folded brim or leave it unfolded for more slouch. The pattern includes notes on yarn usage and examples of yarns used in the sample hats.
Why You'll Love This Freestyle Beanie Pattern
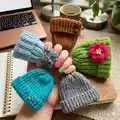
I absolutely love this pattern because it gives you a reliable framework and still lets your creativity run wild. I enjoy how easy it is to change yarn weights and hooks to make everything from tiny child hats to cozy adult beanies. The back-loop HDC rib is simple but creates a beautiful, stretchy fabric that feels great to wear. I also love adding extra details — embroidery, buttons, pom-poms, or a 3-D flower — to make each hat unique and meaningful.
Switch Things Up
I love how this pattern can be customized in so many ways; try changing yarn colors every 10 rows to create stripes or color blocks.
Want a chunkier hat? I often use a super bulky yarn and a larger hook to create a fast, squishy version with extra warmth.
For a daintier mini beanie, choose fingering or sport weight yarn with a smaller hook to make a tiny hat perfect for dolls or ornaments.
Swap the HDC rows for SC rows if you prefer a denser fabric and a slightly different rib effect; the pattern includes a note about starting with a SC row for blending.
Make different brim styles: fold the bottom edge for a double-layered brim, or leave it unfolded for more slouch and a casual look.
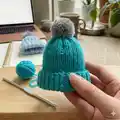
Add a faux fur pom-pom, a crocheted flower, leather buttons, or studs to suit the recipient's style — attach embellishments securely through both brim layers.
I sometimes embroider long whipstitches along the ridges for a cactus-inspired look; use two strands of fingering yarn held together for subtle contrast.
If you want a child-size hat, reduce the chain and number of rows; for an oversized adult beanie, increase chain length and add more rows until you reach the desired circumference.
Try lining the hat with fleece for extra warmth on windy days; sew the lining into place before finishing the brim seam for a clean interior.
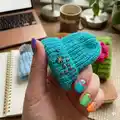
I often experiment with button placement and small knit fabric inserts behind studs so they are hidden when the brim is folded; it's a small trick that adds polish.
Change the direction of the ribs by alternating BLO rows with standard rows for a textured, modern look; test on a small swatch first to see the effect.
Common Mistakes & How to Fix Them
✗ Not checking your gauge before you begin can result in a hat that is too small or too large; measure your swatch and adjust hook size to match the desired width and stretch.
✗ Skipping the back loop only (BLO) instruction will give you a different fabric and rib look; always work the HDC into the back loop as directed for the correct rib texture.
✗ Failing to measure the rectangle against the head or a beanie will give you the wrong circumference; pin the short ends together and try the piece on or measure across the long side to confirm fit.
✗ Using a foundation chain that is the exact desired height (without adding the extra 1") will make the hat too short after folding; make the chain slightly longer than desired height and add one extra stitch for the turning chain.
✗ Seaming carelessly will make a visible ridge at the join; use the yarn tail to whipstitch under top loops and foundation loops as instructed to create a neat, blended seam.