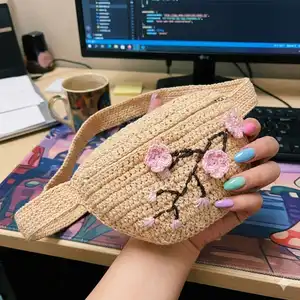
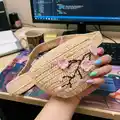
Make a stylish crocheted fanny pack using raffia yarn with this clear, photo-led pattern. You will learn how to crochet a structured circular base, build the front panel, sew in a zipper, and add embroidered floral details. The pattern is beginner-friendly and includes tips for working with raffia yarn and finishing techniques. Perfect for a handmade gift or a trendy everyday accessory.
Progress Tracker
0% Complete
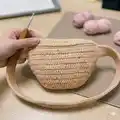
— Back side (circle) :
Round 1 :
Crochet 6 SC in the 2nd loop from the hook. Next crochet a spiral (6)
Round 3 :
(1 SC, 1 Inc) *6 = 18. Place the marker in the 1st loop of this row. Then, rearrange the marker in the 1st loop of the each subsequent row.
Info :
Turn the circle to the wrong side. Pull the end of the thread through all loops of the 1st row. Strengthen, cut and hide the end.
Round 4 :
(2 SC, 1 Inc) *6 = 24. Crochet +2 SC, and repeat this in the each row. Thus, the circle will come out in the correct form.
Round 5 :
(3 SC, 1 Inc) *6 = 30; +2 SC.
Round 6 :
(4 SC, 1 Inc) *6 = 36; +2 SC.
Round 7 :
(5 SC, 1 Inc) *6 = 42; +2 SC.
Round 8 :
(6 SC, 1 Inc) *6 = 48; +2 SC.
Round 9 :
(7 SC, 1 Inc) *6 = 54; +2 SC.
Round 10 :
(8 SC, 1 Inc) *6 = 60; +2 SC.
Round 11 :
(9 SC, 1 Inc) *6 = 66; +2 SC.
Round 12 :
(10 SC, 1 Inc) *6 = 72; +2 SC.
Round 13 :
(11 SC, 1 Inc) *6 = 78; +2 SC.
Round 14 :
(12 SC, 1 Inc) *6 = 84; +2 SC.
Round 15 :
(13 SC, 1 Inc) *6 = 90; +2 SC.
Round 16 :
(14 SC, 1 Inc) *6 = 96.
Info :
Crochet more 4 SC, gradually reduce the height of the SC.
Info :
Cut the thread, pull out the end. Skip one loop. Insert the hook under the 2nd loop of the row, pull out the end, tighten the end back to the wrong side. Strengthen and hide the end.
Info :
Steam the circle with an iron. Do not press hard on the face, but steam workability. Shape with hands. The finished circle should be about 8 inches (20 cm) in diameter.
Info :
If you crochet with raffia Fibranatura, then take an adhesive material (similar to gauze), cut out a circle 5 mm smaller than the diameter of the back side. Steam with an iron the back side through a damp cloth together with an adhesive material.
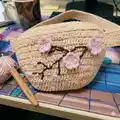
— Front side :
Info :
Turn the circle to the front side.
Info :
Insert the hook on the back loop and jumper only. Pull the loop, crochet CH.
Round 1 :
40 SC on the back loop and jumper only, CH. Crochet in the end of the thread in this row.
Round 2 :
40 SC, CH. Turn.
Round 3 :
4 SC, 32 CH, 4 SC = 40, CH. Crochet the chain freely so that the lower part don't tighten the zipper. Turn.
Round 4 :
40 SC, CH. (SC crochet in each CH of previous row). Turn.
Round 5 :
40 SC, CH. Turn.
Round 6 :
40 SC, CH. Turn.
Round 7 :
1 Dec, 36 SC, 1 Dec = 38, CH. Make the decrease in the simple method (Place the hook into the stitch and pull up the loop. Place the hook into the next stitch and pull up the 2nd loop. Now there are 3 loops on the hook. Yarn over and then pull through all the 3 loops). Turn.
Round 8 :
38 SC, CH. Turn.
Round 9 :
1 Dec, 34 SC, 1 Dec = 36, CH. Turn.
Round 10 :
36 SC, CH. Turn.
Round 11 :
1 Dec, 32 SC, 1 Dec = 34, CH. Turn.
Round 12 :
1 Dec, 30 SC, 1 Dec = 32, CH. Turn.
Round 13 :
1 Dec, 28 SC, 1 Dec = 30, CH. Turn.
Round 14 :
1 Dec, 26 SC, 1 Dec = 28, CH. Turn.
Round 15 :
1 Dec, 24 SC, 1 Dec = 26, CH. Turn.
Round 16 :
1 Dec, 22 SC, 1 Dec = 24, CH. Turn.
Round 17 :
1 Dec, 20 SC, 1 Dec = 22, CH. Turn.
Round 18 :
1 Dec, 18 SC, 1 Dec = 20, CH. Turn.
Round 19 :
1 Dec, 16 SC, 1 Dec = 18.
Info :
Cut the thread, pull out the end, strengthen and hide the end on the wrong side.
Info :
Steam the front side with an iron. Shape with hands. Now, you can cut the lining.
— Sewing in the zipper :
Item Name (P1) :
Take the sewing needle and the sewing thread in the same colour as the yarn.
Item Name (P2) :
Attach the zipper with pins.
Item Name (P3) :
Sew the lower part from left to right, using the "backstitch" seam.
Item Name (P4) :
Use sewing machine if available.
Item Name (P5) :
At the end of the lower part of the zipper, sew a few stitches.
Item Name (P6) :
Turn over and sew the top part of the zipper. At the end of the top part of the zipper, sew a few stitches. Melt the ends of zipper with lighter.
Item Name (P7) :
Steam the seam with an iron through a damp cloth. Check the zipper opens and closes without problems.
— Embroidery :
Info :
Take the brown yarn.
Info :
Embroider branches with brown raffia and flowers with pink raffia as desired, using the photos as a reference for placement and stitch type.
This raffia Fanny Pack pattern was made to help you create a chic, handmade accessory with clear steps and helpful photos. You will learn how to shape a round base, build a zipped front panel, and finish like a pro with lining and embroidery. Enjoy the process, add your personal touches, and wear your creation proudly! 🧶✨