About This Elephant Amigurumi Pattern
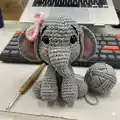
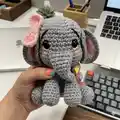
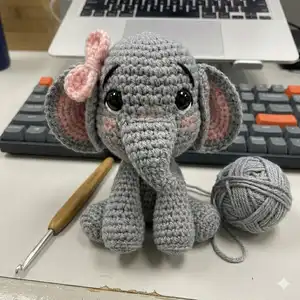
This pattern creates a tiny, adorable elephant amigurumi approximately 10 cm tall when made with the recommended materials. It uses single crochet in spiral, shaping through increases and decreases to form a rounded head and body. The pattern includes trunk, ears, legs, arms, tail and a simple ribbon accessory with step-by-step photos.
Clear rounds and photo sequence make assembly straightforward and beginner-friendly for those with basic crochet skills. You will get helpful finishing tips for embroidery, shaping and attaching parts.
Why You'll Love This Elephant Amigurumi Pattern
I absolutely love this pattern because it turns simple stitches into a sweet, characterful elephant that feels special to gift or display. I designed the face shaping and trunk joining steps so you can get an expressive result with minimal effort. As the maker, I enjoy how quickly this little amigurumi comes together — it is very rewarding to see the full shape appear after stitching a few rounds. I also love that the ribbon and blush finishing let you personalize each elephant easily.
Switch Things Up
I love to change colors to personalize each elephant; try pastel greys, mint or lavender for a soft, modern look.
You can scale the size by changing yarn weight and hook size: bulky yarn creates a chunky version while fine yarn makes a miniature keychain-sized elephant.
I often embroider different eyebrow shapes to give each elephant a unique expression — a little curve can make it look surprised or sleepy.
Try using safety eyes of different sizes or embroidered eyes for a child-safe toy; small changes in eye placement change personality a lot.
For a cuddly texture, use a plush or chenille yarn and increase hook size slightly to keep stitches flexible and soft.
Add tiny accessories like a crocheted scarf, hat, or a tiny heart to match seasons or holidays for gifting ideas.
To make the limbs poseable, you can insert a small piece of wire inside the arms and legs before stuffing, taking care to wrap wire ends securely.
If you want a weighted base so the elephant sits steadily, add a small amount of plastic pellets or tightly wrapped thread into the bottom of the body before final stuffing.
I sometimes change ribbon styles — braid three thin yarn strands for a rustic bow, or use felt for a flat decorative ear bow for variety.
Experiment with facial blushing and placement of the trunk to create different ages or character styles, from baby to more mature little elephants.
Common Mistakes & How to Fix Them
✗ Not using a consistent magic ring method can produce uneven starting rounds; use the same tension when creating your magic ring and pull it closed evenly before continuing.
✗ Stuffing too little or too much will distort the shaping of the head and body; stuff gradually, adjusting firmness as you progress and aim for even distribution to preserve the intended shape.
✗ Skipping stitch counts when working increases and decreases causes unbalanced shaping; count after each round, especially during the increase/decrease rounds to ensure the correct stitch totals.
✗ Sewing parts in the wrong position can spoil the expression or balance; pin parts (ears, trunk, legs, arms) in place and check symmetry before permanently sewing.