About This Daisy The Duck Amigurumi Pattern
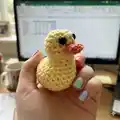
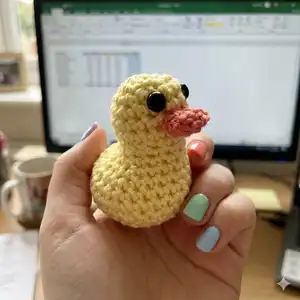
This pattern creates Daisy, a small amigurumi duck you can hold in the palm of your hand. It uses 4ply yarn and a 3.5mm hook for a neat, compact finish. The pattern features clear round-by-round instructions, photos for reference, and simple finishing directions. Perfect for gifting or making a little travel companion.
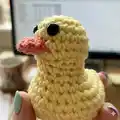
Includes a materials list, stitch explanations, and assembly tips to help you finish neatly. Sew on the beak and eyes and adjust stuffing for a balanced, duck-like shape.
Why You'll Love This Daisy The Duck Amigurumi Pattern
I absolutely love this pattern because it turns simple stitches into a joyful little character you can finish quickly. I enjoy how portable Daisy is—she fits in your pocket or makes a perfect tiny gift. The design is compact and forgiving, so you can experiment with color and slight shaping without stress. I also love seeing how a few stitches and a bit of stuffing become a personality-filled friend.
Switch Things Up
I love changing the colors to create different personalities; try pastel yellow, mint, or even grey for a unique look.
I sometimes make Daisy larger by using DK or aran weight yarn with a larger hook for a cuddly, chunky version.
I also make tiny versions using thinner yarn and a smaller hook for keychains and zipper pulls.
I often replace safety eyes with embroidered eyes for a child-safe toy or to give a softer expression.
Try adding a tiny felt bow, crocheted scarf, or a little hat to accessorize your duck and give them character.
I recommend experimenting with beak placement and stitching styles to create different mouth expressions and personalities.
For stability, I add a small pebble or bag of poly pellets at the bottom when I want the duck to sit reliably on a shelf.
Embroider tiny spots or wing outlines for extra detail, or use a contrasting yarn to crochet little wings and sew them on later.
I also enjoy combining two colors in stripes or color changes to make seasonal or themed ducks like pastel Easter or bright summer versions.
Finally, I often gift them as a pair and include a handmade tag; small packaging details make handmade ducks extra special and gift-ready.
Common Mistakes & How to Fix Them
✗ Not using a magic ring can lead to a hole at the top; always start with a magic ring to keep the top neat and tight.
✗ Forgetting to insert the safety eyes at the correct rounds will misplace facial features; place eyes between rounds 4 and 5 exactly 4-5 stitches apart before stuffing.
✗ Under-stuffing the back end causes the duck to tip forward; add extra stuffing to the back end to ensure a stable base and upright posture.
✗ Skipping stitch counts during increases and decreases leads to uneven shaping; count your stitches after every increase or decrease round to maintain the correct stitch count.
✗ Sewing the beak without aligning the joins can make the mouth look crooked; fold and position the beak, then stitch along the bottom edge to align with the join between round 7/8 for a neat finish.