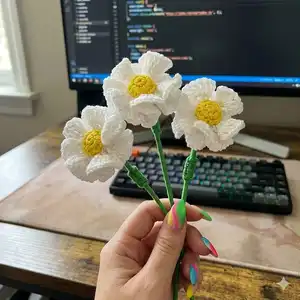
Create delicate crochet daisies and ruffled carnations to build a charming bouquet. This pattern walks you through centers, petals, sepals, and stem assembly with clear photo-based steps so you can recreate each flower exactly. Youll enjoy crafting small floral pieces perfect for gifts, decorations, or bouquets. Follow each step and glue assembly notes for neat, lasting results.
Progress Tracker
0% Complete
— Flower :
Info :
Diagram shows petal and round layout. Circle = magic ring. Dot = slip stitch (st). + = single crochet (sc). Oval = chain (ch). T = double crochet (dc).
— Daisy :
Row 1 :
CH 1, SC 16 in the magic ring
Row 1 :
tighten the magic ring, ST in the first SC
Row 2 :
CH 3 from the first SC
Row 2 :
DC 1 in the first SC
Row 2 :
DC 1 in the second SC
Row 2 :
DC 1 in the second SC
Row 2 :
DC 1, CH 1, DC 1 in the third SC
Row 2 :
repeat (continue same petal sequence around)
Row 2 :
ST in the third chain
Row 3 :
DC 1 in the next chain
Row 3 :
DC 1 in the next DC
Row 3 :
DC 1 in the same chain
Row 3 :
DC 1, CH 1, DC 1 in the next chain
Row 3 :
DC 1 in the next DC
Row 3 :
repeat (continue petal repeat around)
Row 3 :
ST in the third chain
— Finishing Daisy Petals :
Info :
After completing the petal rounds, fasten off and trim the edges of the yarn.
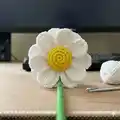
— The central part of the flower (button center) :
Row 1 (SC 8) :
CH 1, SC 8 in the magic ring
Row 1 (SC 8) :
tighten the magic ring, ST in the first SC
Row 2 (SC 16) :
CH 1, SC 2 in the first SC
Row 2 (SC 16) :
repeat, SC 2 in each SC (end with ST in the first SC)
Row 3 (SC 8) :
CH 1, SC 1 in the first SC
Row 3 (SC 8) :
skip the second SC, SC 1 in the third SC
Row 3 (SC 8) :
skip the fourth SC, SC 1 in the fifth SC, repeat
Row 3 (SC 8) :
ST in the first SC
Info :
fasten and trim the edges of the yarn
Info :
apply glue to the back of the button
Info :
glue the button in the center of the flower
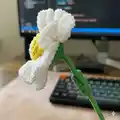
— Sepal, Stem and Leaf assembly :
Info :
all parts + glue, for a daisy, make the sepal the same color as the flower
Info :
apply glue in the hole of the flower
Info :
apply glue to the edge of the stem
Info :
put the stem into the hole and wait for hardening
Info :
put the sepal on the stem, apply glue to the sepal
Info :
and glue to the flower
Info :
for daisy, use a white sepal like the flower itself, because the green sepal can shine through the flower to the outside
Info :
apply glue to the narrower edge of the leaf and glue it to the stem
— Carnation :
Info :
The carnation is made in the same way as the previous flower - daisy. For daisy, the first row began with CH 16, for carnation make CH 20 in the first row
Row 1 :
magic ring (photo shows starting a ring for demonstration)
Row 1 :
tighten the magic ring, ST in the first SC
Info :
and make the next two rows in the same way as you did the daisy
Info :
with the help of a needle and yarn, pull the round element into a bundle (for the instructions I'll use the green color of the yarn in the needle, but actually use the same color as the carnation)
Info :
Pass the needle with yarn behind the DC of the second row as follows: pass the needle under the bottom of the first DC, pass the needle above the second DC, pass the needle under the bottom of the next DC, pass the needle above the next DC. In the same way, pass the entire row to the starting point.
Info :
pull the yarn by two edges and tie a knot, fasten and trim the edges of the yarn
Info :
open the flower, apply glue inside and close, pressing with your fingers until the glue hardens
Info :
apply glue in the hole of the flower and on the edge of the stem, insert the stem into the hole and wait for the glue to harden
Info :
put the sepal on the stem, apply glue and glue it to the flower
Info :
apply glue to the narrow edge of the leaf and glue it to the stem
Info :
and glue it to the stem
— Bouquet assembly :
Info :
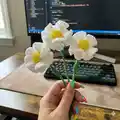
for the tutorial I used yellow color, and here are 5 daisies that will be part of the bouquet
Info :
Fold all the flowers included in the bouquet (in my case it is 32 pieces), align the edges of the stems and wind a sufficient amount of yarn on the bundle. Fasten the edges of the yarn with glue.
This floral crochet pattern guides you step-by-step to create charming daisies and ruffled carnations for bouquets and decor. Each flower is built from a neat round center, layered petals or ruffles, and an assembled stem for durability. Make single stems or combine many into a handmade bouquet to gift or display. 🌼🌿