About This Crochet Owl Amigurumi Pattern
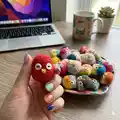
This pattern teaches you how to crochet a tiny owl amigurumi starting from the bottom of the body and finishing with simple eyes and a beak. It uses basic US crochet terms and simple shaping so you can make adorable owls in many color combinations. The design is quick to make and perfect for using up small yarn scraps and creating a set of colorful buddies.

Follow the step-by-step rounds for the body and eyes, then assemble by inserting safety eyes and shaping the top. Great for beginners and a lovely little gift idea.
Why You'll Love This Crochet Owl Amigurumi Pattern
I absolutely love this pattern because it is so quick and satisfying to make; each little owl comes together in just a few rounds and is instantly charming. I enjoy experimenting with different color combinations and seeing how personality changes with tiny variations. The design is simple enough to be relaxing but flexible enough for creative embellishments. Making a whole flock is addictive and perfect for using leftover yarn scraps.
Switch Things Up
I love how easy it is to customize these tiny owls by changing colors; try a pastel palette for a soft nursery set or bold brights for playful gifts.
You can make a mini keychain by adding a small loop or attaching a split ring before closing the top of the owl.
To make a larger owl, use a thicker yarn and a larger hook and work the same rounds — the proportions remain pleasing when you scale up.
I often change the eye style by embroidering eyelids or using felt circles instead of safety eyes for a softer look.
For a different beak effect, experiment with embroidery, small crochet cones, or felt triangles stitched in place.
I sometimes add tiny wings by crocheting small semicircles and sewing them to the sides for more personality.
If you want posable owls, consider inserting a thin piece of wire into each wing before sewing it on and wrapping it with extra yarn for stability.
Play with texture by using boucle or wool yarn for a fluffy-bodied owl that looks almost feathery.
Try surface crochet or embroidery to add chest patterns, stripes or little hearts to personalize each bird.
I like to make whole sets in coordinated colors for gifts — mix solids and variegated yarns to create charming combinations.
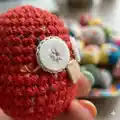
Don't be afraid to add tiny accessories like scarves, hats, or little flower appliques to turn your owl into a character.
Lastly, if you'd like a modern flat version, work fewer rounds and flatten slightly before closing to create a puck-shaped owl that sits nicely on shelves.
Common Mistakes & How to Fix Them
✗ Not counting stitches after increases can lead to incorrect stitch counts and uneven shaping; always count your stitches at the end of each increase round to confirm the correct total.
✗ Placing safety eyes too early or too close together can distort the face; insert and check eye placement before stuffing and secure them through the inner closure for best alignment.
✗ Overstuffing the body will make shaping the top and ears difficult; stuff gradually and stop when the body is firm but still pliable so you can close and shape the top.
✗ Using inconsistent tension between rounds causes slightly misshapen owls; maintain steady tension throughout and practice the stitch if needed to even out your fabric.
✗ Skipping the color change instruction can make the top look uneven; change color neatly between rounds and fasten off/secure tails to keep the edge tidy.