🧶 Beautiful ✨ Detailed 💝 Adorable

Crochet Flower Bookmark Pattern

Crochet Flower Bookmark Pattern
3.9★ Rating
1-2 Hours Time Needed
2.2K Made This
✂️

Beginner Friendly Level

Perfect for those just starting their crochet journey, with clear instructions and simple techniques

⏱️

Quick Make

Complete in under 2 hours—lightning fast fun for instant gratification and quick gifts.

Stylish Touch

An elegant detail to elevate any look, combining traditional techniques with contemporary design sensibilities.

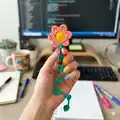
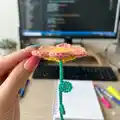
About This Crochet Flower Bookmark Pattern

This pattern creates a pretty floral bookmark with a crochet flower head, a twisted stem with leaves, and a small bell on the end. It uses simple stitches—DC, TR, HDC, SC and slip stitches—so it omes together quickly. You can change colours at the slip stitch to make bright or subtle flowers.

Crochet Flower Bookmark Pattern crochet pattern - detailed view of completed project

Perfect for beginners who know basic stitches and a magic ring. The stem repeats can be extended to make longer bookmarks or shortened for mini versions.

Why You'll Love This Crochet Flower Bookmark Pattern

I absolutely love this pattern because it turns basic stitches into a charming little accessory that makes readers smile. I enjoy how quickly the flower takes shape and how satisfying the colour change at the petal base looks. I also love that it an be easily customised with different yarns and colours to match gifts or seasonal themes. Making a small bell at the end gives it a playful finish that I always find delightful.

Crochet Flower Bookmark Pattern step 1 - construction progress Crochet Flower Bookmark Pattern step 2 - assembly progress Crochet Flower Bookmark Pattern step 3 - details and accessories Crochet Flower Bookmark Pattern step 4 - final assembly and finishing

Switch Things Up

I love to change up the colours when I make this bookmark; try a pastel centre with contrasting bold petals for a modern look.

You can make the bookmark longer by repeating the chain-and-stitch leaf section more times; I often make an extra two or three repeats for larger books.

If you want a chunkier version, I use a thicker cotton or DK weight yarn and a larger hook to create a bolder flower that stands out.

For a delicate mini version suitable as a keychain, use thinner thread and a very small hook, then omit the bell and add a keyring instead.

I sometimes add embroidered veins to the leaves with a contrasting thread to give them more detail and dimension.

Try swapping the bell for a bead or charm to match the recipientor a personalized gift; make sure to sew it on securely.

I also like to stiffen petals lightly with fabric starch if I want the flower to hold a specific shape for display.

Make a set in seasonal colours—reds and greens for holidays or pastels for spring—to create a themed gift bundle.

Experiment with fuzzy or metallic yarns for a fun texture; these change the look dramatically and make special occasion bookmarks.

Finally, consider adding a small ribbon loop at the top of the flower to hang it or to attach a gift tag for a finished present-ready look.

Common Mistakes & How to Fix Them

✗ Changing colour without securing the new yarn can cause loose loops; secure the new colour with the slip stitch and pull gently to tidy the join. ✗ Skipping the magic ring step can create a hole in the flower center; always start with 18 DC in a magic ring and tighten the ring before continuing. ✗ Not checking stitch counts after each round leads to uneven petals; count after rounds 1 and 2 to ensure 18 DC and the correct joins. ✗ Pulling chains too tight for the stem makes it curl oddly; keep a consistent, slightly loose tension for a natural flowing stem. ✗ Forgetting to fasten off and weave in ends results in unraveling; fasten off at the instructed points and work away all yarn ends securely. ✗ Attaching the bell without reinforcing the loop can cause it to fall off; sew the bell on with extra stitching and knot securely inside the finished last chain.

Crochet Flower Bookmark Pattern

Make a delicate crocheted flower bookmark that slips between pages and adds a handmade touch to your reading. This pattern walks you through a simple flower head, a leafy stem, and a small bell finish. Ideal for gifting or keeping, you can customize colours and length to suit your style.

Beginner Friendly 1-2 Hours

Materials Needed for Crochet Flower Bookmark Pattern

— Main Fabric

  • 01
    Phildar Coton 3 (recommended) - small amounts for flower centre, petals and stem
  • 02
    Colour A: Yellow (small amount for flower center)
  • 03
    Colour B: Pink/Coral (small amount for flower petals)
  • 04
    Colour C: Green (small amount for stem and leaves)

— Tools Required

  • 01
    Crochet hook size 2.5mm (recommended for Phildar Coton 3)
  • 02
    Scissors
  • 03
    Yarn needle for sewing in ends
  • 04
    Small bell or charm to attach to the end
  • 05
    Stitch markers (optional)

Progress Tracker

0% Complete

— Pattern :

Infos :

Hello! Thank you for downloading one of my patterns. Here are some instructions that I think you need to know before you start working on the pattern. 1. In what terms is this pattern written? In US terms. 2. What yarn should I use? I used Phildar Coton 3. 3. What crochet hook should I use? I always use a crochet hook size 2.5mm for Phildar Coton 3. 4. Can I use a different type of yarn? Ofcourse you can use other yarn and a different crochet hook. 5. What abbreviations are in this pattern? CH: chain SLST: slip stitch SC: single crochet HDC: half double crochet DC: double crochet TR: treble crochet

Info :

Well, this should be a good start for your bag project! Should you have any questions, don't hesitate to contact me. I'm happy to help you out if necessary. You can reach me at: annemarieshaakblog@hotmail.com

Info :

Just one more thing. I always try to make my patterns as perfect as possible, but please let me know if anything is unclear or if you encounter any mistakes.

Info :

Do you want to see more of my patterns? Please visit my LoveCrochet pattern page: click here. And don't forget to check my blog: www.annemarieshaakblog.blogspot.com

Info :

There are a lot of (free) crochet patterns on my blog, you can link your project at my weekly Link Party and every now and then I have fun giveaways. Good luck with your project!

Round 1 :

18DC in a magic ring. If you don't know how to make a magic ring, click here for a tutorial on my blog.

Round 2 :

1 SLST in the first DC and change colour while doing so.

Round 3 :

CH2, in the same stitch below: 1DC, 1TR. Chain 1.

Round 4 :

In the next stitch: 1TR, 1DC. Chain 2. Do 1 SLST in the same stitch.

Round 5 :

1 SC in the next stitch, 1SLST in the next stitch.

Round 6 :

Repeat rows 3-5 until you reach the first leaf (fasten off here if you only want to make the flower).Change colour at the last stitch, change to green. So change with the slip stitch that you make at the bottom of the first leaf.

Round 7 :

Chain 10. Do 1SC in the second stitch from hook. In the next chain: 1HDC. In the next chain: 1DC. Do 1 SLST in the same chain you did your last DC in.

Round 8 :

Repeat row 7 four times (or more often if you want your bookmark to be longer). Chain 5 and fasten of. Attach a little bell at the end and work away all yarn ends.

Infos :

Last but not least Designing crochet patterns is a time-consuming and difficult job. I'd love to see you make as many bags as you like for yourself or to give as a gift. But please do not make copies of this pattern, don't distribute this pattern, don't share it and don't sell it as if it is your design. If you post your own bag somewhere on the WorldWideWeb, I'd love it if you refer to my blog or shop. Enjoy!

Assembly Instructions

  • Change colour to green with the slip stitch at the bottom of the first leaf as instructed in step 6 to start the stem cleanly.
  • For each leaf and stem segment, follow the chain counts exactly and fasten off where indicated to shape the bookmark.
  • Attach a small bell to the final chain end after chaining 5 and fastening off; secure the bell with several stitches and weave in ends.
  • Work away all yarn ends with a yarn needle, hiding tails along the stem so they are not visible on the front.
  • If you only want the flower, fasten off at the first leaf as noted and weave in ends to finish a flower-only bookmark.

Important Notes

  • 💡This pattern is written in US terms, so use US stitch equivalents if you refer to international references.
  • 💡Change colours using a slip stitch at the bottom of the leaf to create a neat colour join for the stem.
  • 💡If you are unsure how to make a magic ring, follow a magic ring tutorial before starting to ensure a neat flower center.
  • 💡Fasten off and weave in ends carefully to prevent the small bell or petals from coming loose during use.

Create a sweet keepsake with this simple flower bookmark pattern that brightens any book and makes a thoughtful gift. 🧶 The easy stitches and small size mean you can make several in different colours in no time. 🌸 Have fun customizing your petals, stem length and bell for a truly unique handmade touch. ✨

You ask,

we answer.

FAQs

What size will the finished piece be?

The finished bookmark length will vary based on how many stem repeats you make, but using Phildar Coton 3 and the recommended hook it should be small enough to comfortably sit in a paperback book (approximately 15-20 cm including bell).

Can I use different yarn weights for this pattern?

Yes, you can use different yarn weights but it will change the final size; use an appropriate hook for your chosen yarn and adjust chain lengths as needed to get the bookmark length you want.

Do I need prior crochet experience for this pattern?

This pattern is beginner friendly but assumes you know basic stitches (CH, SC, HDC, DC, TR) and how to make a magic ring; a short tutorial is recommended if you re new to magic rings.

How long does this project typically take to complete?

Most crocheters can finish this quick project in under 2 hours, depending on customization and how many repeats you add to the stem.