🧢 Beautiful ✨ Detailed πŸ’ Adorable

Crochet Beret Pattern

Crochet Beret Pattern
4.5β˜… Rating
1-2 Hours Time Needed
2.3K Made This
βœ‚οΈ

Beginner Friendly Level

Perfect for those just starting their crochet journey, with clear instructions and simple techniques

⏱️

Quick Make

Complete in under 2 hoursβ€”lightning fast fun for instant gratification and quick gifts.

✨

Stylish Touch

An elegant detail to elevate any look, combining traditional techniques with contemporary design sensibilities.

About This Crochet Beret Pattern

This pattern details a small beret designed to fit the big penguin amigurumi from the same collection. It uses simple rounds of single crochet with increases and decreases to form a classic beret shape. The instructions are concise and include the final finishing loop made from the starting tail.

Crochet Beret Pattern crochet pattern - detailed view of completed project

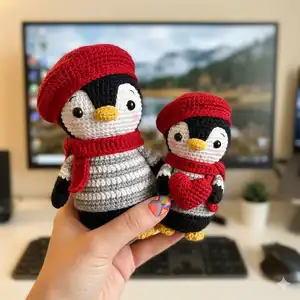
Perfect as a quick accessory to add personality to your toys or as a small gift. Uses YarnArt Jeans yarn and a 2 mm hook for a neat, firm fabric.

Why You'll Love This Crochet Beret Pattern

I absolutely love this pattern because it transforms a few simple rounds into a charming, wearable accessory that instantly personalizes any amigurumi. The beret is quick to make, which means you can crochet several in an afternoon to match different toys. I enjoy how a small starting tail becomes a decorative loopβ€”such a clever finishing touch. It’s satisfying to see the shaping come together with small increases and decreases and to place the finished beret on a penguin for an instant style upgrade.

Crochet Beret Pattern step 1 - construction progress Crochet Beret Pattern step 2 - assembly progress Crochet Beret Pattern step 3 - details and accessories Crochet Beret Pattern step 4 - final assembly and finishing

Switch Things Up

I love changing yarn colors to create seasonal berets; try pastels for spring or deep jewel tones for winter.

You can make the beret larger by using a thicker yarn and larger hook; this creates a slouchier, more dramatic hat.

Use sport or fingering weight yarn with a smaller hook to make miniature berets for keychains or tiny dolls.

I sometimes add a contrasting trim round around the brim to give the beret a finished, decorative edge.

Try embroidering small motifs like stars or hearts on the beret to personalize it for gifts.

Make a matching scarf or mittens using the same yarn to create a coordinated outfit for your penguin.

If you want a posable look, lightly block the beret on a rounded surface to set its shape before attaching it to the toy.

You can replace the top loop with a tiny pompom or a crocheted flower for a playful variation.

To secure the beret more firmly, add a few invisible whipstitches around the inner brim once placed on the penguin's head.

I often stitch a small button or bead where the loop meets the beret for added detail and charm.

Common Mistakes & How to Fix Them

βœ— Skipping the long starting tail will make it hard to create the finishing loop; leave a long starting tail at the beginning so you can make the ch6 finishing loop later. βœ— Not counting stitches after increases or decreases can cause uneven shaping; count each round carefully and verify the stitch total shown in brackets. βœ— Using inconsistent tension changes the beret size and fit; maintain even tension throughout and check the fit on your penguin as you go. βœ— Forgetting to weave in ends neatly causes the beret to look unfinished; cut the thread and weave it in securely after finishing the final round.

Crochet Beret Pattern

Make a charming tiny beret perfect for dressing up your amigurumi penguins. This quick pattern uses simple increases and decreases to shape a neat beret top. You will enjoy the clean rounds and easy finishing steps to create a polished accessory for your handmade toys.

Beginner Friendly 1-2 Hours

Materials Needed for Crochet Beret Pattern

β€” Main Fabric

  • 01
    YarnArt Jeans (160 m/50 g), color 90 (red)

β€” Tools Required

  • 01
    Crochet hook 2 mm
  • 02
    A second crochet hook size up from your main hook (example: 1.75 mm for penguins, 2 mm for the berets)
  • 03
    Needle
  • 04
    Stitch marker
  • 05
    Scissors

Progress Tracker

0% Complete

β€” Beret for big penguin :

Info :

Leave a long starting tail

Round 1 :

6 sc in mr

Round 2 :

6 inc (12)

Round 3 :

(1 sc, inc) x 6 (18)

Round 4 :

(2 sc, inc) x 6 (24)

Round 5 :

(3 sc, inc) x 6 (30)

Round 6 :

(4 sc, inc) x 6 (36)

Round 7 :

(5 sc, inc) x 6 (42)

Round 8 :

(6 sc, inc) x 6 (48)

Round 9 :

(7 sc, inc) x 6 (54)

Round 10 :

(8 sc, inc) x 6 (60)

Round 11 :

(9 sc, inc) x 6 (66)

Round 12 :

(10 sc, inc) x 6 (72)

Round 13 :

(11 sc, inc) x 6 (78)

Round 14-16 :

(78) 3 rounds

Round 17 :

(11 sc, dec) x 6 (72)

Round 18 :

(10 sc, dec) x 6 (66)

Round 19 :

(9 sc, dec) x 6 (60)

Round 20 :

(18 sc, dec) x 3, sl st (57)

Info :

Cut the thread, weave it in.

Info :

Using a long starting tail make ch6 and starting in the 2nd ch from the hook crochet 5 sl st along the chain. Weave the thread in (see pic. 1-3).

Assembly Instructions

  • Leave a long starting tail at the beginning of the beret so you can create the finishing loop later.
  • After completing Round 20 cut the thread and weave it in securely to finish the beret top.
  • Using the long starting tail make ch6 and, starting in the 2nd ch from the hook, crochet 5 sl st along the chain to form the small top loop; weave the tail in (see pics 1-3).
  • Place the finished beret on the penguin's head and adjust the fit; if necessary, secure with a few hidden stitches around the head to keep the beret in place.
  • Work in continuous rounds for a smooth, seamless look and use stitch markers if switching rounds or checking placement.

Important Notes

  • πŸ’‘Work in continuous rounds for a seamless beret shape and consistent stitch alignment.
  • πŸ’‘For the penguins and berets you will need 2 different hook sizes; use a size up from the main hook you use for the penguins (example: 1.75 mm for penguins, 2 mm for berets).
  • πŸ’‘Leave a long starting tail at the beginning so you can make the decorative ch6 loop and weave it in neatly.

This petite beret is the perfect little finishing touch for your amigurumi penguin collection. It works up quickly and adds a delightful personality boost to each toy. Make a set of colorful berets to mix and match for gifts and displays. 🧢🎁

You ask,

we answer.

FAQs

What size will the finished beret be?

The finished beret is designed to fit the big penguin in the pattern set; size will vary with yarn and tension but is intended for small amigurumi heads using YarnArt Jeans and a 2 mm hook.

Can I use a different yarn or hook size?

Yes, you can substitute yarn or change hook size but this will affect the final fit; use a slightly larger hook for a looser beret or a smaller hook for a firmer, smaller beret.

Do I need to join rounds or use slip stitches between rounds?

No, work in continuous rounds as noted in the pattern for a seamless finish; use stitch markers if you need to track the start of rounds.

How do I make the little loop on top of the beret?

Use the long starting tail to chain 6, then starting in the 2nd chain from the hook make 5 slip stitches along the chain, pull through and weave the tail in to form the loop.