About This Bunny Garland Amigurumi Pattern
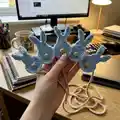
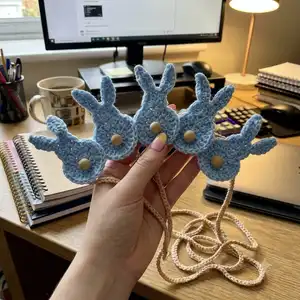
This pattern creates a delightful string of small crocheted bunnies that make a lovely garland for a nursery, party, or seasonal display. The design uses simple rounds and basic stitches to form the body, a small head, and two ears. Each bunny is finished with a small pompom tail and attached to a crocheted cord. The pattern is compact and quick, using only a few grams of yarn per bunny.
Follow clear step-by-step instructions with photos to guide you through each stage of making the bunny motifs and assembling the garland. The finished garland can be shortened or lengthened by adjusting chain counts for spacing.
Why You'll Love This Bunny Garland Amigurumi Pattern
I absolutely love this pattern because it turns a few simple stitches into a charming little decoration that brightens any space. I enjoy how quickly a single bunny comes together — it is very satisfying to see a row of tiny bunnies build up in an afternoon. The design is playful and compact, so it is perfect for using small amounts of yarn and trying out color variations. I take pride in how easy it is to customize the spacing and length of the garland, making it great for different events and rooms.
Switch Things Up
I love customizing this garland by changing colors: try pastel shades for a soft nursery look or bright colors for a party display.
I sometimes use a variegated yarn for the bunny bodies to get a speckled effect without changing yarns mid-work.
To make a chunky version, I use a bulkier yarn and a larger hook, which creates a more substantial decoration quickly.
For a dainty look, I switch to finer yarn and a smaller hook to make tiny, delicate bunnies perfect for a mobile.
I often experiment with different pompom sizes or use sewn felt circles for a flat, secure tail option.
Try adding embroidered eyes or a small nose instead of a pompom if you want a flatter profile for framing or cards.
I sometimes attach a loop at the top of the head instead of a long cord so each bunny can be used as an ornament.
Mix and match cord styles: a simple chain, braided yarn, or a cotton cord will change the overall look of the garland.
To make a matching set, I create smaller and larger bunnies and hang them at staggered heights for a layered effect.
You can also convert each bunny into a brooch by sewing a pin to the back — I create tiny wearable versions for party favors.
Common Mistakes & How to Fix Them
✗ Not closing the magic ring tightly can leave a visible hole in the center; pull the tail firmly to close the ring and position your starting slip stitch to hide the gap.
✗ Skipping stitch counts in rounds will make the body uneven; count your stitches after each round to ensure you have 12 then 24 stitches as instructed.
✗ Starting the head in the wrong stitch will misplace the ears; skip the correct stitch before placing 7 Tc and mark the starting stitch if needed.
✗ Making the chain for the ears too tight will make ear shaping difficult; keep a relaxed tension when chaining and forming the ear stitches.
✗ Not securing the pompom well may cause it to fall off; use fabric glue and allow it to dry thoroughly before handling the garland.