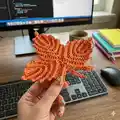
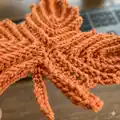
Create a stunning Virelle Mandala wall hanging with this detailed crochet pattern. You'll work with front-post and back-loop techniques, chart symbols, and optional bead accents to create a textured, decorative piece. The pattern includes clear row-by-row instructions and diagrams so you can follow along confidently. Perfect for adding a handmade, elegant touch to your home decor.
Progress Tracker
0% Complete
— Required materials and information :
Infos :
This is the yarn I used for the Virelle mandala: Yarn for hook 2.5 mm (US size C). I used Cotton DK from 'Budget Yarn' in the color Glass. I used about 800 meters. Optional: wooden beads: 10, 12 and 15 mm (each size 8x). 70 cm ring or blocking materials. You also need: Crochet hook 2.5 mm (US size C). Scissors. Tapestry needle.
Infos :
Notes about this pattern: 1. The beads in the center of the mandala are sewed on after the mandala is finished. You can find the description at the end of the pattern. 2. Beads are optional! If you prefer to work without beads, simply work a normal dc (or fp-dc) instead of a 'dc with bead'. 3. Tip: if you find this pattern difficult, there is a video version available, which can be very helpful! You can find the 'video only' here: https://www.etsy.com/nl/listing/1439187917/aleen-video-mandala-haakpatroon-virelle 4. There are charts in this pattern, to show how you need to work with the stitches. The previous rows are always shown as light grey, meaning that the top row in the chart is always the current row. For an overview of all stitches shown, find the 'chart symbols overview' at the beginning of this pattern. Also keep in mind that, for example in row 3, row 2 is not shown (because this row is worked in the front loops of the same stitches you use in row 3 to work in the back loops).
— Crochet abbreviations used in this pattern (US terms) :
Infos :
st = stitch. ch = chain. slst = slipstitch. fp-sl.st = front post slip stitch. sc = single crochet. fp-sc = front post single crochet. dc = dc. tr = treble crochet. fp-dc = front post dc. clst = cluster stitch. pic = picot. fp-dc2tog = crochet together 2 front post double crochet. (stitches that are crocheted together are written as: the stitch, then the number of stitches that are crocheted together, and then the 'tog' which is the short term for crocheting together).
— Explanation stitches :
Infos :
Front post stitches: When you make a front post stitch, the only difference compared to a 'normal' stitch is that you insert from front to back in between the first en second stitch from the row below, and then from back to front in between the second and third stitches. This means you insert around the stitch, instead of through the v-shape in the top of the stitch. Back post stitches: When you make a back post stitch, you insert your hook from back to front in between the first and second stitches of the row below, and then from front to back again between the second and third stitches. This means you insert around the stitch, instead of through the v-shape in the top of the stitch. Chain: yarn over, through the loop. Slip stitch: insert, pull up a loop, through the loop. Single crochet: insert, pull up a loop, yarn over, through both loops. Double crochet: yarn over, insert, pull up a loop, yarn over, through 2 loops, yarn over, through 2 loops. Treble crochet: yarn over 2x, insert, pull up a loop, yarn over, through 2 loops (3 loops on the hook), yarn over, through 2 loops (2 loops on the hook), yarn over, through 2 loops.
Infos :
Front post double crochet: yarn over, insert from front to back in between the first and second stitch from the row below, and then from back to front in between the second and third stitches. Pull up a loop, yarn over, through 2 loops, yarn over, through 2 loops. Crochet together front post dc: yarn over, insert (see previous explanation), pull up a loop, through 2 loops, yarn over, insert in next stitch, pull up a loop, yarn over, through 2 loops, yarn over, through 3 loops. When crocheting together fp-dc that already has been crocheted together in the previous row, you insert your hook in the two loops in the top of the stitch (as pictured in the photo). Picot: chain 3, slip stitch in the first chain. Crochet a bead with dc: yarn over, bead on the hook, insert, pull up a loop, yarn over through the first loop and bead, yarn over and through the remaining 3 loops. Cluster stitch: work 4 dc in the same stitch (sometimes it's made with fp-dc's, if so this is mentioned in the pattern). Take out the hook (make sure you make the loop big enough) and insert the hook in the first dc. Put the loop on your hook again and pull through.
— Chart symbols overview :
Infos :
See the chart symbols overview image in the pattern for symbol meanings. Symbols shown include: worked in front loops only, worked in back loops only, magic ring, arrow pointing to a stitch or space, single crochet, 2 single crochet in 1 stitch, sc, ch 3 and sc in 1 stitch, chain, picot with slip stitch, double crochet, 2 double crochet in 1 stitch, crochet together 2 double crochet, a chain 3 and double crochet in 1 stitch, a bead with a double crochet, double crochet, chain 3 and double crochet in 1 stitch, treble crochet, cluster stitch with 4 double crochet, front post double crochet, crochet together 2 front post double crochet, 2 front post double crochet in 1 stitch, 3 front post double crochet in 1 stitch, front post double crochet and a chain 3, cluster stitch where you work with front post double crochet (the first stitch is now a fp-slst and ch 3). Refer to the image for exact symbols used in charts.
— The pattern :
Row 1 :
Start with a magic ring. Chain 3 (counts as dc), and work 11 dc in the ring. Slst in 3rd chain.
Row 2 :
In this row: front loops only. You work in the front loops from row 1. In every stitch (so also in the slst from row 1): slst, ch 2, 2 dc, ch 2, slst. End with a slst in the first chain from this row. You have 12 leaves.
Row 3 :
In this row: back loops only. You're working in the back loops of row 1. Slst in next. Chain 3 (counts as dc), dc in same. *2 dc in every stitch.* Repeat instructions between * until the end of the row. Slst in 3rd chain from the beginning of this row. You now have a total of 24 dc.
Row 4 :
In this row: front loops only. You're working in the front loops of row 3. *In next stitch: [slst, ch 2, dcl. In the next: [dc, ch 2 and slst].* Repeat instructions between * until the end of the row. Slst in first chain from the beginning of this row. You have 12 leaves.
Row 5 :
In this row: back loops only. You're working in the back loops of row 3. Slst in next. Ch 3 (counts as dc), dc in same. 1 dc in next. *2 dc in next, 1 dc in next.* Repeat instructions between * until the end of the row. Slst in 3rd chain from the beginning of this row. You have 36 dc.
Row 6 :
In this row: work in the front loops only. You're working in the front loops of row 5. *In next: [slst, ch 2, dc]. In next: 2 tr. In next: [dc, ch 2, slst].* Repeat instructions between * until the end of the row. Slst in first chain from the beginning of this row. You have 12 leaves.
Row 7 :
In this row: back loops only. You're working in the back loops from row 5. Ch 3 (counts as dc), dc in next, 2 dc in next. *2 dc (1 in each), 2 dc in next.* Repeat instructions between * until the end of the row. You now have 48 dc.
Row 8 :
In this row: front loops only. You're working in the front loops from row 7. *In next: [slst, ch 2, dc]. In next: 2 tr. In next: 2 tr. In next: [dc, ch 2, slst].* Repeat instructions between * until the end of the row. Slst in the first chain from the beginning of this row. You have 12 leaves.
Row 9 :
In this row: back loops only. You're working in the back loops from row 7. Slst in next. Ch 3 (counts as dc), 2 dc (1 in each). In next 2 dc (so 2 dc in 1). *3 dc (1 in each), 2 dc in 1.* Repeat instructions between * until the end of the row. Slst in 3rd chain from the beginning of this row. You have a total of 60 dc.
Row 10 :
Ch 1, sc in same st. Crochet 3 more sc and then 2 sc in next (2 in 1). *4 sc, 2 sc in next st.* Repeat instructions between * until the end of the row. You now have 72 sts. Skip ch and end with slst in first sc.
Row 11 :
Ch 1, sc in same st. Crochet 3 more sc, in next: [1 sc, ch 3, 1 sc]. *8 sc, in the next: [1 sc, 3 ch, and 1 sc].* Repeat instructions between * and # until the end of the row. You have 4 sts left at the end of the row; 1 sc in each. Skip the chain from the beginning of this row, end with a slst in the first sc.
Row 12 :
2 slst, ch 3. dc in next. Then ch 1, in the chain space: [1 dc + 3 ch + 1 dc]. Ch 1, skip 1 st. *3 dc, ch 1, fp-dc in next 2 sts (insert hook in the next stitch, to the back side, and to the front again through the next), ch 1, 3 dc. Ch 1, skip 1 st, in the chain space: [1 dc + 3 ch + 1 dc]. Ch 1, skip 1 st.* Repeat instructions between * until the end of the row. Then work: 3 dc, ch 1, fp-dc in next 2 sts, ch 1, 1 dc, and end with slst in the 3rd ch.
Info :
The yellow circle shows in which sc you need to work the fp-dc.
Row 13 :
Ch 3 (counts as dc). *Ch 2, skip 1 st, fp-dc in dc. 8 dc in chain space, fp-dc in dc. Ch 2, skip 1 st. 2 dc. Chain 1, fp-dc, ch 1. 2 dc.* Repeat instructions from * until the end of the row. End with a ch 2, skip 1 st, 2 dc, chain 1, fp-dc, ch 1, dc. Then a slst in the 3rd chain from the beginning of this row.
Row 14 :
2 slst. Then fp-slst in the fp-dc from the previous row, ch 3 (counts as fp-dc). Work another fp-dc in the same st. 8 dc. 2 fp-dc in 1. Ch 1. Skip 1 st. *1 dc, ch 1, fp-dc, ch 1, 1 dc. Skip 1 st. Ch 1, 2 fp-dc in 1. 8 dc. 2 fp-dc in 1. Ch 1, skip 1 st.* Repeat instructions from * until the end of the row. End with 1 dc, ch 1, fp-dc, ch 1, 1 dc, ch 1, then work slst in the 3rd ch.
Row 15 :
Fp-slst, ch 3 (counts as fp-dc). 2 fp-dc in next. Sc between 1st and 2nd dc's. Then ch 1, and work a sc between the next two dc's. Repeat this until you have a total of 7 sc with a chain between each of the sc's. 2 fp-dc in 1, fp-dc. *ch 2, skip 1 st, fp-dc in fp-dc from previous row, skip 1 st, ch 2. Fp-dc, 2 fp-dc in 1. Work a sc between the 1st and 2nd dc's, chain 1, sc between next two stitches. You have 7 sc with a ch between each sc. 2 fp-dc in 1, fp-dc.* Repeat instructions from * until the end of the row. End with a fp-dc and ch 2, then a slst in the 3rd chain from the beginning of this row.
Row 16 :
Fp-slst, ch 3 (counts as fp-dc). Fp-dc, 2 fp-dc in 1. Sc in ch-1 space, chain 1, sc in next ch-1 space, chain 1, and repeat this until the end of the shell (so 6 sc and 5 chains in total). 2 fp-dc in 1, 2 fp-dc (1 in each). *ch 1, fp-dc in fp-dc from previous row, ch 1. 2 fp-dc, 2 fp-dc in 1. Sc in ch-1 space, chain 1, sc in ch-1 space, chain 1, sc in ch-1 space, repeat until end of the shell (so 6 sc and 5 chains in total). 2 fp-dc in 1, then 2 fp-dc (1 in each).* Repeat instructions between * until the end of the row. After the last leaf, you end with a ch 1, fp-dc, ch 1, and slst in the 3rd chain from the beginning of this row.
Row 17 :
Fp-slst, ch 3 (counts as fp-dc). Then 2 fp-dc (1 in each), 2 fp-dc in 1. 1 sc in ch-1 space, ch 1, sc in ch-1 space, ch 1, repeat (5 sc and 4 chains in total). 2 fp-dc in 1, 3 fp-dc (1 in each). *ch 1, fp-dc, ch 1. 3 fp-dc (1 in each), 2 fp-dc in 1. 1 sc in ch-1 space, ch 1, sc in next ch-1 space, ch 1, sc in ch-1 space, repeat (5 sc and 4 chains in total). 2 fp-dc in 1, 3 fp-dc (1 in each).* Repeat instructions between * until the end of the row. End with a ch 1, fp-dc, ch 1, and then a slst in the 3rd chain from the beginning of this row.
Row 18 :
Fp-slst, ch 3 (counts as fp-dc). 3 fp-dc (1 in each). 2 fp-dc in 1. Sc in ch-1 space, ch 1, repeat (4 sc and 3 chains in total). 2 fp-dc in 1, 2 fp-dc (1 in each), fp-dc2tog. *ch 2, fp-dc, ch 2. fp-dc2tog, 2 fp-dc (1 in each), 2 fp-dc in 1. Sc in ch-1 space, ch 1, sc in ch-1 space, repeat (4 sc and 3 chains in total). 2 fp-dc in 1, 2 fp-dc (1 in each), fp-dc2tog.* Repeat instructions between * until the end of the row. End with a ch 2, fp-dc, ch 2, and a slst in the 3rd chain from the beginning of this row + the next fp-dc (this way you 'crochet them together').
Row 19 :
2 slst (1 in each). Fp-slst in next, ch 3 (counts as fp-dc). Fp-dc, 2 fp-dc in 1. Sc in ch-1 space, ch 1, sc in next ch-1 space, repeat (3 sc and 2 chains in total). 2 fp-dc in 1, 2 fp-dc (1 in each), fp-dc2tog. *ch 2. In next: [fp-dc, ch 1, fp-dc]. ch 2, fp-dc2tog, 2 fp-dc (1 in each), 2 fp-dc in 1. Sc in ch-1 space, ch 1, sc in next ch-1 space, ch 1, sc in ch-1 space (so 3 sc and 2 chains in total). 2 fp-dc in 1, 2 fp-dc (1 in each), fp-dc2tog.* Repeat instructions between * until the end of the row. End with: in next [fp-dc, ch 1, fp-dc]. Ch 2, fp-dc2tog (you work in the ch 3 + the next fp-dc from the previous row, and the next fp-dc). Slst in 3rd chain from the beginning of this row.
Row 20 :
Fp-slst in next fp-dc, ch 3 (counts as fp-dc). Fp-dc in next, 2 fp-dc in 1. Sc in ch-1 space, ch 1, sc in next ch-1 space. 2 fp-dc in 1, 2 fp-dc (1 in each), fp-dc2tog. *ch 3, 2 fp-dc in 1, ch 2, 2 fp-dc in 1, ch 3. fp-dc2tog, 2 fp-dc (1 in each), 2 fp-dc in 1. Sc in ch-1 space, ch 1, sc in next ch-1 space. 2 fp-dc in 1, 2 fp-dc (1 in each), fp-dc2tog.* Repeat instructions between * until the end of the row. End with 2 fp-dc in 1, ch 2, 2 fp-dc in 1, ch 3. fp-dc2tog, slst in 3rd chain from the beginning of this row.
Row 21 :
Fp-slst in next fp-dc, ch 3 (counts as fp-dc). Fp-dc2tog (skip the space with sc's and chains). 2 fp-dc (1 in each), fp-dc2tog. *ch 3, 2 fp-dc (1 in each), ch 3, dc in chain space, ch 3, 2 fp-dc (1 in each), ch 3. fp-dc2tog, 2 fp-dc (1 in each), fp-dc2tog (skip the space with the sc's and chains), 2 fp-dc (1 in each), fp-dc2tog.* Repeat instructions between * until the end of the row. End with a ch 3, 2 fp-dc (1 in each), ch 3, dc in ch space, ch 3, 2 fp-dc (1 in each), ch 3. Fp-dc2tog, and a slst in the 3rd chain from the beginning of this row.
Row 22 :
Fp-slst in same (the beginning chain from the previous row), ch 3 (counts as fp-dc). Fp-dc in the fp-dc2tog from the previous row (you insert in the top loops as shown in the picture). Fp-dc in next. Fp-dc2tog. *ch 3, 2 fp-dc (1 in each), ch 3. Clst in first chain space, ch 4, clst in second chain space. Ch 3, 2 fp-dc (1 in each), ch 3. Fp-dc2tog, 3 fp-dc (1 in each, the second one goes in the fp-dc2tog from the previous row, where you insert through the loops in the top as shown in the picture). Then a fp-dc2tog.* Repeat instructions between * until the end of the row. End with a clst, ch 3, 2 fp-dc (1 in each), ch 3 and fp-dc2tog. Then a slst in the 3rd chain from the beginning of this row.
Row 23 :
Fp-slst in next, ch 3 (counts as fp-dc). You start in the center of the leaf. Fp-dc2tog. *ch 3, 2 fp-dc (1 in each), ch 3. 2 fp-dc in clst from previous row (you insert from front to the back side, and going behind the clst, you go to the front again). Ch 5, 2 fp-dc in next clst from previous row (same instructions as before). Ch 3, 2 fp-dc in 1, ch 3. Fp-dc2tog, fp-dc, fp-dc2tog.* Repeat instructions between * until the end of the row. End with a fp-dc2tog and a slst in the 3rd chain from the beginning of this row.
Row 24 :
Work a slst in the fp-dc2tog and the 3 chains (so 1 slst in each) and in the next fp-dc. *To make a heart shape, you follow these instructions: You have 4 fp-dc in total to work
This Virelle Mandala pattern invites you to create a beautiful, textured centerpiece for your home that captures light and detail. Whether you add beads or keep it minimal, the mandala becomes a graceful focal point in any space. Enjoy each round and the calming rhythm of working the front-post stitches as your design blossoms into a framed piece. 🧶✨