๐Ÿงถ Beautiful โœจ Detailed ๐Ÿ’ Adorable

Turtle Amigurumi Pattern

Turtle Amigurumi Pattern
4.8โ˜… Rating
5-7 Hours Time Needed
3.8K Made This
โœ‚๏ธ

Intermediate Level

Ideal for those with basic crochet experience, featuring slightly more advanced stitches and techniques to expand your skills.

โฑ๏ธ

Weekend Treat

Takes 5-7 hours, making it an enjoyable project to finish over a couple of days.

๐Ÿฅ

Charming Critter

Delightful animal designs with sweet details that capture the essence of your favorite woodland and farmyard friends.

About This Turtle Amigurumi Pattern

This pattern guides you through crocheting an adorable turtle amigurumi including head, legs, shell, spots and finishing details. It uses YarnArt Jeans yarn and two hook sizes to achieve defined shapes and texture. The pattern features step-by-step rounds, photo references and clear assembly instructions so you can follow along easily.

Turtle Amigurumi Pattern crochet pattern - detailed view of completed project

The toy measures about 20 cm when made with the recommended materials and tension. Techniques include bobble stitches for shell texture and sewing legs in place while crocheting the shell.

Why You'll Love This Turtle Amigurumi Pattern

I absolutely love this pattern because it combines playful details with simple shaping to create a lovable little turtle. I enjoy how the bobble stitches on the shell add a tactile texture that feels great to make and hold. I also love that the legs are joined during shell construction โ€” it streamlines assembly and gives a neat, integrated finish. Making the little spots and embroidered freckles always brings the turtle to life for me.

Turtle Amigurumi Pattern step 1 - construction progress Turtle Amigurumi Pattern step 2 - assembly progress Turtle Amigurumi Pattern step 3 - details and accessories Turtle Amigurumi Pattern step 4 - final assembly and finishing

Switch Things Up

I love to experiment with colors; I often swap the main green for pastel shades to create a softer look and a different personality for the turtle.

You can make the toy bigger or smaller by changing yarn weight and hook size: bulky yarn and a larger hook gives a cuddly chunky turtle; thin yarn makes a tiny keychain-sized version.

I sometimes embroider different facial expressions by moving the eyes or changing the eyebrow stitch to give a sleepy, surprised, or smiling face.

Try replacing safety eyes with embroidered eyes for a completely child-safe toy, or use different sized eyes to alter the character's proportions.

For a textured shell effect you can experiment with color changes in the bobble rounds or add surface embroidery after finishing for extra detail.

I like to add small accessories like a tiny crocheted scarf, a felt heart sewn to the shell, or tiny felt sunglasses for playful variations.

If you want posable limbs, consider inserting thin craft wire into the legs before stuffing so they bend and hold shape for display poses.

To customize the spots, change their number, size and placement โ€” sew them asymmetrically for a whimsical look or symmetrically for a classic appearance.

I also make a family set by varying color schemes and eye sizes to give each turtle its own character and personality.

Don't be afraid to combine yarns for a marled effect: hold two strands together or use a boucle accent to create unique texture on the shell.

Common Mistakes & How to Fix Them

โœ— Skipping stitch markers during growth rounds can make increases hard to track; place a marker at the start of each round to keep your stitch counts accurate. โœ— Forgetting to stuff gradually leads to lumps or uneven shaping; stuff little by little during decreasing rounds and smooth stuffing as you go. โœ— Attaching legs after finishing the shell can be awkward and misaligned; attach the legs while crocheting the upper shell following the pattern positions for easier placement. โœ— Using a larger hook than recommended without adjusting yarn will produce a much bigger toy; match hook size to yarn or adjust the pattern counts when changing yarn weights.

Turtle Amigurumi Pattern

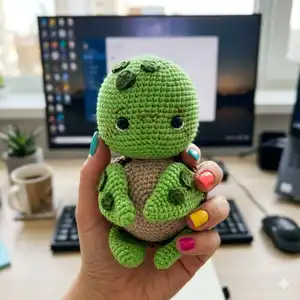
Make a sweet handmade turtle amigurumi with this complete pattern. You will learn to crochet the head, legs, shell and spots with clear step-by-step rounds and helpful assembly notes. The design uses YarnArt Jeans yarn and small hooks for a compact, detailed toy. Perfect for gifting or keeping as a charming decorative companion.

Intermediate 5-7 Hours

Materials Needed for Turtle Amigurumi Pattern

โ€” Main Fabric

  • 01
    YarnArt Jeans (160 m / 50 g) - color 69 (green) for head and legs (use 1-2 x 50 g depending on size)
  • 02
    YarnArt Jeans (160 m / 50 g) - color 87 (beige) for lower part of shell (use 1 x 50 g)
  • 03
    YarnArt Jeans (160 m / 50 g) - color 40 (brown) for upper part of shell (use 1 x 50 g)
  • 04
    YarnArt Jeans (160 m / 50 g) - color 82 (dark green) for spots (small amounts, 10-20 g)
  • 05
    YarnArt Jeans (160 m / 50 g) - color 03 (cream) for details (small amount for eye whites)

โ€” Tools Required

  • 01
    Crochet hook size 2 mm (US B)
  • 02
    Crochet hook size 3 mm (US D)
  • 03
    Soft toy filling (polyester stuffing)
  • 04
    Safety eyes 8-9 mm (2 pieces)
  • 05
    Needle for sewing and embroidery
  • 06
    Stitch markers
  • 07
    Scissors
  • 08
    Pins for assembly
  • 09
    Brown felt pen (for freckles)

Progress Tracker

0% Complete

โ€” Head :

Round 1 :

6 sc in mr (6)

Round 2 :

(inc) x 6 (12)

Round 3 :

(1 sc, inc) x 6 (18)

Round 4 :

(2 sc, inc) x 6 (24)

Round 5 :

(3 sc, inc) x 6 (30)

Round 6 :

(4 sc, inc) x 6 (36)

Round 7 :

(5 sc, inc) x 6 (42)

Round 8 :

(6 sc, inc) x 6 (48)

Round 9 :

(7 sc, inc) x 6 (54)

Round 10-11 :

54 sc (54) 2 rounds

Round 12 :

(8 sc, inc) x 6 (60)

Round 13-20 :

60 sc (60) 8 rounds

Round 21 :

10 sc, (inc) x 3, 7 sc, (inc) x 3, 37 sc (66)

Round 22-23 :

66 sc (66) 2 rounds

Round 24 :

(9 sc, dec) x 6 (60)

Round 25 :

(8 sc, dec) x 6 (54)

Round 26 :

(7 sc, dec) x 6 (48)

Round 27 :

(6 sc, dec) x 6 (42)

Info :

Place the eyes between rnds 19/20, with a distance of 8 sts between the eyes. Insert the first eye over the second increase of rnd 21, insert the second eye over the fifth increase of rnd 21. Pic. 1-3

Round 28 :

(5 sc, dec) x 6 (36)

Info :

Start to stuff the head.

Round 29 :

(4 sc, dec) x 6 (30)

Round 30 :

(3 sc, dec) x 6 (24)

Round 31 :

(2 sc, dec) x 6 (18)

Info :

Stuff the head from rnd 29 to rnd 31 not tightly.

Round 32 :

(1 sc, dec) x 6 (12)

Info :

Cut the thread leaving a long tail. After all the head details are made, we'll close the opening on the head using this thread tail. Pic. 5

โ€” Big spots :

Round 1 :

7 HDC in mr (7)

Info :

Join the beginning and the end of rnd with sl st. Cut the thread leaving a long tail. Make 3 big spots in dark green color. Pic. 6

โ€” Small spots :

Round 1 :

7 sc in mr (7)

Info :

Join the beginning and the end of rnd with sl st. Cut the thread leaving a long tail. Make 4 small spots in dark green color. Pic. 7

โ€” Head details :

Info :

The beginning and the end of all threads are located in the head opening. I tie all thread tails in knots and cut the ends after all the head details are made.

Info :

Make shaping for the eyes. Use the thread of the green color YarnArt Jeans. Using a needle, insert the thread into the hole on the head, bring it out at point 1, insert it at point 2 and bring it out at point 3, insert it at point 4 and bring it out into the hole on the head. Tighten the ends of the threads well and fix them with a knot. Pic. 8

Info :

Embroider the eye whites with the thread of cream color. Pic. 9-11

Info :

Embroider the eyebrows above the eyes with brown thread YarnArt Jeans. Divide it into 4 thin strands and use 2 strands. Draw freckles between the eyes and on the cheeks. Pic. 12

Info :

1. Sew a large spot between rnds 8 and 12. 2. Sew a small spot between rnds 5 and 8. 3. Sew a small spot between rnds 6 and 9. Count the rnds from the top of the head. Pic. 13

Info :

Close the opening on the head using the thread tail as follow: (dec) x 6 (6). Pull the opening closed pulling a needle through front loops of stitches. Weave in the thread tail. Pic. 14-15

โ€” Lower legs :

Info :

Make 2, use a 2 mm crochet hook, in green color, don't stuff

Round 1 :

6 sc in mr (6)

Round 2 :

(1 sc, inc) x 3 (9)

Round 3 :

9 sc (9)

Round 4 :

(2 sc, inc) x 3 (12)

Round 5 :

(3 sc, inc) x 3 (15)

Round 6 :

15 sc (15)

Round 7 :

(4 sc, inc) x 3 (18)

Round 8-10 :

18 sc (18) 3 rounds

Round 11 :

6 sc, (dec) x 3, 6 sc (15)

Round 12 :

4 sc, (dec) x 3, 5 sc (12)

Round 13-14 :

12 sc (12) 2 rounds

Round 15 :

Fold the leg in half and work 6 sc through two layers. Cut the thread. Pic. 16

โ€” Upper legs :

Info :

Make 2, use a 2 mm crochet hook, in green color, don't stuff. Please note! Before you start crocheting the upper legs, you need to crochet the spots.

Round 1 :

6 sc in mr (6)

Round 2 :

(1 sc, inc) x 3 (9)

Round 3 :

9 sc (9)

Round 4 :

(2 sc, inc) x 3 (12)

Round 5 :

12 sc (12)

Round 6 :

3 sc, (1 sc, inc) x 3, 3 sc (15)

Round 7 :

3 sc, (2 sc, inc) x 3, 3 sc (18)

Round 8 :

3 sc, (3 sc, inc) x 3, 3 sc (21)

Round 9-10 :

21 sc (21) 2 rounds

Round 11 :

3 sc, (4 sc, inc) x 3, 3 sc (24)

Round 12-14 :

24 sc (24) 3 rounds

Round 15 :

6 sc, (dec) x 6, 6 sc (18)

Round 16 :

6 sc, (dec) x 3, 6 sc (15)

Info :

Sew the spots on the legs, sew a large spot on top, and a smaller spot under it. Pay attention to the location of the spots on both legs. Pic. 17

Round 17 :

(3 sc, dec) x 3 (12)

Round 18-19 :

12 sc (12) 2 rounds

Round 20 :

Sc, fold the leg in half and work 6 sc through two layers. Cut the thread. Pic. 18

โ€” Shell :

Info :

Start crocheting from the upper part of the shell (in brown color), then crochet the lower part (in beige color). The legs are attached when crocheting the upper part of the shell. Use a 3 mm hook for the upper part and a 2 mm hook for the lower part.

Round 1 :

6 sc in mr (6)

Round 2 :

(bo, sc) x 6 (12)

Round 3 :

(1 sc, inc) x 6 (18)

Round 4 :

(bo, sc, in next st: bo, sc) x 6 (24)

Round 5 :

(3 sc, inc) x 6 (30)

Round 6 :

(bo, sc, bo, sc, in next st: bo, sc) x 6 (36)

Round 7 :

(5 sc, inc) x 6 (42)

Round 8 :

(bo, sc, bo, sc, bo, sc, in next st: bo, sc) x 6 (48)

Round 9 :

(7 sc, inc) x 6 (54)

Round 10 :

(bo, sc) x 23, ch7, skip 7 st, beginning from the 8th st crochet 1 sc (54)

Info :

Change to beige color. Don't cut the brown thread, leave it in front of the work. Next crochet in beige color.

Round 11 :

BLO 54 sc (54)

Round 12-13 :

54 sc (54) 2 rounds

Info :

Return to the brown thread. We are going to join the legs. Use a crochet hook 2 mm.

Instruction :

Ch1, 3 sc, take the upper leg and crochet through both pieces layers 6 sc. Pay attention to the position of the leg. Next crochet 6 sc, take the lower leg and crochet through both pieces layers 6 sc, 3 sc, take the second lower leg and crochet 6 sc through both pieces layers. Then crochet 6 sc, take the upper leg and crochet through both pieces layers 6 sc. Pay attention to the position of the second upper leg. Then 3 sc, sl st. Cut the thread leaving a long tail.

Round 14 :

(7 sc, dec) x 6 (48)

Round 15 :

(6 sc, dec) x 6 (42)

Round 16 :

(5 sc, dec) x 6 (36)

Round 17 :

(4 sc, dec) x 6 (30)

Info :

Stuff the shell.

Round 18 :

(3 sc, dec) x 6 (24)

Round 19 :

(2 sc, dec) x 6 (18)

Round 20 :

(1 sc, dec) x 6 (12)

Round 21 :

(dec) x 6 (6)

Info :

Cut the thread leaving a long tail. Using this thread tail pull the opening closed pulling a needle through front loops of stitches. Weave in the thread tail. Add some stuffing through the hole on top, giving the shell a beautiful shape. Pic. 30

โ€” Pattern for the upper part of the shell :

Info :

Diagram shows how to crochet rnds 1-6 using symbols: mr - magic ring, sc - single crochet, bo - bobble stitch; direction of crocheting and rounds indicated on diagram. Use the diagram to understand the principle of crocheting the upper part of the shell.

โ€” Toy assembly :

Instruction :

Sew the head to the shell having fixed it with pins. Pic. 31-33

Info :

Attach spots to head and sew in any remaining details. Weave in ends and trim thread tails. Your turtle is now complete.

Assembly Instructions

  • Sew the head to the shell having fixed it with pins, aligning the head center over the shell opening and stitching securely around the neck edge.
  • Attach the legs during the upper shell construction: when instructed, crochet through both layers to join upper and lower legs securely into the shell fabric.
  • Sew the spots to the head and legs according to the placement notes: one large spot between rnds 8 and 12 and small spots between the indicated rounds on the head.
  • Use the long thread tails to close openings: pull the thread through front loops to close and weave in the tails to secure and hide them.

Important Notes

  • ๐Ÿ’กThe toy pieces are crocheted in continuous non-joining rounds (unless otherwise stated) so use a stitch marker to track your start of round.
  • ๐Ÿ’กThis pattern does not include crochet lessons; you must know how to crochet the main stitches used (sc, inc, dec, bo, HDC).
  • ๐Ÿ’กThe finished toy measures about 20 cm (7.87 inch) when using the indicated materials and hooks, but gauge and stitch shape affect final size.
  • ๐Ÿ’กLegs are attached while crocheting the upper part of the shell, so do not finish or firmly fasten them earlier; follow the joining instructions carefully.

This adorable Turtle amigurumi was designed to be fun and detailed while remaining small and giftable. It combines bobble stitches, careful shaping and embroidered details for a charming finish. Whether you make one as a present or keep it by your desk, it will bring a smile every time. ๐Ÿข๐Ÿงถ

You ask,

we answer.

FAQs

What size will the finished piece be?

The finished amigurumi measures approximately 20 cm tall when using the recommended YarnArt Jeans and hook sizes.

Can I use different yarn weights for this pattern?

Yes, you can change yarn weight but the final size will vary; use an appropriate hook for your yarn and expect to adjust stuffing amounts and possibly stitch counts.

Do I need prior crochet experience for this pattern?

This pattern is rated intermediate, so familiarity with single crochet, increases, decreases, bobble stitches and working in continuous rounds is recommended.

How long does this project typically take to complete?

Most crocheters complete this project in 5-7 hours, though total time depends on experience level, finishing details and how carefully you assemble the parts.