About This Trick or Treat Sam Amigurumi Pattern
This pattern creates a small amigurumi Trick or Treat Sam — a spooky, sweet Halloween companion with button eye details and embroidered features. It includes step-by-step rounds for the head, body, legs, arms, patch and ruffled collar, plus photos to guide assembly. The design uses simple amigurumi shaping and small finishing stitches to give Sam his character.
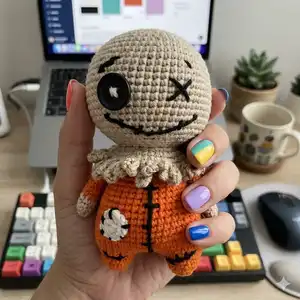
Perfect for gifting or seasonal decor, Sam is made using cotton yarn and a small hook for crisp stitches. The pattern includes clear abbreviations and useful construction notes to help you complete each piece.
Why You'll Love This Trick or Treat Sam Amigurumi Pattern
I absolutely love this pattern because it balances cute and creepy in a tiny, collectible form. I enjoy how a few simple stitches and a button can create so much personality. It is satisfying to assemble — the ruffled collar and embroidered details really bring Sam to life. I designed it to be a fun weekend project that leaves you with a charming Halloween keepsake.
Switch Things Up
I love customizing this pattern — I often change the body color to purple or black for a different Halloween vibe.
I sometimes swap the button eye for a larger safety eye for a less vintage look, or use two buttons for a quirky style.
If you want a bigger Sam, use a bulkier yarn and a larger hook; a smaller hook and finer yarn give a mini keychain version.
I add wire into the arms if I want posable limbs for display; be careful to enclose wire ends safely inside the stuffing.
Try embroidering different facial expressions — a crooked smile, stitched mouth or surprised look all change Sam's personality.
For a softer, cuddly version, use acrylic yarn instead of cotton; the texture changes how the stitches appear and how the toy feels.
I sometimes make a little crocheted hat, scarf or tiny pumpkin accessory to create a mini themed set with Sam.
Change the patch color and stitch pattern to make Sam look patched up in different ways — zigzags, crosses or heart patches work well.
Use metallic thread for a subtle shimmer in the collar or on the patch for festivity photos and seasonal decor.
I recommend trying different stuffing levels: slightly understuffed for a floppy look or firmer stuffing for a structured collectible.
Common Mistakes & How to Fix Them
✗ Not cutting the thread after finishing the first leg when the pattern instructs can make joining to the body confusing; cut the first leg thread and keep the second leg attached so you can continue the body seamlessly.
✗ Forgetting to use the back loop only on round 28 of the head will prevent the ruffle from forming correctly; make sure to work BLO on round 28 and cut the yarn as instructed to create the collar base.
✗ Skipping stitch counts or failing to count after increases/decreases makes shaping uneven; count your stitches at the end of each round and mark the start of the round with a stitch marker.
✗ Understuffing or overstuffing the head and body changes proportions and makes sewing difficult; stuff gradually and evenly, adjusting firmness to match the photos and shape before closing.
✗ Switching color yarns carelessly leaves loose ends inside the toy; secure and weave in color change ends as you go to keep the inside tidy and prevent unraveling.


