About This Tommy the T-Rex Amigurumi Pattern
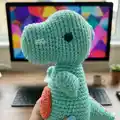
This pattern creates Tommy, a small, mischievous T-Rex amigurumi made from separate crocheted pieces and sewn together. The design features embroidered stripes and tiny teeth for character and charm. Youll work in the round using basic amigurumi techniques and assemble each part to bring Tommy to life.
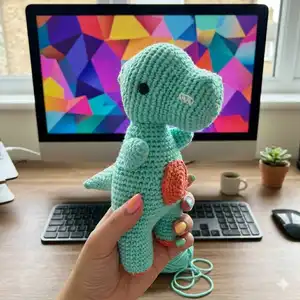
Intermediate-level stitches include increases, decreases and simple bobble stitches for detail. The finished Tommy is approximately 23cm tall when made with the recommended materials.
Why You'll Love This Tommy the T-Rex Amigurumi Pattern
I absolutely love this pattern because it captures personality with just a few simple shapes and a little embroidery. I enjoy how the small details—like the stripes and tiny teeth—transform a basic amigurumi into a character with attitude. I also love that it is made from separate pieces so you can customise colours and placement easily. Sharing this pattern lets me see so many creative variations from makers, which always inspires me.
Switch Things Up
I love experimenting with colours when I make Tommy; try pastel greens and peaches for a softer look or bold brights for a playful version.
You can change the yarn weight and hook to alter Tommy's size: use a thicker yarn and larger hook for a chunky, huggable dino or a finer yarn for a keychain-sized mini.
I often swap the safety eyes for embroidered eyes to make the toy toddler-friendly and give it a different expression.
Mix and match yarn textures — cotton gives a neat finish while acrylic adds softness; try a boucle or fuzzy yarn for a novelty look.
Add accessories like a tiny crochet scarf, bow or felt crown to personalise Tommy for gifting or seasonal themes.
Try different stitch patterns on the stomach circle or use surface crochet to create spots or scales for more detail.
Embroider different mouth shapes or eyebrow lines to change Tommy's personality from mischievous to friendly or surprised.
For stability, sew small beanbag pellets into the base of the torso before finishing to help Tommy stand upright.
I sometimes use contrasting colours for the feet and tail tip to create a two-tone effect that really pops in photos.
Don't be afraid to shorten or lengthen the tail rounds to experiment with proportions — a longer tail changes the whole silhouette.
Common Mistakes & How to Fix Them
✗ Skipping stitch markers during rounds can lead to accidental miscounts; place a marker at the start of each round to stay on track and recount often.
✗ Not stuffing gradually results in lumps or awkward shaping; stuff a little at a time and shape as you go for a smooth finish.
✗ Changing colour incorrectly makes a visible knot or loose join; pull through the new colour on the last stitch of the previous round to create a neat change.
✗ Forgetting to indent eyes will leave them protruding too much; use a length of yarn under each safety eye and pull tight to indent, then tie securely.
✗ Overtight tension can make pieces stiff and hard to assemble; maintain a consistent, slightly firm but not overly tight tension for even stitches.