About This Sun & Rainbow Key Chains Amigurumi Pattern
This pattern teaches you how to crochet sunny suns and rainbow key chains using simple shaping and short rounds. Youll make small, no-sew charms that are perfect for bags, keys, or gifting. The instructions include full round-by-round details, color changes, and finishing tips for embroidery and cheeks.
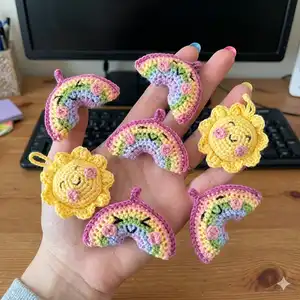
Designed for mercerized cotton yarn and a 3mm hook for crisp stitch definition. The pattern includes directions for both the sun and rainbow pieces and clear assembly notes.
Why You'll Love This Sun & Rainbow Key Chains Amigurumi Pattern
I absolutely love this pattern because it turns small amounts of yarn into cheerful, gift-ready charms that brighten everyday items. I enjoy the quick satisfaction of finishing a key chain in a short sitting while still getting to use a variety of stitches. The combination of simple shaping and small decorative details like embroidered faces and tiny cheeks makes each piece feel lovingly handmade. I also love how versatile the design is—change the loop length to make bag charms or use different colors for seasonal variations.
Switch Things Up
I love customizing these key chains by changing colors—try pastel shades for a softer look or bright neons for a playful style.
You can change the loop length to 50 chains to convert the design into a bag charm that hangs from a strap or zipper pull.
If you want a larger version, switch to a thicker cotton or DK yarn and use a larger hook for a chunky, cuddly charm.
For a tiny pocket pal, use fingering weight yarn and a 2.5mm hook to create miniature versions perfect for key rings.
Try adding small beads or a metal bell inside the loop for a gentle jingle when used as a pet tag or backpack charm.
I often embroider different facial expressions with black yarn—experiment with eyebrow angles and mouth shapes to give each piece personality.
Use a variegated yarn for the rainbow rows to get subtle color transitions without changing yarn each round.
Combine a stitched mouth with tiny felt or embroidered cheeks in different orders to create sleepy, happy, or surprised characters.
For durability, reinforce the loop with an extra round of sc in a matching color before closing and sewing the loop ends securely.
I also love making matching sets—create a sun and rainbow in coordinating colorways to give as a small gift duo.
Common Mistakes & How to Fix Them
✗ Not counting stitches during increases can quickly throw off shaping; count your stitches at the end of each round to ensure you have the correct stitch count.
✗ Skipping the BLO (back loop only) instruction for the sun can flatten the texture; pay attention to BLO and FLO directions to get the intended ridges and front-facing rows.
✗ Overstuffing the pieces causes lumps and distorts the shape; stuff gently in small amounts until you achieve a smooth, even surface.
✗ Closing the loop carelessly can leave a visible gap at the top; use a tapestry needle to sew the loop closed neatly and securely.
✗ Placing cheeks or embroidered features without checking placement can look unbalanced; pin or place the cheeks and embroidery position first, then secure when youre happy with the look.


