About This Pino Amigurumi Pattern
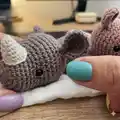
This pattern guides you to crochet Pino, a small rhino amigurumi made in continuous rounds using single crochet stitches. You will work legs, arms, body, head and small details like horn and nails with clear round-by-round instructions. The design includes tips for placement, stuffing and finishing so your rhino looks neat and symmetrical.
The pattern uses Eco Cotton yarn with a 2.5 mm hook and produces an approx. 16 cm tall rhino. Helpful photos and notes are included to support assembly and finishing.
Why You'll Love This Pino Amigurumi Pattern
I absolutely love this pattern because it combines simple shaping with charming details like the tiny horn and embroidered nails. I enjoy that the body is worked in continuous rounds which gives a smooth, seamless finish. I love giving these small handmade rhinos as gifts because they are quick to make but look professionally finished. I feel proud when a few simple stitches turn into a cute companion full of personality.
Switch Things Up
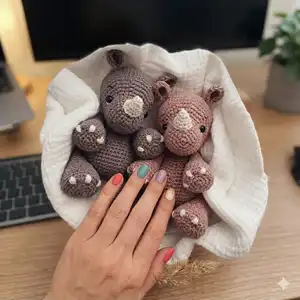
I love customizing this rhino by changing the yarn color to create different personalities—try soft pastels for a baby version or deep gray for a realistic look.
I sometimes use a slightly larger hook and chunky cotton to make a bigger, squishier version; you can also go smaller for a keychain-sized mini by using finer yarn.
I often add embroidered accessories like a tiny scarf or a heart on the belly to make each rhino unique and gift-ready.
You can experiment with different eye types: use safety eyes for durability or embroider eyes for baby-safe toys.
To alter the pose, add a bit of wire inside the limbs for a posable version that can sit or wave.
I like to change the horn color for contrast—try metallic or cream colors for a playful effect.
If you want a softer look, work a few rounds in half double crochet instead of single crochet for bulkier texture.
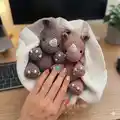
I sometimes create matching siblings by adjusting yarn weight and hook to produce small and large pairs that look adorable together.
For seasonal versions, use holiday-colored yarn or tiny embellishments like felt flowers or a mini pompom tail.
Remember to test placement of eyes and horn before securing them—move pins around until you find the expression you love most.
I also enjoy making the nails a different color for contrast and stitching small patches on the belly for a whimsical touch.
Common Mistakes & How to Fix Them
✗ Skipping a stitch marker while working continuous rounds will make pieces misaligned; always place and move a stitch marker at the beginning of each round to keep track.
✗ Stuffing too firmly in small parts like the horn or ears can distort shape and make sewing difficult; stuff little parts lightly with small amounts of fiberfill and check shape as you go.
✗ Forgetting to count stitches after increases or decreases can lead to wrong shaping; count your stitches after each shaping round and correct immediately if the count is off.
✗ Sewing parts without pinning or checking placement results in uneven assembly; pin parts in place and compare left/right symmetry before you sew permanently.
✗ Using a different yarn weight without adjusting the hook will change the finished size and stitch tension; if you change yarn, adjust hook size and make a gauge test to ensure correct proportions.