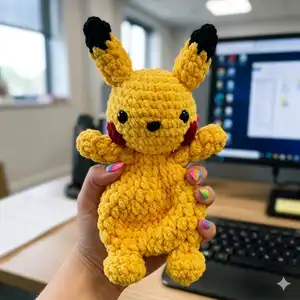
Create an adorable Pika the Electric Mouse amigurumi using soft Bernat Blanket yarn. This pattern guides you through every round with clear step-by-step instructions and helpful photos so you can crochet a cuddly character. Perfect for gifting or keeping, the finished piece has cute ears, chubby cheeks, and a little tail for extra charm.
Progress Tracker
0% Complete
— Materials :
Infos :
Yarn Used: Bulky Weight 6 Bernat Blanket Brights - Yellow Bernat Blanket - Black Bernat Blanket - Cranberry
Infos :
You can use a different weight of yarn for this project, and adjust for the appropriate hook size. Be aware that this will affect the finished size.
Infos :
Special Stitches Invisible Colour Change Sc Performed on the stitch before the colour change: Begin Sc (insert hook into stitch and pull up a loop). There are 2 loops on the hook. Using new colour, pull through both loops to complete the stitch. Tie off both yarn tails to secure stitch.
Infos :
Additional Supplies: - Stuffing - 14mm Safety Eyes - Hook L 8mm - Tapestry Needle - Stitch Markers - Scissors
Infos :
Stitch Abbreviations: Sc - Single Crochet. Inc - Single Crochet Increase. Dec - Single Crochet Decrease. Hdc - Half Double Crochet. Hdc Inc - Half Double Crochet Increase. Hdc Dec - Half Double Crochet Decrease. Sl St - Slip Stitch. Ch - Chain.
— Head :
Round 1 :
8 Sc into Magic Ring (8)
Round 3 :
(Sc 1, Inc) x 8 (24)
Round 4-6 :
Sc around (24) (3 Rounds x 24 Sc = 72 Sc)
Round 7 :
(Sc 3, Inc) x 6 (30)
Round 8-9 :
Sc around (30) (2 Rounds x 30 Sc = 60 Sc)
Round 10 :
(Sc 3, Dec) x 6 (24)
Round 11 :
(Sc 2, Dec) x 6 (18)
Round 12 :
(Sc 1, Dec) x 6 (12)
Info :
Place safety eyes between rounds 7 & 8, 5 stitches apart. (PHOTO A) If embroidering eyes, loop yarn through repeatedly until you have a full, round eye. Tie ends off and leave the tails inside the head.
Info :
Nose can be added at this time, or at the end. Refer to Page 6 for instructions. Stuff the head until the desired firmness is achieved.
Info :
Tie off, leaving a 6" tail. Using a tapestry needle, finish off the head by picking up the front loops of the final 6 stitches. Pull tight to close and then hide the yarn tail through the piece and trim the excess. (PHOTO B)
— Arms :
Round 1 :
5 Hdc into Magic Ring (5)
Round 2-4 :
Hdc around (5) (3 Rounds x 5 Hdc = 15 Hdc)
Round 5 :
Hdc 3, Hdc Dec (4)
Info :
Fasten off and leave a long tail for sewing onto the body. (PHOTO C) Set aside for sewing later.
— Ears :
Round 1 :
5 Sc into Magic Ring (5)
Info :
Invisible colour change to Yellow:
Round 3 :
Sl st, Sc 5 (6) (The sl st reduces the appearance of the colour change).
Round 4 :
(Sc 2, Inc) x 2 (8)
Info :
Fasten off and leave a long tail for sewing onto the head. (PHOTO D)
— Body :
Info :
Begin by holding the head upside down and face pointing away from you. Note: You will be placing 6 sc into the bottom of the head (using Round 13 as a guide for stitch placement). You will start the row at the back of the head.
Round 1 :
6 sc into head (6) (PHOTO E)
Round 2 :
Hdc Inc x 6 (12)
Round 3 :
(Hdc 1, Hdc Inc) x 6 (18)
Round 4 :
(Hdc 2, Hdc Inc) x 6 (24)
Round 6 :
(Hdc 3, Hdc Inc) x 6 (30)
Round 7-8 :
Hdc around (30) (2 Rounds x 30 Hdc)
Round 9 :
(Hdc 3, Hdc Dec) x 6 (24)
Round 10 :
(Hdc 2, Hdc Dec) x 6 (18)
Info :
Add extra Hdc to get to the centre of the back.
Info :
Do not fasten off yet, you will go directly to the leg instructions.
— Legs :
Info :
Lay the body flat to figure out how to place the legs (There will be 5 stitches designated for each leg, that will leave 8 stitches unworked). Recall that on the previous page that you added extra Hdc to get to the centre of the back. Using stitch markers, mark 5 stitches for each leg, with a 4 stitch gap in between on each side. (PHOTO F). Add extra Hdc to get to the first st marker, if needed.
First Leg :
1. Sc Inc x 5 (10) (PHOTO G)
Round 2 :
(Sc 4, Inc) x 2 (12)
Round 3 :
(Sc 2, Dec) x 3 (9)
Round 4 :
(Sc 1, Dec) x 3 (6)
Info :
Fasten off and weave in tail. (PHOTO H)
Second Leg :
Add Yellow yarn to Round 10 of body, leaving a 10" yarn tail. The second leg will be worked the same way as the first leg. (PHOTO I)
Info :
Use the 10" yarn tail to sew closed the gap between the legs. (PHOTO J)
— Assembly :
Info :
Sew the arms onto Round 2 of the body, 4 stitches apart, at the front. (PHOTO K)
Info :
Sew the ears onto either side of the head, between Rounds 3 & 4. (PHOTO L)
— Nose :
Info :
In Black: Sew a strand of black yarn around the the centre stitch rounds 8 & 9, between the eyes. Secure the ends inside the head. (PHOTO M)
— Cheeks :
Round 1 :
In Cranberry: 5 Sc into Magic Ring (5) Sl st.
Info :
Fasten off and sew between Rounds 9 & 11, slightly behind the eyes. (PHOTO N)
— Tail :
Info :
* Leave a long tail at the beginning to sew onto body. In Yellow:
Round 2 :
Starting 2nd Ch from the hook: Sc 5 (5) Ch 1 & turn
Round 3 :
Sc 5 (5) Ch 1 & turn
Round 4 :
Sc 2 (2) Ch 1 & turn
Round 5 :
Sc 2, Ch 4 (6) turn
Round 6 :
Starting 2nd Ch from the hook: Sc 5 (5) Ch 1 & turn
Round 7 :
Sc 5 (5) Ch 1 & turn
Info :
Fasten off and sew between Rounds 7 & 8, at a slight angle. (PHOTO O & P)
This Pika the Electric Mouse amigurumi pattern brings a beloved electric friend to life with soft Bernat Blanket yarn. The plush texture, clever shaping, and tiny details like cheek patches and ear tips create a lovable character you can cherish. Whether for display or snuggles, this little amigurumi is a joyful weekend project. 🧶✨