🧶 Beautiful ✨ Detailed 💝 Adorable

Pepper the Fox Amigurumi Pattern

Pepper the Fox Amigurumi Pattern
4.0★ Rating
12-15 Hours Time Needed
2.3K Made This
✂️

Intermediate Level

Ideal for those with basic crochet experience, featuring slightly more advanced stitches and techniques to expand your skills.

⏱️

Multi-Day Project

A rewarding 12+ hour journey—perfect for dedicated crafters who love detailed work.

🐰

Whimsical Buddy

Playful characters full of personality, designed to spark imagination and become cherished playtime favorites.

About This Pepper the Fox Amigurumi Pattern

Pepper the Fox is a knitted sweater pattern featuring a colorful fox yoke and unisex straight shaping. The pattern includes both top-down and bottom-up constructions and a full set of charts for multiple sizes. It is designed for DK/light yarn and offers an adventurous, timeless look for children and adults alike.

Pepper the Fox Amigurumi Pattern crochet pattern - detailed view of completed project

You will receive detailed instructions for sleeves, yoke colorwork, neck finishing, and helpful tutorials. The design is versatile and can be knit in many different yarns and color combinations for a truly unique garment.

Why You'll Love This Pepper the Fox Amigurumi Pattern

I absolutely love this pattern because it brings a playful fox motif into a wearable, practical sweater that children adore. I enjoy designing colorwork that tells a little story around the yoke, and Pepper captures that spirit perfectly. The pattern offers both top-down and bottom-up constructions, so I can choose the method that suits the project and recipient. I love that it is sized for many ages, letting me knit matching sweaters for siblings or grown-ups. The finishing details and charts make the process satisfying and creative every time.

Pepper the Fox Amigurumi Pattern step 1 - construction progress Pepper the Fox Amigurumi Pattern step 2 - assembly progress Pepper the Fox Amigurumi Pattern step 3 - details and accessories Pepper the Fox Amigurumi Pattern step 4 - final assembly and finishing

Switch Things Up

I love how versatile this sweater is for customization; you can easily change the color palette to create completely different looks — try muted earth tones for a woodland feel or bright contrasting colors for a playful finish.

Want to make the sweater larger or smaller? Change your yarn weight and needles: a sport weight yarn with smaller needles will give a finer fabric and a bulkier DK/aran yarn with larger needles will make a chunkier sweater.

I often substitute locally sourced wools or norwegian yarns listed in the yarn alternatives section to make garments more suited to outdoor use; just be mindful to get the correct gauge.

For a softer, less traditional look, try using a mohair or brushed alpaca held together with the DK yarn for halo and warmth — make a swatch to ensure your colorwork remains legible.

If you prefer less stranded knitting, translate the chart into duplicate stitch after knitting a solid-color yoke to mimic the fox pattern as embroidery.

I like to personalize the sweater with small embroidered initials or a tiny motif on the sleeve cuff to mark the recipient — use contrast yarn and a tapestry needle for neat results.

Consider adding a small hem or longer rib at the cuffs and hem for extra snugness in winter; simply work more rounds of the rib before binding off.

I sometimes add a lining or soft cotton facing to the neck for very young children to avoid scratchy seams; sew carefully with matching thread and hand-stitch to the inside.

For a sibling set, change only the contrast colors and keep the main color consistent across sizes to create a coordinated family look that’s quick to knit using same-color leftovers.

If you like posable or playful details, add tiny leather patches at elbows or a contrasting fox-tail applique sewn onto the back for a whimsical finish.

Common Mistakes & How to Fix Them

✗ Casting on the wrong number of stitches for your chosen size will affect fit; double-check the cast-on counts listed for each size before you begin. ✗ Skipping the gauge swatch leads to unexpected sizing issues and mismatched drape; always knit and block a swatch using your chosen yarn and needles to match the pattern gauge. ✗ Inconsistent color dominance in stranded colorwork causes uneven floats and tension differences; hold the dominant color in the same hand throughout and catch floats every 3-5 stitches for even fabric. ✗ Not placing markers to separate front and back or to mark the start of the round will make shaping confusing; place markers exactly where instructed to track sections and armhole separations. ✗ Changing needle sizes mid-section without adjusting stitch tension will alter the garment dimensions; follow needle size recommendations and change at the specified points only. ✗ Forgetting to fold and secure the neck after the stretchy bind-off can leave a floppy edge; use the recommended stretchy bind-off and fold the neck carefully before sewing.

Pepper the Fox Amigurumi Pattern

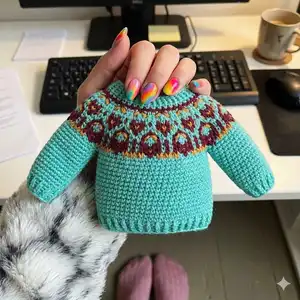
Create a charming, fox-themed sweater for little ones with Pepper the Fox. This detailed knitting pattern includes both top-down and bottom-up constructions, full colorwork charts, and multiple sizes from baby to adult. You will love the thoughtful shaping, playful yoke motif, and clear instructions for finishing and assembly. Perfect for knitters who want a cozy, handmade sweater with personality.

Intermediate 12-15 Hours

Materials Needed for Pepper the Fox Amigurumi Pattern

— Main Fabric

  • 01
    Light/DK weight yarn (11 wpi). Sample uses Merinoull by Sandnes, meterage 105 meters (115 yards) per 50 g skein.
  • 02
    Main color Col 1: BLÅ TURKIS 7213 - quantities for sizes listed in pattern (examples shown: (150, 200, 200) (250, 300, 350) (350, 400, 400) - {400, 450, 450}{500, 550, 600}{650, 700, 750}{850, 900, 950}{1000, 1050, 1100} g) - refer to pattern for exact yardage per size.
  • 03
    Contrast color Col 2: RUST 3355 - quantities listed per size in pattern (examples include groups of 50-200g depending on size) - refer to pattern for exact yardage per size.
  • 04
    Contrast color Col 3: HONNINGGUL 2325 - quantities listed per size in pattern (examples include groups of 50-200g depending on size) - refer to pattern for exact yardage per size.
  • 05
    Yarn alternatives recommended in the pattern: Ritual Dyes Sprite (60% Merino/40% Corriedale), The Farmer's Daughter Fibers Recollect (100% Rambouillet), Peer Grynt (75% Norwegian wool, 25% Peruvian wool), Hifa Tinde Pelsullgarn (100% Norwegian wool), Hifa Sol (100% Norwegian wool), Knit Picks Wool of the Andes (100% wool), Valley Yarns Valley Superwash Sport (100% merino), Istex Plötulopi (1 strand, 100% Icelandic wool), Juniper Moon Farm Patagonia Organic Merino (100% merino), Sandnes Garn Double Sunday (100% merino), Stonehedge Fiber Mill Shepherds Wool (100% wool).

— Tools Required

  • 01
    Double pointed needles: 3.0 mm and 3.5 mm (also 2.5 mm and 4.0 mm for some sizes as noted)
  • 02
    Circular needles 40 or 60 cm: 3.0 mm and 3.5 mm (16" or 24" lengths may use 2.5 mm and 4.0 mm as required)
  • 03
    Circular needle 80 cm: 3.0 mm and 3.5 mm (32" length may use 2.5 mm and 4.0 mm as required)
  • 04
    Stitch markers to mark start of round and panel divisions
  • 05
    Tapestry / yarn needle for weaving in ends and seaming
  • 06
    Scrap yarn or stitch holder for holding sleeve stitches
  • 07
    Blocking tools (towel, mat) for finishing
  • 08
    Scissors

Progress Tracker

0% Complete

— Bottom-up :

Body :

Cast on (108, 120, 132)( 144, 156, 172) (184, 192, 200) - {176, 188, 200}{212, 224, 236}{248, 260, 272}{284,296,308}{320, 332,344} stitches on needle size 3 mm/2.5 with Main color. Position a stitch marker to mark the start of the round.

Info :

Work (3, 3, 3) (4, 4, 4) (5, 5, 5) - {7, 7, 7}{7, 7, 7}{7, 7, 7}{7, 7, 7}{7, 7, 7} cm // (1.2, 1.2, 1.2) (1.6, 1.6, 1.6) (2, 2, 2) - {2.8, 2.8, 2.8}{2.8, 2.8, 2.8}{2.8, 2.8, 2.8} Inches rib 1 knit, 1 purl sts. Change to needle size 3.5 mm/4.

Info :

Place a marker after (54, 60, 66)(72, 78, 86) (92, 96, 100) - {88, 94, 100}{106, 112, 118}{124, 130, 136}{142, 148, 154}{160, 166, 172} stitches to separate front from the back.

Info :

Continue in stockinette stitch with maincolor until work measures (17, 19, 21)(22, 25, 28) (32, 34, 38) - {38, 38, 40}{42, 45, 45}{45, 45, 46}{46, 47, 47}{48, 48, 48} cm // (7, 7.5, 8.25)(8.75, 9.5, 11) (12.5, 13.5, 15) - {15, 15, 16}{16, 17.8, 17.8}{17.8, 17.8, 18.2}{18.2, 18.6, 18.6}{18.9, 18.9, 18.9} Inches or desired length.

Info :

Place the first (3, 3, 3) (3, 4, 5) (5, 5, 4) - {5, 5, 5}{5, 5, 5}{5, 5, 5}{5, 5, 5}{5, 5, 5} stitches and the last (4, 4, 4) (4, 5, 5) (6, 5, 5) - {6, 6, 6}{6, 6, 6}{6, 6, 6}{6, 6, 6}{6, 6, 6} stitches on the round on a sleeve holder for armholes, a total of (7, 7, 7) (7, 9, 10) (11, 10, 9) - {11, 11, 11}{11, 11, 11}{11, 11, 11}{11, 11, 11}{11, 11, 11} stitches. The stitches for the second armhole are set off when you start on the support piece. Set the work aside and knit the sleeves.

Arms :

Cast on (36, 36, 36) (36, 36, 40) (40, 40, 40) - {40, 40, 40}{42, 42, 42}{42, 42, 42}{44, 44, 44}{44, 46, 46} stitches on needle size 3 mm/2.5 with Main color. Position a stitch marker to mark the start of the round.

Info :

Work (3, 3, 3) (4, 4, 4) (5, 5, 5) - {7, 7, 7}{7, 7, 7}{7, 7, 7}{7, 7, 7}{7, 7, 7} cm // (1.2, 1.2, 1.2) (1.6, 1.6, 1.6) (2, 2, 2) - {2.8, 2.8, 2.8}{2.8, 2.8, 2.8}{2.8, 2.8, 2.8} Inches rib 1 knit, 1 purl sts. Change to needle size 3.5 mm/4.

Info :

Continue in stockinette stiches with maincolor and increase 2 sts on underside of sleeve (1 st after the first st on round, and 1 st before the last st on round). Then repeat every 4 rounds until you have (50, 52, 54) (56, 58, 60) (64, 68, 72) - {70, 72, 74}{76, 78, 80}{82, 84, 86}{88, 90, 92}{94, 96, 98} stitches. Knit until sleeve measures (17, 19, 21)(24, 28, 32) (34, 36, 40) - {44, 45, 47}{50, 50, 50}{50, 52, 52}{52, 52, 52}{53, 53, 53} cm // (7, 7.5, 8.25)(9.5, 11, 12.5)(13.5, 14.25, 15.75) inches or desired length.

Info :

Place the first (3, 3, 3) (3, 4, 5) (5, 5, 4) - {5, 5, 5}{5, 5, 5}{5, 5, 5}{5, 5, 5}{5, 5, 5} stitches and the last (4, 4, 4) (4, 5, 5) (6, 5, 5) - {6, 6, 6}{6, 6, 6}{6, 6, 6}{6, 6, 6}{6, 6, 6} stitches on the round on a sleeve holder for armholes, a total of (7, 7, 7) (7, 9, 10) (11, 10, 9) - {11, 11, 11}{11, 11, 11}{11, 11, 11}{11, 11, 11}{11, 11, 11} stitches. Set the sleeve aside and knit the second sleeve the same as the first.

Yoke :

Assemble body and sleeves on a 3.5 mm/4 circular needle. Place a stitch marker at the first join to mark the start of the round. Work stockinette st over first sleeve. Then work the front piece of the body and place the next (7, 7, 7) (7, 9, 10) (11, 10, 9) - {11, 11, 11}{11, 11, 11}{11, 11, 11}{11, 11, 11}{11, 11, 11} stitches on a sleeve holder for armholes. Knit over the other sleeve and back piece. You should now have (176, 192, 208) (224, 240, 256) (272, 288, 304) - {272, 288, 304}{320, 336, 352}{368, 384, 400}{416, 432, 448}{464, 480, 496} stitches.

Info :

Knit Knit (1, 1, 1) (2, 3, 4) (5, 5, 5) - {1, 2, 4}{5, 6, 7}{8, 9, 10}{11, 12, 13}{14, 15, 16} rounds with main color straight. Then work pattern according to Chart and decrease as directed. Choose the right size according to the size you are knitting. Change to shorter circular needle when needed.

Neck :

Change to needle size 3 mm/2.5 and work 1 round straight in maincolor while at the same time decreasing the stichcount evenly over the round to (80, 82, 84) (86, 86, 86) (86, 86, 86) - {98, 98, 98}{98, 98, 104}{104, 110, 110}{110, 120, 120}{130, 130, 140} stitches. Work (5, 5, 5) (6, 6, 6) (7, 7, 7) - {8, 8, 8}{8, 8, 8}{8, 8, 8}{8, 8, 8}{8, 8, 8} cm // (2, 2, 2) (2.4, 2.4, 2.4) (2.8, 2.8, 2.8) - {3.2, 3.2, 3.2}{3.2, 3.2, 3.2}{3.2, 3.2, 3.2}{3.2, 3.2, 3.2}{3.2, 3.2, 3.2} Inches rib 1 knit, 1 purl sts.

Info :

Use a stretchy Bind off. This is especially important for the childrens sizes. Fold neck.

Finalizing :

Kitchener stitch the underarms. Weave in loose ends. Enjoy :-)

Useful Tutorials :

Cast on: https://www.youtube.com/watch?v=cLzBSrIO96E&ab_channel=Anna-SofiaVintersol

Useful Tutorials :

Join body with arms: https://www.youtube.com/watch?v=gVcHBQ2m-go&ab_channel=Anna-SofiaVintersol

Useful Tutorials :

Stretchy Bind off: https://www.youtube.com/watch?v=SbzeEg6XMwM&ab_channel=VeryPinkKnits

— Top-Down :

Neck :

Cast on (80, 82, 84) (86, 86, 86) (86, 86, 86) - {98, 98, 98}{98, 98, 104}{104, 110, 110}{110, 120, 120}{130, 130, 140} stitches on needle size 3 mm/2.5 with Main color. Position a stitch marker to mark the start of the round. Work (5, 5, 5) (6, 6, 6) (7, 7, 7) - {8, 8, 8}{8, 8, 8}{8, 8, 8}{8, 8, 8}{8, 8, 8} cm // (2, 2, 2) (2.4, 2.4, 2.4) (2.8, 2.8, 2.8) -{3.2, 3.2, 3.2}{3.2, 3.2, 3.2}{3.2, 3.2, 3.2} Inches rib 1 knit, 1 purl sts. Change to needle size 3.5 mm/4 circular needle.

Yoke :

Work Chart according to the size you are knitting. Increase according to Chart and use a longer circular needle if necessary. Once you have finished the Chart you will have (176, 192, 208) (224, 240, 256) (272, 288, 304) - {272, 288, 304}{320, 336, 352}{368, 384, 400}{416, 432, 448}{464, 480, 496} stitches on your needle.

Info :

Knit (1, 1, 1) (2, 3, 4) (5, 5, 5) - {1, 2, 4}{5, 6, 7}{8, 9, 10}{11, 12, 13}{14, 15, 16} rounds with main color straight. On the following round, the garment is divided for the body and sleeves by placing the sleeve stitches on hold in order to work the body first.

Info :

Place a stitchmarker to mark the beginning of the round. Place a stitchmarker after stitches (101, 113, 115)(137, 147, 162) (173, 182, 191) - {165, 177, 189}{201, 213, 225}{237, 249, 261}{273,285,297}{309,321,333} stitches to mark the backside. Place another stitchmarker after (43, 45, 47)(49, 49, 50) (53, 58, 63) - {59, 61, 63}{65, 67, 69}{71, 73, 75}{77, 79, 81}{83, 85, 87} for the first arm. Place the next stitchmarker after {165, 177, 189}{201, 213, 225}{237, 249, 261}{273,285,297}{309, 321, 333} stitches to mark the front side.

Info :

Start knitting over the back side of the sweater. Now we cast on a total of (7, 7, 7) (7, 9, 10) (11, 10, 9) - {11, 11, 11}{11, 11, 11}{11, 11, 11}{11, 11, 11}{11, 11, 11} stitches for the underarm. Place first arm stitches on a piece of scrap yarn. Join Front side with back side by knitting over the front side. Cast on (7, 7, 7) (7, 9, 10) (11, 10, 9) - {11, 11, 11}{11, 11, 11}{11, 11, 11}{11, 11, 11}{11, 11, 11} more stitches for the underarm of the otherside. Place second arm on a piece of scrap yarn.

Body :

From here on we will knit the body. Knit in stockinette stitch with maincolor until work measures (14, 16, 18)(18, 21, 24) (27, 29, 33) - {31, 31, 33}{39, 39, 39}{39, 39, 40}{40, 41, 41}{42, 42, 42} cm // (5.8, 6.3, 7)(7.15, 7.9, 8.5) (10.5, 11.5, 12) - {12.2, 12.2, 13.2}{13.4, 15, 15}{15, 15, 15.4}{15.4, 15.8, 15.8}{16.1, 16.1, 16.1} Inches or desired length.

Info :

Change to needle size 3 mm/2.5 and work rib (3, 3, 3) (4, 4, 4) (5, 5, 5) - {7, 7, 7}{7, 7, 7}{7, 7, 7}{7, 7, 7}{7, 7, 7} cm // (1.2, 1.2, 1.2) (1.6, 1.6, 1.6) (2, 2, 2) - {2.8, 2.8, 2.8}{2.8, 2.8, 2.8}{2.8, 2.8, 2.8} Inches rib 1 knit, 1 purl sts. Bind off. Continue with arms.

Arms :

Place stitches from the piece of scrap yarn on a needle size 3.5 mm/4 circular needle (or double pointed if you prefer to knit your arms like that). Pick up the (7, 7, 7) (7, 9, 10) (11, 10, 9) - {11, 11, 11}{11, 11, 11}{11, 11, 11}{11, 11, 11}{11, 11, 11} stitches we have cast on for the underarm. Join in a round. You now have (50, 52, 54) (56, 58, 60) (64, 68, 72) - {70, 72, 74}{76, 78, 80}{82, 84, 86}{88, 90, 92}{94, 96, 98} stitches.

Info :

Continue in stockinette stitches with maincolor and decrease 2 sts on underside of sleeve (1 st after the first st on round, and 1 st before the last st on round). Then repeat every 4 rounds until you have (36, 36, 36) (36, 36, 36) (40, 40, 40) - {40, 40, 40}{42, 42, 42}{42, 42, 42}{44, 44, 44}{44, 46, 46} stitches and your sleeve measures (14, 16, 18)(20, 24, 28) (29, 31, 35) - {37, 38, 40}{43, 43, 43}{43, 45, 45}{45, 45, 45}{46, 46, 46} cm // (5.8, 6.3, 7)(7.9, 9.4, 10.9)(11.5, 12.25, 13.75) inches or desired length.

Finalizing :

Fold Neck. Kitchener stitches the underarms if you didn't knit them close. Weave in loose ends. Enjoy :-)

Useful Tutorial :

With this technique, you close the underarm holes while you knit the arm. I can only recommend it! https://www.youtube.com/watch?v=8K-IsMdTHK0&t=74s&ab_channel=KnittingwithSuzanneBryan

Assembly Instructions

  • Assemble body and sleeves onto a circular needle as instructed for the yoke, placing a marker at the first join to mark the beginning of the round.
  • Place sleeve stitches on scrap yarn when instructed and later return them to needles; cast on underarm stitches as directed and join front and back pieces by knitting over the front piece.
  • After finishing colorwork, change to smaller needles for the neck rib and perform a stretchy bind-off; fold the neck and secure it for a neat finish.
  • Kitchener stitch the underarm openings if you did not close them in the round; weave in all loose ends using a yarn needle.
  • Block the garment gently after weaving in ends to even out stitches and set the shape before final wearing.

Important Notes

  • 💡The needle sizes provided are guidance only; knit a swatch and adjust needle size to achieve the correct gauge before starting the project.
  • 💡Pay attention to color dominance and be consistent holding the same color in the same hand to keep stranded colorwork even.
  • 💡Use stitch markers to mark the start of rounds and to separate body panels and sleeve stitches for accurate shaping and assembly.
  • 💡Fold the neck after the stretchy bind-off and secure it carefully; a stretchy bind-off is especially important for children's sizes.
  • 💡Block your knitted garment in lukewarm water with wool soap and vinegar if desired, gently squeeze out excess water and lay flat to dry to set the shape.

Pepper the Fox is a delightful fox-yoke sweater designed to bring warmth and whimsy to any little wardrobe. The pattern includes both top-down and bottom-up constructions and a wide range of sizes so you can knit for babies, children, and adults. Choose your favorite color palette, enjoy the meditative rhythm of stranded colorwork, and create a treasured handmade piece. 🧶🦊

You ask,

we answer.

FAQs

What size will the finished piece be?

The pattern includes many sizes from 6 months up to adult; check the Measurements section and select the size that corresponds to your bust measurement plus desired positive ease.

Can I use different yarn weights for this pattern?

Yes, you can use different yarns but this will change the finished size and gauge; always knit a swatch and adjust needle size to reach the pattern gauge before starting.

Do I need prior knitting experience for this pattern?

This pattern is rated intermediate and requires knowledge of circular knitting, stranded colorwork, increases and decreases, and reading charts; beginners may find it challenging but can follow along with tutorials.

How long does this project typically take to complete?

Most knitters will spend approximately 12-15 hours on this pattern depending on size, colorwork complexity, and finishing—allow more time for adult sizes or detailed blocking.

Are there tutorials to help with the techniques used?

Yes, the pattern includes links to helpful YouTube tutorials for casting on, joining body with arms, and the stretchy bind-off; these are listed in the Useful Tutorials section.