🧢 Beautiful ✨ Detailed πŸ’ Adorable

Neon the Horse Amigurumi Pattern

Neon the Horse Amigurumi Pattern
4.5β˜… Rating
5-7 Hours Time Needed
1.3K Made This
βœ‚οΈ

Intermediate Level

Ideal for those with basic crochet experience, featuring slightly more advanced stitches and techniques to expand your skills.

⏱️

Weekend Treat

Takes 5-7 hours, making it an enjoyable project to finish over a couple of days.

🧸

Cute Companion

An adorable friend to cherish, handcrafted with love to bring comfort and joy for years to come.

About This Neon the Horse Amigurumi Pattern

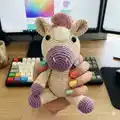
Neon the Horse is a sweet, seated amigurumi horse worked mainly in single crochet rounds with color accents on the snout, hooves and mane. The pattern includes separate pieces for ears, head, body, legs, arms, mane, tail and a decorative patch, plus full assembly instructions. You will work small curved shapes and ruffled rows for the mane and tail to give Neon her girly, whimsical look. This pattern uses US terminology and is written for fingering/4ply yarn.

Neon the Horse Amigurumi Pattern crochet pattern - detailed view of completed project

Finished Neon measures approximately 15 cm tall when seated (5 3/4 inches). The pattern includes yarn brand suggestions and clear notes on hook choice to achieve tight amigurumi stitches.

Why You'll Love This Neon the Horse Amigurumi Pattern

I absolutely love this pattern because it brings a playful pastel personality to life with simple techniques and delightful details. The ruffled mane and tail add a magical touch that always makes me smile while stitching. I enjoy how the contrasting snout and hooves give the character strong visual pop even with soft colors. Sewing the pieces together is satisfying and the finished Neon makes a lovely gift or decor piece that shows off handmade charm.

Neon the Horse Amigurumi Pattern step 1 - construction progress Neon the Horse Amigurumi Pattern step 2 - assembly progress Neon the Horse Amigurumi Pattern step 3 - details and accessories Neon the Horse Amigurumi Pattern step 4 - final assembly and finishing

Switch Things Up

I love how easy it is to change the colour palette to make a completely different personality β€” try muted browns for a realistic foal or bold neons for a funky friend.

You can make a mini version by using thinner yarn and a smaller hook, or go chunky with bulky yarn for a cuddle-sized variation.

I often add embroidered eyelashes or a little mouth to give extra expression β€” try contrasting embroidery thread for a pop of detail.

If you want posable limbs, consider adding wire into the arms and legs before stuffing, securing the ends inside with extra stuffing.

Swap safety eyes for embroidered eyes if the toy is for a baby or if you prefer a handmade look.

Change the mane style by making longer ruffled rows or by crocheting individual spirals for a more textured crest.

Make a set in varying sizes and colours for a charming display or to sell as a collectible family.

Experiment with yarn textures β€” a slightly fuzzy yarn for the body can give a soft, cuddly feel while retaining the smooth features in cotton for the snout.

I like to add small accessories like a tiny scarf, ribbon or saddle to personalize each horse and make it gift-ready.

Try attaching a keyring loop for a portable Mini Neon if you downsize the pattern β€” it makes a great bag charm.

Use sparkly or metallic thread in the mane for a magical glitter effect; it adds a playful shine without altering stitch structure.

When sewing pieces, pin everything in place and take photos of placement so you can recreate or adjust the look consistently across multiple makes.

Common Mistakes & How to Fix Them

βœ— Skipping the use of a stitch marker will lead to lost round starts; place a marker at the beginning of each round to keep your rounds even and accurate. βœ— Using a larger hook than recommended creates loose stitches and visible stuffing; switch to a smaller hook to tighten your gauge for amigurumi. βœ— Forgetting to stuff gradually causes lumps and uneven shaping; stuff a little at a time and shape as you go for a smooth finish. βœ— Not counting increases or decreases carefully will change final stitch counts; count your stitches after each shaping round to confirm totals and fix mistakes early.

Neon the Horse Amigurumi Pattern

Create Neon the Horse, an adorable pastel amigurumi with a curly mane and cute snout. This pattern walks you through each piece including ears, head, body, legs, arms, mane, tail and patch with clear step-by-step rounds. Perfect for crafters who love playful pastel toys and detailed finishing touches. With complete assembly instructions, you can make a charming handmade companion to gift or display.

Intermediate 5-7 Hours

Materials Needed for Neon the Horse Amigurumi Pattern

β€” Main Fabric

  • 01
    4ply yarn / fingering weight (less than 50g each) in BEIGE (main body)
  • 02
    4ply yarn / fingering weight (less than 50g) in APRICOT (head/body contrast and details)
  • 03
    4ply yarn / fingering weight (less than 50g) in PURPLE (snout, hooves)
  • 04
    4ply yarn / fingering weight (less than 50g) in PINK (mane and tail)
  • 05
    BEIGE = Hobbii Cotton Kings 8/4 in colour 02 (used in sample)
  • 06
    APRicot = Hobbii Rainbow Cotton 8/4 in colour 89 (used in sample)
  • 07
    PURPLE = Hobbii Rainbow Cotton 8/4 in colour 39 (used in sample)
  • 08
    PINK = Hobbii Rainbow Glitter Gold in colour 044 (used in sample)

β€” Tools Required

  • 01
    Crochet hook size 2.0mm (B-1 US)
  • 02
    Safety eyes 8mm (2 pieces)
  • 03
    Scissors
  • 04
    Tapestry needle
  • 05
    Polyester toy stuffing
  • 06
    Stitch marker

Progress Tracker

0% Complete

β€” Ears :

Round 1 :

6 sc in MR [6]

Round 2 :

inc x 6 [12]

Round 3 :

(sc, inc) x 6 [18]

Round 4-9 :

sc x 18 [18]

Info :

Fasten off, fold ears in half and half again (you should have 4 edges together) and sew across the bottom. Leave a tail for sewing.

β€” Head :

Round 1 :

6 sc in MR [6]

Round 2 :

inc x 6 [12]

Round 3 :

(sc, inc) x 6 [18]

Round 4 :

(sc x 2, inc) x 6 [24]

Round 5 :

(sc x 3, inc) x 6 [30]

Round 6-9 :

sc x 30 [30]

Info :

Change to APRICOT.

Round 10 :

in BLO: sc x 30 [30]

Round 11 :

sc x 30 [30]

Round 12 :

(sc x 4, inc) x 6 [36]

Round 13 :

(sc x 5, inc) x 6 [42]

Round 14 :

(sc x 6, inc) x 6 [48]

Round 15 :

(sc x 7, inc) x 6 [54]

Round 16-20 :

sc x 54 [54]

Round 21 :

(sc x 7, dec) x 6 [48]

Round 22 :

sc x 48 [48]

Round 23 :

(sc x 6, dec) x 6 [42]

Round 24 :

(sc x 5, dec) x 6 [36]

Round 25 :

(sc x 4, dec) x 6 [30]

Info :

If using safety eyes, insert between rounds 15 and 16, 11 stitches apart.

Round 26 :

(sc x 3, dec) x 6 [24]

Info :

Stuff the head and continue stuffing until fastened off.

Round 27 :

(sc x 2, dec) x 6 [18]

Round 28 :

(sc, dec) x 6 [12]

Round 29 :

dec x 6 [6]

Info :

Fasten off and weave tail through final round, pull to close.

β€” Arms :

Round 1 :

6 sc in MR [6]

Round 2 :

inc x 6 [12]

Round 3 :

(sc, inc) x 6 [18]

Round 4 :

sc x 18 [18]

Round 5 :

in BLO: sc x 18 [18]

Round 6 :

(sc x 7, dec) x 2 [16]

Info :

Change to BEIGE.

Round 7 :

(sc x 6, dec) x 2 [14]

Round 8 :

sc x 14 [14]

Info :

Change to APRICOT.

Round 9-18 :

sc x 14 [14]

Info :

Fasten off, stuff rounds 1-8 and sc across top. Leave a tail for sewing.

β€” Legs :

Round 1 :

8 sc in MR [8]

Round 2 :

inc x 8 [16]

Round 3 :

(sc, inc) x 8 [24]

Round 4-5 :

sc x 24 [24]

Round 6 :

in BLO: (sc x 6, dec) x 3 [21]

Round 7 :

(sc x 5, dec) x 3 [18]

Info :

Change to BEIGE.

Round 8-9 :

sc x 18 [18]

Info :

Change to APRICOT.

Round 10-18 :

sc x 18 [18]

Info :

Fasten off, stuff and sc across the top to close. Leave a tail for sewing.

β€” Body :

Round 1 :

6 sc in MR [6]

Round 2 :

inc x 6 [12]

Round 3 :

(sc, inc) x 6 [18]

Round 4 :

(sc x 2, inc) x 6 [24]

Round 5 :

(sc x 3, inc) x 6 [30]

Round 6 :

(sc x 4, inc) x 6 [36]

Round 7 :

(sc x 5, inc) x 6 [42]

Round 8-15 :

sc around [42]

Round 16 :

(sc x 5, dec) x 6 [36]

Round 17-20 :

sc x 36 [36]

Round 21 :

(sc x 4, dec) x 6 [30]

Round 22 :

sc x 30 [30]

Round 23 :

(sc x 3, dec) x 6 [24]

Info :

Stuff and continue stuffing until fastened off.

Round 24 :

(sc x 2, dec) x 6 [18]

Round 25 :

(sc, dec) x 6 [12]

Info :

Fasten off, weave tail through final round and pull to close. Leave a tail for sewing.

β€” Mane :

Info :

Leave a long tail at the beginning for sewing. You will work in rows and turn at the end of each row. Chains do not count as a stitch.

Row 1 :

ch16, sc in 2nd ch from hook, sc x 14 [15]

Row 2 :

ch2 and 3dc in same stitch, 3dc x 14 [45]

Row 3 :

ch2 and 3dc in same stitch, 3dc x 44 [135]

Info :

Fasten off and leave a tail for sewing.

β€” Tail :

Info :

Leave a long tail at the beginning for sewing. You will work in rows and turn at the end of each row. Chains do not count as a stitch.

Row 1 :

ch9, sc in 2nd ch from hook, sc x 7 [8]

Row 2 :

ch2 and 3dc in same stitch, 3dc x 7 [24]

Row 3 :

ch2 and 3dc in same stitch, 3dc x 24 [72]

Info :

Fasten off and leave a tail for sewing.

β€” Patch :

Round 1 :

ch 6, sc in 2nd chain from hook, sc x 3, 3sc in the final chain, turn and work on the other side: sc x 3, inc [12]

Round 2 :

inc, sc x 3, inc, sc, inc, sc x 3, inc, sc [16]

Round 3 :

sc, inc, sc x 4, inc, sc, inc, sc x 5, inc, sc [20]

Info :

Fasten off and leave a tail for sewing.

β€” Assembly :

Item (P1) :

1) EYES – using APRICOT, sew over a stitch on the inner part of each eye (As shown) and pull a little to create an indent. Tie off yarn tails and hide inside the head.

Item (P2) :

2) PATCH – sew to the centre of the head over rounds 12-19.

Item (P3) :

3) HEAD – sew to the body. Go around twice to make secure.

Item (P4) :

4) EARS – sew to either side of the head over rounds 18-22. Approx. 3 stitches from the patch.

Item (P5) :

5) LEGS – sew to rounds 5-7 of the body pointing outwards, 3 stitches apart.

Item (P6) :

6) ARMS – sew to the body over rounds 17-22 on a diagonal so the arms point slightly forward and rest on the legs.

Item (P7) :

7) MANE – approx. 1 round after the patch, sew down the back of the head.

Item (P8) :

8) TAIL – sew to the back of the body over rounds 6-11.

Item (P9) :

9) NOSTRILS – using APRICOT, making 2 vertical lines over rounds 3-5, approx. 5 stitches apart.

Info :

That’s it! Enjoy your Neon.

Assembly Instructions

  • Using APRICOT yarn, sew the eyes by stitching over a stitch on the inner part of each eye to create a small indent; tie off yarn tails and hide them inside the head.
  • Sew the patch to the centre of the head covering rounds 12-19 to create the white forehead detail.
  • Attach the head to the body by sewing around the neck opening twice for a secure join.
  • Sew ears to either side of the head over rounds 18-22, positioning them approximately 3 stitches from the patch for symmetry.
  • Sew legs to the body at rounds 5-7, spacing them 3 stitches apart and angling them slightly outwards for a seated pose.

Important Notes

  • πŸ’‘Use a yarn with no stretch for best amigurumi results; cotton or cotton blends are recommended for stability and even stitches.
  • πŸ’‘Amigurumi pieces are stitched in the round unless noted otherwise; follow the rounds exactly and use stitch markers to track starts.
  • πŸ’‘The hook size and yarn thickness will affect finished size; the sample measures approximately 15 cm tall when seated using the specified yarns.

Neon the Horse is a sweet little pastel amigurumi designed to bring a smile to any maker or recipient. This pattern includes detailed rounds for every piece and clear assembly steps to make finishing effortless. Make one as a gift or as a playful shelf companion β€” she is full of charm and personality. 🧢✨

You ask,

we answer.

FAQs

What size will the finished piece be?

The finished amigurumi measures approximately 15 cm tall when seated (5 3/4 inches) using the recommended yarn and hook size.

Can I use different yarn weights for this pattern?

Yes, you can use different yarn weights, but the final size will change; adjust your hook size accordingly to keep stitch tension suitable for amigurumi.

Do I need prior crochet experience for this pattern?

This pattern is rated Intermediate and assumes familiarity with basic stitches like sc, inc, dec and working in the round.

When should I insert safety eyes?

Insert safety eyes between rounds 15 and 16 of the head, spacing them 11 stitches apart as instructed in the pattern.