About This Minimal Frog Amigurumi Pattern
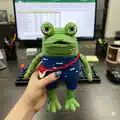
This pattern creates a minimalist, striped frog amigurumi with separate pieces for the head, body, legs, eyes, snout and tiny cross bag. The design uses standard amigurumi techniques and color changes guided by the included symbol chart. Photographs and step-by-step notes show assembly and finishing to help you achieve a neat, professional result.
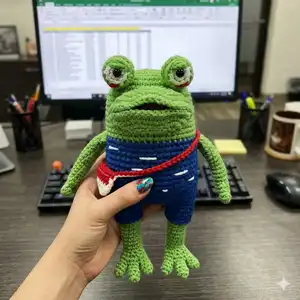
Youll work in continuous rounds and change yarn colors according to the symbol pattern for the striped body. The finished frog measures about 15 cm (5.9 inches) using the recommended hook and yarn.
Why You'll Love This Minimal Frog Amigurumi Pattern
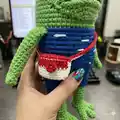
I absolutely love this pattern because it combines charming minimal design with fun colorwork, so every frog turns out unique. I enjoy how the simple striped body gives lots of character without complicated stitches. The separate pieces (eyes, snout, arms and legs) are quick to make and let you practice shaping and finishing techniques. Sewing the snout and eye stalks into place is very satisfying and gives the frog its adorable face. I also love that the pattern includes a tiny cross bag — a delightful little accessory that makes the finished toy extra playful.
Switch Things Up
I love customizing this pattern by changing the stripe colors to match seasonal palettes or favorite team colors.
I sometimes use soft pastel yarns to make a nursery-friendly frog or bright contrasting yarns for a playful, bold look.
To make the frog larger, I use bulky yarn and a larger hook; to make a tiny keychain friend I use fingering weight yarn and a smaller hook.
I often replace the plastic eyes with embroidered eyes for a safer toy for small children, or use safety eyes for a polished finish.
Try adding tiny accessories like a crocheted hat, scarf, or different shaped bag to give the frog personality and variety.
I occasionally embroider freckles or a tiny heart on the chest for a personalized touch that makes each frog unique.
Experiment with different stuffing amounts: firmer stuffing gives structure while lighter stuffing makes the frog more squeezable and soft.
You can also alter limb placement slightly higher or lower on the body to change the frogs posture and overall expression.
I recommend trying different stitch textures for the body band — slip stitch rows or back-loop-only rows can create subtle, interesting effects.
Finally, I like to mix yarn types for accents (cotton for crisp stripes, acrylic for soft body) to play with color saturation and final feel.
Common Mistakes & How to Fix Them
✗ Skipping the magic ring tightening step can leave a visible hole at the top; always tighten the magic ring securely before proceeding.
✗ Not changing yarn colors exactly where the symbol chart indicates causes misaligned stripes; follow the symbol pattern on page one for accurate color placement.
✗ Forgetting to place stitch markers when dividing the legs can make counting tricky; use markers to identify the 31st stitch and the leg separation points.
✗ Overstuffing the head or legs will distort shaping and make sewing pieces together difficult; stuff gradually and stop when the shape looks firm but soft.