About This Miniature Pippi Amigurumi Pattern
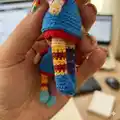
This pattern makes a miniature Pippi-style crochet doll about 7 cm tall using lace-weight yarn and small hooks. It includes full instructions for tiny limbs, a shaped body, head, shoes, dress, apron and textured hair. The pattern features both crocheted hair options and mohair rope hair instructions for a realistic finish.
You will find abbreviations, materials and complete round-by-round instructions to follow easily. Photographs and assembly notes are included to help place parts and finish details neatly.
Why You'll Love This Miniature Pippi Amigurumi Pattern
I absolutely love this pattern because it captures the playful spirit of a tiny, handmade character with surprisingly simple techniques. I enjoy working at this small scale — it challenges my precision while rewarding me with an adorable finished doll. The colorplay possibilities are endless, so I can make each Pippi unique and personal. I also love the hair options: you can crochet textured hair or use mohair rope for realistic braids and volume.
Switch Things Up
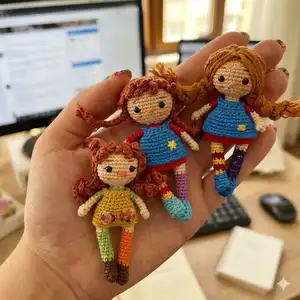
I love experimenting with color combinations for this miniature Pippi — try pastel shades for a soft, vintage look or bright, mismatched socks for playful character.
You can make the doll larger or smaller by changing yarn weight and hook size; bulky yarn with a larger hook gives a chunkier doll while finer yarn makes an even tinier collectible.
I often swap the crocheted hair for mohair rope to get a more natural, fluffy texture; braid it or leave it loose for different personalities.
For a modern twist, embroider small facial expressions instead of using safety eyes to give each doll a unique look.
I sometimes add wire to the legs or arms for slight posability when displaying the dolls on shelves.
Try different eye sizes and placements — moving the eyes slightly changes the doll's expression and character dramatically.
Add tiny accessories like a crocheted hat, a miniature scarf, or a felt pocket to the apron to personalize each doll as a gift.
Use metallic or variegated yarns for small accents like buttons or dress pockets to create little focal points on the doll.
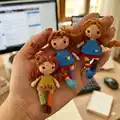
If you want a set, make a matching trio with coordinated colors and hairstyles so they look like a little family or friends group.
I recommend experimenting with hair density and braid styles — thicker mohair ropes or multiple narrow braids both look charming on this scale.
Common Mistakes & How to Fix Them
✗ Skipping stitch markers during joining legs and starting the body causes uneven seams; place a marker at your starting point and mark the join to keep legs aligned.
✗ Forgetting to add safety eyes at the recommended rounds results in misplaced eyes later; insert and secure eyes between the 38th and 39th rounds leaving 6 SC between them before continuing.
✗ Overstuffing the head or body makes shaping difficult and distorts the doll; stuff gradually and add small amounts of fiberfill while you close rounds for smooth shaping.
✗ Not counting stitches after increases and decreases causes incorrect stitch counts and shaping issues; count your stitches at the end of each round, especially after inc/dec rounds.
✗ Changing color without securing yarn tails neatly leads to bulky seams; weave in or neatly carry the yarn and trim tails, and fasten off leaving tails for sewing when necessary.