🧢 Beautiful ✨ Detailed πŸ’ Adorable

Mini Whale Amigurumi Pattern

Mini Whale Amigurumi Pattern
4.1β˜… Rating
1-2 Hours Time Needed
1.6K Made This
βœ‚οΈ

Beginner Friendly Level

Perfect for those just starting their crochet journey, with clear instructions and simple techniques

⏱️

Quick Make

Complete in under 2 hoursβ€”lightning fast fun for instant gratification and quick gifts.

🎁

Tiny Treasure

Small, sweet, and gift-worthy creations that fit perfectly in the palm of your hand with detailed charm.

About This Mini Whale Amigurumi Pattern

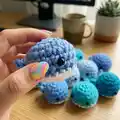
This pattern makes a tiny, stuffed whale amigurumi using simple single crochet rounds and minimal assembly. It is perfect for using up scrap worsted weight yarn and makes a sweet keychain-sized toy or pocket pal. The instructions include clear rounds for body, belly, and tail plus placement notes for safety eyes.

Mini Whale Amigurumi Pattern crochet pattern - detailed view of completed project

Designed for quick, satisfying makes, this mini whale is ideal for gifting or crafting practice. The pattern uses basic stitches and finishes with a small sewn tail for charm.

Why You'll Love This Mini Whale Amigurumi Pattern

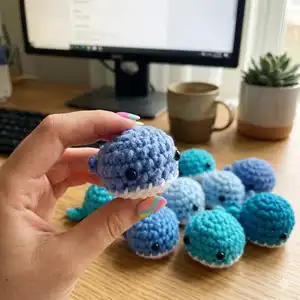
I absolutely love this pattern because it turns a few simple stitches into an instantly adorable whale. I enjoy how quickly you can make a whole pod of them using scrap yarn. The small size makes them perfect for gifts, party favors, or as sweet decorations. I also love that the pattern uses basic techniques, so it feels relaxing and satisfying to complete.

Mini Whale Amigurumi Pattern step 1 - construction progress Mini Whale Amigurumi Pattern step 2 - assembly progress Mini Whale Amigurumi Pattern step 3 - details and accessories Mini Whale Amigurumi Pattern step 4 - final assembly and finishing

Switch Things Up

I love customizing these mini whales by changing colors to create an entire pod with personality.

I sometimes use variegated yarn for a playful, mottled finish that looks magical on the body.

If you want a chunkier whale try bulky yarn with a larger hook which makes a cuddlier, larger version.

For a tiny keychain, use lighter fingering or sport weight yarn and a smaller hook to miniaturize the pattern.

I like adding embroidered smiles or blush with contrasting thread to give each whale a unique expression.

Try different eye options: tiny safety eyes, French knots, or embroidered eyes for a softer look.

I occasionally stuff less for a flatter, squishier toy that makes a nice pincushion or shelf buddy.

To make a mobile, crochet several whales in graduated sizes and suspend them with clear thread for a sweet nursery accent.

I sometimes add a tiny felt fin or a little crocheted bow to personalize whales for gifts or themed sets.

If you like poseable toys, consider adding a thin wire inside the tail when assembling to allow gentle shaping and display options.

Common Mistakes & How to Fix Them

βœ— Attaching safety eyes too early can shift placement later; attach eyes between the 5th and 6th rows and double-check spacing before securing. βœ— Understuffing the body causes flat or misshapen whales; stuff gradually and firmly, beginning halfway through and adjusting as you sew the belly in place. βœ— Skipping stitch counts when increasing leads to uneven shaping; count stitches after each round, especially after increases to ensure correct totals. βœ— Weaving in ends only at the end can make finishing messy; weave in ends as you go to keep pieces tidy and avoid bulky joins.

Mini Whale Amigurumi Pattern

Create an adorable mini whale with this compact crochet pattern that is perfect for quick makes and handmade gifts. Youll enjoy simple rounds, easy assembly, and sweet results that fit in the palm of your hand. This pattern uses worsted weight yarn and safety eyes to create charming little whales in minutes.

Beginner Friendly 1-2 Hours

Materials Needed for Mini Whale Amigurumi Pattern

β€” Main Fabric

  • 01
    Worsted weight yarn (Red Heart Soft Yarn was used for these)

β€” Tools Required

  • 01
    One pair of 6mm safety eyes
  • 02
    Polyfil Stuffing

Progress Tracker

0% Complete

β€” Body :

Round 1 :

Using the color for the body, ch 2. Sc 6 into 2nd ch from hook. (6)

Round 2 :

Inc in each st around. (12)

Round 3 :

*Sc in next st, inc. Repeat from * around. (18)

Round 4 :

Sc in each st around. (18)

Round 5-6 :

[2 rounds]: repeat Round 4. F/o, weave in ends.

Info :

*attach safety eyes in between the 5th and 6th rows, 4 st apart.*

β€” Belly :

Round 1 :

Using the color for the belly, ch 2. Sc 6 into 2nd ch from hook. (6)

Round 2 :

Inc in each st around. (12)

Round 3 :

*Sc in next st, inc. Repeat from * around. (18)

Info :

F/o and leave long tail for sewing.

β€” Tail :

Tail (make 1) :

Ch 3. Turn, sc into 2nd ch from hook. Sc in next st. Ch 3, sc in 3rd st from hook, sl st into the side of the next st. Ch 3, sc in 3rd st from hook, and sl st into the next st. Continue making sl st until you reach the bottom of your very first st. F/o and leave tail for sewing.

β€” Assembly :

Assembly :

Sew the belly to the body, begin stuffing about half-way through. Weave in ends. Sew the tail in the 6th row of the body, directly behind the two eyes on the opposite side of the whale.

Info :

Enjoy! Follow us on Instagram @crocheting or find our etsy shop "The Crocheting" for more!

Assembly Instructions

  • Attach the belly to the underside of the body, beginning to sew with a long tail and stuffing about half-way through before completing the seam.
  • Weave in all ends securely after the belly is attached to keep the finish neat and tidy.
  • Position and sew the tail into the 6th row of the body on the side opposite the eyes, securing firmly with the long tail left from the tail piece.
  • Attach safety eyes between the 5th and 6th rows, spacing them 4 stitches apart before closing and finishing the body.

Important Notes

  • πŸ’‘Attach safety eyes between rows 5 and 6 and ensure they are evenly spaced before securing the washers.
  • πŸ’‘Stuff the body gradually while sewing the belly to avoid creating lumps and to maintain a smooth shape.
  • πŸ’‘Weave in ends as you go to keep the piece tidy and reduce finishing time at the end.
  • πŸ’‘Count stitches after rounds with increases to maintain correct stitch totals and even shaping.

This mini whale pattern is a delightful quick make that transforms scrap yarn into tiny treasures you can gift and cherish. Perfect for party favors, stocking stuffers, or a whimsical desk companion that brings a smile every time. Make a whole pod in different colors and spread the joy of handmade cuteness. πŸ§ΆπŸ‹

You ask,

we answer.

FAQs

What size will the finished piece be?

The finished amigurumi measures approximately palm-sized when using worsted weight yarn and typical hook sizes for that yarn; exact size will vary with yarn and tension.

Can I use different yarn weights for this pattern?

Yes, you can use different yarn weights but the final size will change; use an appropriate hook for your chosen yarn and adjust stuffing for shape.

Do I need prior crochet experience for this pattern?

This pattern is beginner friendly and uses basic stitches like single crochet and increases, so basic crochet experience is helpful but not strictly required.

How long does this project typically take to complete?

Most crocheters complete this project in under 2 hours, making it a quick and satisfying project for gifting or practice.