🧢 Beautiful ✨ Detailed πŸ’ Adorable

Mike Wazowski Amigurumi Pattern

Mike Wazowski Amigurumi Pattern
4.2β˜… Rating
5-7 Hours Time Needed
2.4K Made This
βœ‚οΈ

Intermediate Level

Ideal for those with basic crochet experience, featuring slightly more advanced stitches and techniques to expand your skills.

⏱️

Weekend Treat

Takes 5-7 hours, making it an enjoyable project to finish over a couple of days.

🧸

Cute Companion

An adorable friend to cherish, handcrafted with love to bring comfort and joy for years to come.

About This Mike Wazowski Amigurumi Pattern

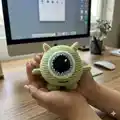
This pattern creates a small Mike Wazowski amigurumi using 2.0 mm hook and mercerized cotton. You will crochet the body, feet, arms, horns and a layered eye, then join and embroider the final details. Photographs show placement and assembly to help you finish with a polished result.

Mike Wazowski Amigurumi Pattern crochet pattern - detailed view of completed project

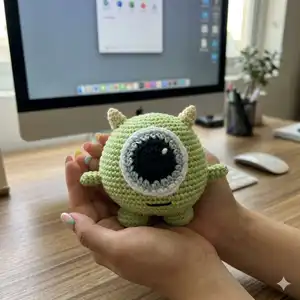
Ideal for crafters who enjoy making small characters, the finished toy measures approximately 11 cm tall. The pattern uses basic shaping, increases, decreases and a few color changes for the eye detail.

Why You'll Love This Mike Wazowski Amigurumi Pattern

I absolutely love this pattern because it captures personality with very few pieces and simple shaping. I enjoy how the layered eye gives Mike his character with just a couple of color changes and embroidery details. This design is quick to crochet yet rewarding to assemble, so I often make several as quick gifts. I am excited to share clear, photographed steps so you can get the same neat finish I aim for in my samples.

Mike Wazowski Amigurumi Pattern step 1 - construction progress Mike Wazowski Amigurumi Pattern step 2 - assembly progress Mike Wazowski Amigurumi Pattern step 3 - details and accessories Mike Wazowski Amigurumi Pattern step 4 - final assembly and finishing

Switch Things Up

I love how easy it is to change the character by swapping yarn colors; try pastel greens or a bright neon for a modern twist.

You can make a tiny keychain version by using thinner yarn and a smaller hook to create a mini Mike.

Want a cuddly larger version? Use bulky yarn and a larger hook, then increase stuffing for a plush feel.

I sometimes embroider different mouths to change the expression β€” a smile, a surprised O, or no mouth at all for variety.

Add tiny accessories like a crochet hat or scarf to create seasonal versions for holidays and gifts.

Try changing the eye colors and the contrast ring to give each amigurumi a unique personality.

I recommend experimenting with safety eyes or buttons for a different finish, but secure them carefully for children’s toys.

You can also add wire inside the arms for posability so the character can hold small props.

If you want a set, make several in a palette of coordinating yarns to display together on a shelf.

Finally, consider using a variegated yarn for the body to add subtle texture without extra color changes.

Common Mistakes & How to Fix Them

βœ— Skipping stitch markers during rounds leads to miscounted stitches and uneven shaping; use a marker at the start of every round to keep track. βœ— Forgetting to stuff gradually causes lumps and poor shape control; stuff small amounts as you progress and shape the piece as you go. βœ— Overstuffing the feet or body makes assembly difficult and distorts round shaping; stuff until firm but still slightly compressible before closing. βœ— Not securing color changes when making the eye can leave loose ends or gaps; weave in and secure color joins or carry yarn neatly to hide transitions.

Mike Wazowski Amigurumi Pattern

Make a charming Mike Wazowski amigurumi with clear, photographed steps and a concise materials list. This pattern walks you through crocheting the body, feet, hands, horns and the layered eye, then assembling everything into a lovable mini monster. Perfect as a handmade gift or a fun project to sharpen your amigurumi skills.

Intermediate 5-7 Hours

Materials Needed for Mike Wazowski Amigurumi Pattern

β€” Main Fabric

  • 01
    2 mm Yarn 100% Mercerized Cotton - Green (main body)
  • 02
    2 mm Yarn 100% Mercerized Cotton - Yellow (horns)
  • 03
    2 mm Yarn 100% Mercerized Cotton - Black (eye center and mouth embroidery)
  • 04
    2 mm Yarn 100% Mercerized Cotton - Blue (eye ring)
  • 05
    2 mm Yarn 100% Mercerized Cotton - White (eye highlight and outer ring)

β€” Tools Required

  • 01
    Crochet hook 2.0 mm
  • 02
    Stitch marker
  • 03
    Pins
  • 04
    Wool needle (for closing and joining)
  • 05
    Stuffing (polyester fiberfill)
  • 06
    Scissors
  • 07
    Yarn needle for sewing and weaving ends

Progress Tracker

0% Complete

β€” Body :

Round 1 :

Magic ring 8 sc (8 sc)

Round 2 :

8 inc (16 sc)

Round 3 :

(1 sc, 1 inc) x 8 (24 sc)

Round 4 :

(2 sc, 1 inc) x 8 (32 sc)

Round 5 :

(3 sc, 1 inc) x 8 (40 sc)

Round 6 :

1 sc in each of the 40 sc (40 sc)

Round 7 :

(4 sc, 1 inc) x 8 (48 sc)

Round 8 :

(5 sc, 1 inc) x 8 (56 sc)

Round 9 :

(6 sc, 1 inc) x 8 (64 sc)

Round 10 to 13 :

1 sc in each of the 64 sc (64 sc)

Round 14 :

(15 sc, 1 inc) x 4 (68 sc)

Round 15 to 16 :

1 sc in each of the 68 sc (68 sc)

Round 17 :

(16 sc, 1 inc) x 4 (72 sc)

Round 18 to 19 :

1 sc in each of the 72 sc (72 sc)

Round 20 :

(17 sc, 1 inc) x 4 (76 sc)

Round 21 to 24 :

1 sc in each of the 76 sc (76 sc)

Round 25 :

(2 sc, 1 dec) x 19 (57 sc)

Round 26 :

(1 sc, 1 dec) x 19 (38 sc)

Round 27 :

(2 sc, 1 dec) x 9, 1 dec (28 sc)

Round 28 :

(2 sc, 1 dec) x 7 (21 sc)

Info :

STUFF.

Round 29 :

(1 sc, 1 dec) x 7 (14 sc)

Round 30 :

7 dec (7 sc)

Info :

NOTE: Using a wool needle: Close the hole.

β€” Feet :

Round 1 :

Magic ring 8 sc (8 sc)

Round 2 :

8 inc (16 sc)

Round 3 :

(1 sc, 1 inc) x 8 (24 sc)

Round 4 to 5 :

1 sc in each of the 24 sc (24 sc)

Round 6 :

12 dec (12 sc)

Info :

STUFF.

β€” Hands :

Round 1 :

Magic ring 6 sc (6 sc)

Round 2 to 4 :

1 sc in each of the 6 sc (6 sc)

Info :

DON'T STUFF.

β€” Horns :

Round 1 :

Magic ring 6 sc (6 sc)

Round 2 :

1 sc in each of the 6 sc (6 sc)

Round 3 :

(1 sc, 1 inc) x 3 (9 sc)

Round 4 :

1 sc in each of the 9 sc (9 sc)

Info :

STUFF.

β€” Eye :

Round 1 :

Magic ring 8 sc (8 sc)

Round 2 :

8 inc hdc (16 hdc)

Round 3 :

(3 sc, 1 inc) x 4 (20 sc)

Info :

(Change the black-colored yarn to the blue one)

Round 4 :

(1 hdc, 1 inc) x 10 (30 hdc)

Info :

(Change the blue-colored yarn to the white one)

Round 5 :

(2 sc, 1 inc) x 10 (40 sc)

Info :

NOTE: Begin to join. Using a wool needle: 1.- Join the eye to the body, starting on round number 8.

β€” Assembly :

Step 1 :

Join the eye to the body, starting on round number 8.

Step 2 :

Join the feet to the body.

Step 3 :

Join the hands to the body.

Step 4 :

Join the horns to the body.

Step 5 :

Embroider the detail in the eye using the white-colored yarn.

Step 6 :

Embroider the mouth using the black-colored yarn.

Assembly Instructions

  • Join the eye to the body, starting on round number 8, using a wool needle and aligning the eye center over the body front.
  • Position and sew the two feet to the bottom front of the body so the amigurumi can stand; space them evenly and tack with pins before sewing.
  • Attach the two hands on either side of the body at approximately the same height, ensuring symmetry and a slight forward angle.
  • Sew the two horns to the top of the head, spacing them evenly about the top-center seam and securing firmly with several passes of the yarn needle.
  • Embroider the white highlight and small details on the eye using white yarn to create the glossy look shown in the photographs.
  • Use black yarn to embroider the small mouth centered below the eye, adjusting length and curve to match the pictured expression.

Important Notes

  • πŸ’‘Use a wool needle to close the final hole and to join flat pieces for a neat finish.
  • πŸ’‘Pin parts in place before sewing to ensure correct alignment, especially the eye and feet.
  • πŸ’‘Do not stuff the hands; stuff feet and body firmly but avoid overstuffing to keep shape consistent.

This Mike Wazowski amigurumi pattern is a delightful small project with big personality. It combines simple shaping with a layered eye detail for maximum charm. Perfect for gifting or displaying on your shelf, and easy to customize with yarn color swaps. 🧢😊✨

You ask,

we answer.

FAQs

What size will the finished piece be?

The finished amigurumi measures approximately 11 cm tall when using the recommended 2 mm mercerized cotton and 2.0 mm hook.

Can I use different yarn weights for this pattern?

Yes, you can use different yarn weights but expect a change in final size; choose an appropriate hook for your yarn and adjust stuffing accordingly.

Do I need prior crochet experience for this pattern?

This pattern is rated intermediate and assumes you know basic amigurumi techniques, magic ring, increases, decreases and half double crochet.

How long does this project typically take to complete?

Most crocheters complete this project in about 5-7 hours depending on experience, details and assembly time.