🧶 Beautiful ✨ Detailed 💝 Adorable

Jack Sparrow Amigurumi Pattern

Jack Sparrow Amigurumi Pattern
4.6★ Rating
12-15 Hours Time Needed
3.5K Made This
✂️

Intermediate Level

Ideal for those with basic crochet experience, featuring slightly more advanced stitches and techniques to expand your skills.

⏱️

Multi-Day Project

A rewarding 12+ hour journey—perfect for dedicated crafters who love detailed work.

🧸

Cute Companion

An adorable friend to cherish, handcrafted with love to bring comfort and joy for years to come.

About This Jack Sparrow Amigurumi Pattern

This pattern creates a detailed Jack Sparrow amigurumi with a movable head, layered hair and authentic costume bits. It uses cotton and embroidery threads to achieve fine details like the bandana, vest and dreadlocked hair strands. The pattern includes full round-by-round instructions for each part, plus assembly guidance and finishing tips. Photographs and notes are provided to help you place hair, beads and accessories accurately.

Jack Sparrow Amigurumi Pattern crochet pattern - detailed view of completed project

You will work legs, body, head, arms, hair layers, hat and many accessories with clear stitch counts and sequence. The design focuses on realistic hair placement and tiny costume embroidery for a collector-quality finish.

Why You'll Love This Jack Sparrow Amigurumi Pattern

I absolutely love this pattern because it captures so many little details that make the character instantly recognizable. I enjoy combining crochet and embroidery threads to create texture and realistic costume pieces. The layered hair technique is one of my favorite parts; it lets me play with curls and dreadlock accents. I also love seeing the project come together during the assembly stage — adding beads and the bandana gives it real personality. Making this pattern made me excited to experiment with other character designs using similar techniques.

Jack Sparrow Amigurumi Pattern step 1 - construction progress Jack Sparrow Amigurumi Pattern step 2 - assembly progress Jack Sparrow Amigurumi Pattern step 3 - details and accessories Jack Sparrow Amigurumi Pattern step 4 - final assembly and finishing

Switch Things Up

I love customizing the bandana and beads to make different personalities — try brighter reds or patterned felt for a playful twist.

I often change yarn weight and hook size to create mini keychain versions or larger display dolls; using thinner thread with a 1mm hook makes delightful tiny versions.

I like to embroider extra details on the vest or add metallic thread to the belt for a worn, piratey look; small beads and charms add authenticity.

Try substituting faux-leather strips or ribbon for the belt to add mixed materials and tactile contrast to the doll.

I sometimes add wire in the arms or braid to the hair for posability; if you do this, wrap wire ends carefully and tuck them inside stuffing to avoid poking through.

I recommend experimenting with different eye sizes: 9mm oval eyes give an expressive look while smaller eyes create a cuter aesthetic.

If you prefer a softer silhouette, reduce stuffing slightly and use a looser tension; for a crisp, structured look, tighten tension and stuff firmly.

I enjoy making sets — create several characters with matching hats and accessories to make a small pirate crew for display or gifts.

You can change the hair color to create other characters entirely — try gray for an older pirate or black for a darker style while following the same hair layering technique.

For gift-giving, personalize the doll by embroidering initials on the handkerchief or adding a tiny crocheted compass using leftover yarn.

Common Mistakes & How to Fix Them

✗ Skipping stitch markers during rounds with increases and decreases causes lost stitch counts; place a marker at the start of each round and after major shaping to stay accurate. ✗ Not stuffing the head firmly causes it to lose shape when you decrease; stuff firmly and fill around the neck as you work to preserve mobility and shape. ✗ Changing yarn weight without adjusting hook size changes final size drastically; always swatch with your yarn and hook to reach the intended gauge and dimensions. ✗ Cutting hair or trimming too early leads to uneven locks; finish all layering and secure attachments before trimming to shape evenly and consistently.

Jack Sparrow Amigurumi Pattern

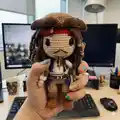
Bring a pint-sized pirate to life with this detailed Jack Sparrow amigurumi pattern. You will crochet each piece — legs, body, head, hair, hat and accessories — with clear step-by-step rounds and helpful photos. This pattern highlights hair layers and tiny costume details to capture Jack's iconic look. Perfect for crafters ready for a rewarding, detailed amigurumi project.

Intermediate 12-15 Hours

Materials Needed for Jack Sparrow Amigurumi Pattern

— Main Fabric

  • 01
    Sinfonia brand cotton thread, 6 strands for body and main pieces (beige/skin, light beige, dark beige) - small amounts of each (approx 10-30g each)
  • 02
    Brown cotton thread (multiple shades) for hair and hat - ~50g total
  • 03
    Red cotton thread for headband - small amount (~5-10g)
  • 04
    Cream cotton thread for shirt and cuffs - ~20g
  • 05
    Madame Tricote N8 embroidery thread (double strand) - dark blue (2 balls), gray, beige, brown, wine color - small skeins for vest embroidery and accents
  • 06
    Additional accent yarns: darker brown for boots and accessories - ~20-30g

— Tools Required

  • 01
    Crochet hook size 2.5mm for main pieces
  • 02
    Crochet hook size 1.5mm and 1mm for fine details and handkerchief
  • 03
    1mm crochet hook for embroidery trims
  • 04
    Safety eyes 9mm oval (or 9-10mm)
  • 05
    Synthetic fiber stuffing
  • 06
    Beads for hair decoration
  • 07
    Needle for sewing and embroidery
  • 08
    Scissors
  • 09
    Stitch markers
  • 10
    Pins for assembly

Progress Tracker

0% Complete

— Legs :

Round 1 :

6 Chains, in the 2nd Stitch from the hook make, 4Sc + Inc4, 3Sc + Inc3 (14)

Round 2 :

4Sc + 4Inc, 4Sc + 2Inc (20)

Round 3 :

BLO 20Sc (20)

Round 4 :

20Sc (20)

Round 5 :

3Sc + 2Dec, 1Dec HDC, 2Dec + 7Sc (15)

Round 6 :

Sc + 5Dec + 4Sc (10)

Round 7-11 :

10Sc (5R) (10)

Info :

Change to a lighter brown.

Round 12 :

BLO (Sc + Inc) *5 (15)

Round 13-14 :

15Sc (2R) (15)

Round 15 :

(Sc + Dec) *5 (10)

Round 16 :

10Sc (10)

— Boot Cuffs :

Info :

Note the orientation of the leg to knit the edge of the boot. In the 10FL of the R12 we will do the cuff.

Round 1 :

Hook with 1 Chain (Sc + Inc) *5 (15)

Round 2-3 :

15Sc (2R) (15)

Info :

Cut yarn over, repeat from R1 to R16 for second leg.

— Joining Legs / Body :

Round 17 (join) :

Chain 4 to serve as union between both legs, join to the center of the second leg, crochet the 10Sc of that leg + 4Sc of the central chains, continue on the other leg with 10Sc and finally the 4Sc of the center chain (diagram in pattern). (join)

Round 17 (body) :

10Sc + 4Sc + 10Sc + 4Sc (28)

Round 18-19 :

28Sc (2R) (28)

Round 20 :

4Sc + Dec, (5Sc + Dec) *3 + Sc (24)

Round 21 :

24Sc (24)

Info :

Change to cream.

Round 22 :

BLO 24Sc put thread on hold, that is, we will not cut it. (24)

Info :

Change to skin tone.

Round 23 :

BLO make 4Dec, 1 front - 1 back, and 1 on each side. (20)

Round 24-28 :

20Sc (5R) (20)

Round 29 :

(2Sc + Dec) *5 (15)

Round 30 :

15Sc (15)

Round 31 :

(Sc + Dec) *5 (10)

Round 32 :

10Sc (10)

Round 33 :

10Inc (20)

Round 34-35 :

20Sc (2R) (20)

Round 36 :

10Dec (10)

Round 37 :

5Dec, Slst (5) *Close*

— T-Shirt :

Info :

We will continue with the cream thread that we had left on R22, and we will work the 24FL of R23.

Round 1 :

1 Chain and turn + 24HDC (24)

Info :

Cut the yarn and make an invisible close, then mark the central point in front of the amigurumi. This is now the last stitch of the row.

Round 2 :

Attach the yarn next to the marker and continue with: 1 Chain stitch + 23 HDC (23)

Round 3 :

1 Chain stitch and turn + 23HDC (23)

Round 4 :

1 Chain stitch and turn + Dec + 19HDC + Dec (21)

Round 5 :

1 Chain stitch and turn + Dec + 17HDC + Dec (19)

Info :

Cut yarn and bind off.

— Head :

Round 1 :

MR 6Sc (6)

Round 2 :

6 Inc (12)

Round 3 :

(Sc + Inc) *6 (18)

Round 4 :

Sc + Inc, (2Sc + Inc) *5 + Sc (24)

Round 5 :

(3Sc + Inc) *6 (30)

Round 6 :

2Sc + Inc, (4Sc + Inc) *5 + 2Sc (36)

Round 7 :

(5Sc + Inc) *6 (42)

Round 8 :

3Sc + Inc, (6Sc + Inc) *5 + 3Sc (48)

Round 9 :

(7Sc + Inc) *6 (54)

Round 10-18 :

54Sc (9R) (54)

Round 19 :

(7Sc + Dec) *6 (48)

Round 20 :

3Sc + Dec, (6Sc + Dec) *5 + 3Sc (42)

Round 21 :

(5Sc + Dec) *6 (36)

Round 22 :

2Sc + Dec, (4Sc + Dec) *5 + 2Sc (30)

Round 23 :

(3Sc + Dec) *6 (24)

Round 24 :

Sc + Dec, (2Sc + Dec) *5 + Sc (18)

Info :

NOTE: Place the eyes between R13-R14 with 12st between them. Embroider the eyebrows with brown thread. Insert the top of the body into the head to obtain a mobile head; fill head firmly and close carefully.

Round 25 :

(Sc + Dec) *6 (12)

— Arms X 2 :

Round 1 :

MR 5Sc (5)

Round 2 :

4Sc + Inc (6)

Round 3 :

5Sc + (2Chain, Sc + Sc at the base of the point) + Sc (8)

Round 4 :

5Sc, skip finger stitches + Sc (6)

Round 5 :

6Sc (6)

Info :

Change to cream.

Round 6 :

6Sc (6)

Round 7 :

BLO 6 Inc (12)

Round 8 :

(Sc + Inc) *6 (18)

Round 9-10 :

18Sc (2R) (18)

Round 11 :

(Sc + Dec) *6 (12)

Round 12 :

12Sc (12)

Round 13 :

(2Sc + Dec) *3 (9)

Round 14-16 :

9Sc (3R) (9)

Info :

You can introduce wire in the arms for mobility; fill slightly and shape thumb by passing a few stitches around it.

Info :

Sleeve Cuffs: In the 6FL of the R8 we will attach yarn + 1 Chain stitch and make Inc of HDC in each point. (12)

— Handkerchief :

Round 1 :

Chain 82, beginning on the 3rd chain from the hook, 80HDC (80)

Round 2 :

Chain 2 and turn + 80HDC (80)

Round 3 :

Chain 4, turn, beginning on the 3rd chain from the hook, 10DC + 72HDC (82)

Round 4 :

Chain 2 and turn, 73HDC + 8DC, do not work the last stitch. (81)

Round 5 :

Chain 2 and turn + 81HDC (81)

Round 6 :

Chain 2 and turn, 80HDC + 8DC, do not work the last stitch. (80)

Round 7 :

Chain 2 and turn + 80 HDC (80)

Info :

Embroider 2 rows of Slst along entire length with wine-colored floss and 1mm needle.

— Jacket :

Round 1 :

Chain 30, beginning in the 3rd Ch from the hook, 28HDC (28)

Round 2 :

Chain 2 turn, 3HDC + Chain 6, skip 6st + 10HDC + Chain 6, skip 6st + 3HDC (28)

Round 3-13 :

Chain 2, turn + 28HDC (11R) (28)

Info :

Mark center upper part of vest with stitch marker. Crochet around contour with Sc until marker, make 2Dec and continue with Sc until you reach the * shown in photos.

— Belt :

Round 1 :

Chain 46, from the 3rd Ch from the hook we will do 44HDC (44)

Round 2 :

Chain 1 turn and continue along the opposite side with 44HDC (45)

— Head Band :

Round 1 :

Ch 50, beginning in the 3rd chain from the hook, 48HDC (48)

Round 2 :

Ch 1 turn + 9Sc + 8HDC + 14DC + 8HDC + 9Sc (48)

Round 3 :

Ch 1 turn + 17HDC + 14DC + 17HDC (48)

— Rear Band :

Round 1 :

Chain 42, beginning in the 3rd Ch from the hook: 8DC + 7HDC + 8Sc + 9HDC + 6DC + 2Trc (40)

— Hair (base rounds) :

Round 1 :

MR 8Sc (8)

Round 2 :

8 Inc (16)

Round 3 :

(Sc + Inc) *8 (24)

Round 4 :

FLO (2Sc + Inc) *8 + Slst (32)

— First Layer (hair strands) :

Round 1-5 :

Chain 28 from the 3rd Ch from the hook, 26HDC *2 (26)

Round 6-12 :

Chain 26 from the 3rd Ch from the hook, 24HDC (24)

Round 13-16 :

Chain 28 from the 3rd Ch from the hook, 26HDC *2 (26)

Info :

You will end up with a total of 25 locks or strands of hair for this layer.

— Second Layer (hair strands) :

Round 1-3 :

Chain 32 from the 3rd ch from the hook we will make 30HDC *2 (30)

Round 4 :

Chain 26 from the 3rd ch from the hook we will make 24HDC *2 (24)

Round 5-9 :

Chain 22 from the 3rd ch from the hook we will make 20HDC (5) (20)

Round 10 :

Chain 26 from the 3rd ch from the hook we will make 24HDC *2 (24)

Round 11-12 :

Chain 32 from the 3rd ch from the hook we will make 30HDC *2 (30)

Info :

We will have a total of 19 locks or strands of hair for the second layer.

— Hat :

Round 1 :

MR 8Sc (8)

Round 2 :

8 Inc (16)

Round 3 :

(Sc + Inc) *8 (24)

Round 4 :

Sc + Inc, (2Sc + Inc) *7 + Sc (32)

Round 5 :

(3Sc + Inc) *8 (40)

Round 6 :

2Sc + Inc, (4Sc + Inc) *7 + 2Sc (48)

Round 7 :

48Sc (48)

Round 8 :

(5Sc + Inc) *8 (56)

Round 9-12 :

56Sc (4R) (56)

Round 13 :

FLO 3Sc + Inc, (6Sc + Inc) *7 + 3Sc (64)

Info :

Change to Brown yarn.

Round 14 :

(7Sc + Inc) *8 (72)

Round 15 :

(5Sc + Inc) *12 (84)

Round 16 :

(Inc + 6Sc) *12 (96)

Round 17 :

(Inc + 7Sc) *12 (108)

Round 18 :

(Inc + 8Sc) *12 (120)

Info :

Fold the brim of the hat to the desired shape.

— Joining pieces / Assembly :

Info :

Place the hair on the head using pins to fix while accommodating strands. Sew or glue strands with a needle and thread; leave free 4 strands of the 1st layer and 3 strands of the 2nd layer in front of the face of the amigurumi.

Info :

Make a braid with the strands of 32 chains previously woven; the leftover strands go under the headband except the 3 front strands separated. Place the band over the head and sew it on, then tie the band at the back.

Info :

To simulate dreadlocks tie a long strand of thread and wrap it around the lock a few times, hide excess inside the hair strand and add beads to front strands for character detail.

Assembly Instructions

  • Place the hair on the head using pins to arrange strands; sew or glue the strands in place leaving 4 strands of the 1st layer and 3 strands of the 2nd layer free at the front.
  • Insert the top of the body into the head before final decreases to create a mobile head; close decreases around the neck and weave thread securely to prevent head from slipping off.
  • Position arms on either side of the body and sew through the body rounds to ensure a secure attachment and natural pose; use a few whipstitches and hide thread ends.
  • Sew the hat to the head brim if desired, fold brim to shape and tack in place; attach the headband over hair and tie or sew at the back for a finished look.

Important Notes

  • 💡Remember that the final size of the amigurumi is determined by the yarn thickness and crochet hook size; in the pattern the finished dimensions are approximately 20cm high by 9cm wide with recommended threads.
  • 💡Read the entire pattern before beginning to understand the project flow and assembly sequence, as this is an intermediate-level pattern that assumes basic amigurumi skills.
  • 💡Use stitch markers at the start of rounds and during shaping to keep track of stitch counts and prevent mistakes.
  • 💡When changing colors or working BLO/FLO rows, keep track of which loop you are using to maintain consistent edges and attachment points.

This Jack Sparrow amigurumi pattern brings a beloved pirate to life with layered hair, tiny accessories and a floppy hat. Make it for fans, gifts, or display — each little bead and braid adds character and charm. Enjoy the process and personalize the details for a unique handcrafted treasure. 🧶⚓️

You ask,

we answer.

FAQs

What size will the finished piece be?

The finished amigurumi measures approximately 20 cm tall by 9 cm wide when using the recommended threads and hook sizes.

Can I use different yarn weights for this pattern?

Yes, but changing yarn weight will affect final size and texture; use an appropriate hook and expect size variations if you switch weights.

Do I need prior crochet experience for this pattern?

This pattern is rated intermediate, so basic knowledge of crochet stitches (SC, HDC, DC), increases and decreases is recommended for best results.

How long does this project typically take to complete?

Most crocheters complete this project in 12-15 hours across several sessions, depending on experience and how much time you spend on hair and assembly details.