About This Harry Potter Ear Saver Pattern
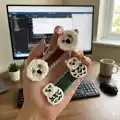
This pattern creates a practical mask ear saver with decorative owl buttons inspired by Harry Potter colors. You can make two styles of buttons: a simple owl face and a fuller owl motif, then attach them to a slim band that holds mask elastic. The instructions include exact rounds, materials, and assembly steps so you can produce neat, durable ear savers.
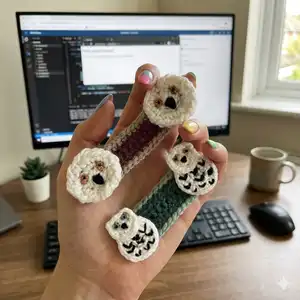
Both button versions are small and quick to crochet and are designed to let mask elastic slide under the button edge. The band is worked flat and sized to fit most adults, and you can easily adapt stitch count for different lengths.
Why You'll Love This Harry Potter Ear Saver Pattern
I absolutely love this pattern because it mixes practicality with a bit of whimsy — the owl buttons bring a playful Harry Potter touch to an otherwise functional accessory. I enjoy small, fast projects and this ear saver fits that perfectly, giving a tangible, useful result in just a few hours. The two button options let me switch styles depending on my mood or yarn stash. I also appreciate how easy it is to customize the band length and colors, making it a great scrap-busting pattern.
Switch Things Up
I love changing the color palette to match different Hogwarts houses; try scarlet and gold for Gryffindor or green and silver for Slytherin to create collectible sets.
I often swap yarn weights and hooks to create mini or jumbo versions — using a bulkier yarn and larger hook makes a chunky, fast option while fine yarn yields delicate, keychain-sized buttons.
I sometimes embroider additional facial features or add felt shapes beneath the button for a layered look; tiny stitched eyebrows or eyelids change the owl's expression dramatically.
Try using metallic or sparkly yarn for the gold accents to give the buttons a magical shimmer that catches the light when worn.
For extra durability, I use cotton yarn for the band so the ear saver holds up to machine washing; synthetic blends also work but may be less resilient over many washes.
I recommend experimenting with placement of the eyes and beak prior to stitching so you can preview the owl's personality and symmetry before securing details permanently.
If you want the ear saver to be adjustable, add a small buttonhole or loop on one end and a button on the other so the length can be modified for kids or adults.
I sometimes replace the sewn-on owls with detachable buttons mounted on snaps so the decorative piece can be removed for washing separately from the band.
Want to make it into a gift? I add a short ribbon loop tucked under one button so the ear saver can hang from a hook or be presented on a card for gifting.
I also enjoy combining embroidery thread for tiny contrasting accents in the owl feathers to create subtle texture and visual interest without adding bulk.
Common Mistakes & How to Fix Them
✗ Failing to leave long tails when fastening off can make assembly difficult; always leave the recommended tail length for sewing and attaching buttons securely.
✗ Skipping the stitch marker for the continuous spiral can cause confusion in rounds; use a marker to track the last stitch and move it each round to maintain consistent shaping.
✗ Sewing buttons too close to the edge may block mask elastic; attach buttons slightly inside the band edge and avoid sewing the very rim so elastic can slide underneath.
✗ Not checking gauge or band length results in a band that is too short or too long; measure as you go and adjust chain count so the finished band reaches about 5.5 in (14 cm) for a standard fit.