🧢 Beautiful ✨ Detailed πŸ’ Adorable

Harry Potter Amigurumi Pattern

Harry Potter Amigurumi Pattern
4.7β˜… Rating
5-7 Hours Time Needed
3.1K Made This
βœ‚οΈ

Intermediate Level

Ideal for those with basic crochet experience, featuring slightly more advanced stitches and techniques to expand your skills.

⏱️

Weekend Treat

Takes 5-7 hours, making it an enjoyable project to finish over a couple of days.

🧸

Cute Companion

An adorable friend to cherish, handcrafted with love to bring comfort and joy for years to come.

About This Harry Potter Amigurumi Pattern

This pattern creates a 20-30 cm tall Harry Potter amigurumi, depending on yarn weight and hook size. It includes full instructions for arms, legs, body/head, hair, scarf and cloak with clear round counts. Youll learn shaping techniques, colour changes and finishing tips to bring the character to life.

Harry Potter Amigurumi Pattern crochet pattern - detailed view of completed project

The pattern uses DK/light worsted yarn and a 3 mm hook for the sample shown, with alternatives suggested for different sizes. Photos and placement notes are included for key steps like eye placement and scarf finishing.

Why You'll Love This Harry Potter Amigurumi Pattern

I absolutely love this pattern because it captures the charm of Harry Potters classic look while staying simple enough to enjoy. I enjoyed designing the little scarf and cloak details that really bring the character to life. Sewing the hair and embroidering the lightning scar is such a satisfying finishing touch that makes each doll unique. I find the construction (legs into body, then head shaping) really clever and easy to follow, which makes assembly feel rewarding.

Harry Potter Amigurumi Pattern step 1 - construction progress Harry Potter Amigurumi Pattern step 2 - assembly progress Harry Potter Amigurumi Pattern step 3 - details and accessories Harry Potter Amigurumi Pattern step 4 - final assembly and finishing

Switch Things Up

I love how easy it is to customize this pattern by changing yarn colors to create different houses or outfits.

I often make the scarf in different colour combos to give each doll its own personality.

If you want a smaller version I switch to a finer yarn and a 2.75 mm hook and work the same rounds for a mini keepsake.

To make a chunkier, cuddlier version I use bulky yarn and a larger hook and adjust stuffing to suit.

I sometimes embroider different facial expressions or add felt glasses for extra character and realism.

You can add wire armature inside limbs for posable arms if you want the figure to hold accessories.

Try using safety eyes for speed, or embroider eyes for a child-safe versionβ€”both look great.

I recommend playing with hair styles: a crocheted cap, yarn bangs, or even a tufted fringe can change the look dramatically.

For gifting, consider crocheting a tiny book or wand as an accessory to make the toy extra special.

I also enjoy adding simple surface crochet details on the cloak to mimic texture or trim for a more finished appearance.

Common Mistakes & How to Fix Them

βœ— Skipping stitch markers at round starts leads to lost stitch counts; use a stitch marker at the first stitch of every round to maintain accurate rounds. βœ— Not stuffing as you go can create uneven shapes in body and limbs; stuff gradually and evenly while crocheting to shape the pieces correctly. βœ— Changing colour without securing tails neatly can leave loose ends visible; weave in or carry yarn neatly at colour changes to hide ends. βœ— Forgetting to place safety eyes before stuffing may be difficult later; position and fasten safety eyes between the recommended rounds before heavy stuffing and continue shaping.

Harry Potter Amigurumi Pattern

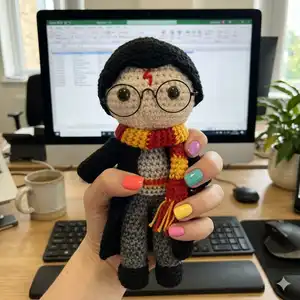
Create your own magical Harry Potter amigurumi with this detailed crochet pattern. You will enjoy stitching the classic robe, scarf, and signature lightning scar while building your amigurumi skills. The pattern includes step-by-step rounds for arms, legs, body, hair, scarf and cloak with clear placement notes. Perfect for gift-making or adding a wizarding touch to your handmade collection.

Intermediate 5-7 Hours

Materials Needed for Harry Potter Amigurumi Pattern

β€” Main Fabric

  • 01
    DK/Light Worsted Weight yarn (3) acrylic for sample, used with 3 mm crochet hook
  • 02
    Worsted weight yarn option for larger size (approx amounts depend on chosen size)
  • 03
    Colors required: Flesh (skin tone) - approx 25-50 g
  • 04
    Black yarn - approx 50-100 g
  • 05
    Light grey yarn - approx 25-50 g
  • 06
    Dark grey yarn - approx 25-50 g
  • 07
    Yellow yarn - small amount for jersey stripe and scarf - approx 10-25 g
  • 08
    Red yarn - small amount for scar and scarf - approx 10-25 g

β€” Tools Required

  • 01
    Crochet hook size 3 mm (recommended)
  • 02
    Crochet hook size 2.75 mm (optional for smaller size)
  • 03
    Safety eyes (optional - can be embroidered instead)
  • 04
    Glasses (optional)
  • 05
    Scissors
  • 06
    Yarn needle for sewing
  • 07
    Stitch markers
  • 08
    Polyester stuffing
  • 09
    Pins for assembly

Progress Tracker

0% Complete

β€” Arms :

Info :

ARMS (MAKE 2)

Info :

Using flesh coloured yarn:

Round 1 :

4 sc into magic ring (4)

Round 2 :

4 inc (8)

Round 3-4 :

8 sc (2 rounds)

Info :

Change to light grey coloured yarn:

Round 5 :

8 sl

Round 6 :

8 sc blo

Round 7-14 :

8 sc (8 rounds)

Info :

Fasten off.

β€” Legs :

Info :

BODY STARTING AT FEET, STUFFING AS YOU GO:

Info :

Legs: Using black coloured yarn:

Round 1 :

6 sc into magic ring (6)

Round 2 :

6 inc (12)

Round 3 :

(3 sc, 3 inc) 2 times (18)

Round 4 :

18 sc blo (18)

Round 5 :

18 sc

Round 6 :

2 sc, 7 dec, 2 sc (11)

Info :

Change to dark grey coloured yarn:

Round 7 :

11 sl

Round 8 :

11 sc blo

Round 9-18 :

11 sc (10 rounds)

Info :

Fasten off.

Info :

Make second leg, but do not fasten off.

Info :

If you are not already at the side of leg with foot facing forward, sc until there. Chain 1 stitch.

β€” Body :

Round 1 :

11 sc around leg that you fastened off (so legs are then attached to each other), 1 sc in ch, 11 sc around second leg, 1 sc in ch (24)

Round 2 :

10 sc, dec, 10 sc, dec (22)

Round 3 :

22 sc

Info :

sc until at centre of back

Info :

Change to light grey coloured yarn:

Round 4 :

22 sl

Round 5 :

22 sc blo

Info :

Change to yellow coloured yarn:

Round 6 :

22 sc

Info :

Change to light grey coloured yarn:

Round 7-8 :

22 sc (2 rounds)

Round 9 :

5 sc, 1 dec, 9 sc, 1 dec, 4 sc (20)

Round 10-11 :

20 sc (2 rounds)

Info :

Sc to side of body with feet facing forward if not already there

Round 12 :

8 sc around arm, 10 sc on body, 8 sc around other arm, 10 sc on body (36)

Round 13 :

(1 sc, 1 dec) x 12 (24)

Round 14 :

12 dec (12)

Info :

Change to flesh coloured yarn:

Round 15 :

12 sl

Round 16 :

12 sc blo

Round 17 :

12 inc (24)

Round 18 :

24 inc (48)

Round 19-26 :

48 sc (8 rounds)

Info :

Place safety eyes between rounds 24 and 25, making sure they are centre on face and 8 stitches apart.

β€” Head :

Round 27 :

(6 sc, 1 dec) x 6 (42)

Round 28 :

(5 sc, 1 dec) x 6 (36)

Round 29 :

(4 sc, 1 dec) x 6 (30)

Round 30 :

(3 sc, 1 dec) x 6 (24)

Round 31 :

(2 sc, 1 dec) x 6 (18)

Round 32 :

(1 sc, 1 dec) x 6 (12)

Round 33 :

dec x 6 (6)

Info :

Fasten off, gather around fasten off stitches and pull tight to close hole at top of head.

β€” Hair :

Info :

Using black coloured yarn:

Round 1 :

7 sc into magic ring

Round 2 :

7 inc (14)

Round 3 :

(1 sc, 1 inc) (21)

Round 4 :

(2 sc, 1 inc) (28)

Round 5 :

(3 sc, 1 inc) (35)

Round 6 :

(4 sc, 1 inc) (42)

Round 7 :

(5 sc, 1 inc) (49)

Round 8-13 :

49 sc (6 rounds)

Round 14 :

(1 sc, 1 dc, 1 dc, 1 tr, 1 dc, 1 dc, 1 sc) x 7

Info :

Fasten off. Pin hair to head and then sew into place.

Info :

Using red yarn, embroider lightning bolt scar on forehead.

Info :

Working around posts of yellow stitches on jersey, 20 sl stitches in red.

β€” Scarf :

Info :

Using red coloured yarn:

Round 1 :

8 ch and join in a loop

Round 2-5 :

8 sc (4 rounds)

Info :

Using yellow coloured yarn:

Round 6-9 :

8 sc (4 rounds)

Info :

Using red coloured yarn:

Round 10-13 :

8 sc (4 rounds)

Info :

Repeat the previous 8 rounds until you have 13 stripes in total. Fasten off. Fold scarf flat, sew together cast on stitches, sew together cast off stitches. Cut eight 10 cm lengths of yellow yarn and eight 10 cm lengths of red yarn. Using one length of red and one length of yellow, fold lengths in half, draw loop through scarf and then pull cut ends through loop (see photos).

β€” Cloak :

Info :

Sleeves (make two): Using black colour yarn

Round 1 :

12 ch and join in a loop

Round 2-11 :

12 sc (10 rounds)

Info :

Main body of cloak: Using black coloured yarn

Round 1 :

Row 1: 21 ch

Round 2 :

Row 2: starting in second chain from hook 20 sc

Round 3-24 :

Row 3-24: 1 ch, starting in second chain from hook 20 sc (22 rows)

Round 25 :

Row 25: 1 ch 5 sc, 12 sc around arm, 10 sc, 12 sc around other arm, 5 sc (44)

Round 26 :

Row 26: 1 ch, 22 dec (22)

Round 27-28 :

Row 27-28: 1 ch, 22 sc (2 rounds)

Round 29 :

Row 29: 1 ch, 11 dec (11)

Info :

Fasten off.

Info :

Weave in yarn ends.

Assembly Instructions

  • Place safety eyes between rounds 24 and 25, centre on face and 8 stitches apart before stuffing the head.
  • Pin hair piece to head to check placement, then sew hair into place securely using yarn needle.
  • Fold scarf flat and sew together cast on edges and cast off edges; add fringes by folding paired yarn lengths and knotting through edge loops.
  • Sew cloak sleeves into place and attach main cloak body around shoulders, matching armholes and weaving in ends for a clean finish.
  • Sew arms to body at the arm openings (round 12 area), angling slightly forward for a natural pose.
  • Attach legs securely at the base of the body where stitches were joined, ensuring even spacing and stability.

Important Notes

  • πŸ’‘Use stitch markers to mark the first stitch of each round to keep track of rounds and shaping.
  • πŸ’‘Stuff pieces gradually as you crochet rather than waiting until the end to achieve smooth, even shaping.
  • πŸ’‘Place and secure safety eyes between the recommended rounds before heavy stuffing to avoid difficulty attaching them later.
  • πŸ’‘Pin hair to the head to confirm correct placement before sewing to ensure a neat final look.

This Harry Potter amigurumi pattern brings a little wizard to life with a handmade robe, scarf and tiny lightning scar. Its a delightful project for fans who love crafting special, characterful toys. Make one as a magical gift or keep it as a charming handmade keepsake. 🧢✨

You ask,

we answer.

FAQs

What size will the finished piece be?

The finished amigurumi measures approximately 30 cm (12 inches) using worsted weight yarn and a 3 mm crochet hook; smaller versions can be made with lighter yarn and smaller hooks.

Can I use different yarn weights for this pattern?

Yes, you can use different yarn weights but your finished size will change; choose an appropriate hook for your yarn and be aware that stitch counts will remain the same.

Do I need prior crochet experience for this pattern?

This pattern is rated intermediate and assumes you know single crochet, increases, decreases, working in the round, and basic colour changes.

How long does this project typically take to complete?

Most crocheters finish this project in 5-7 hours, though time varies by experience level and the amount of detailing and sewing you do.