🧢 Beautiful ✨ Detailed πŸ’ Adorable

Easy Backpack Pattern

Easy Backpack Pattern
4.1β˜… Rating
2-3 Hours Time Needed
3.8K Made This
βœ‚οΈ

Beginner Friendly Level

Perfect for those just starting their crochet journey, with clear instructions and simple techniques

⏱️

Bite-Sized Project

Finishes in 2-4 hoursβ€”perfect for an afternoon of creative relaxation.

✨

Stylish Touch

An elegant detail to elevate any look, combining traditional techniques with contemporary design sensibilities.

About This Easy Backpack Pattern

This pattern teaches you how to create a small, structured crochet backpack using t-shirt yarn or braided cotton cord and a premade leather bottom kit. Youll learn the cross single crochet (CrSC) technique to build the body, attach the leather valve and lock, and finish with a sewn lining. The finished bag is compact, practical, and perfect for gifting or everyday use.

Easy Backpack Pattern crochet pattern - detailed view of completed project

Designed for beginners, the instructions include specific stitch counts and helpful photos so you can follow along easily. Materials include a leather bottom kit and common tools, plus links to purchase supplies and a video tutorial.

Why You'll Love This Easy Backpack Pattern

I absolutely love this pattern because it turns simple materials into a polished, wearable accessory you can make in just a few hours. I enjoy the tactile process of working with t-shirt yarn and seeing the structure form as you add rows of CrSC. The combination of crochet and hardware makes the final bag look professional while still being handmade. I appreciate how beginner-friendly it is β€” I designed the steps and photos to remove guesswork and help you feel confident every step of the way.

Easy Backpack Pattern step 1 - construction progress Easy Backpack Pattern step 2 - assembly progress Easy Backpack Pattern step 3 - details and accessories Easy Backpack Pattern step 4 - final assembly and finishing

Switch Things Up

I love how easy it is to customize this backpack by switching yarn colors; try ombre or stripes for a fresh look.

I sometimes use bulky t-shirt yarn with a larger hook to make a chunkier, more structured bag that doubles as a market tote.

If I want a smaller version for a keychain or doll, I use thinner cord and a smaller bottom plate and scale the hole count down proportionally.

I often change the valve and lock style β€” a magnetic snap or button can give a different finish and may be easier for quick access.

I like to add interior pockets to the lining by sewing small fabric or zippered pockets before inserting the lining into the bag.

I recommend trying contrast-colored tightening cord or metal beads on the cord ends for an extra decorative touch that also strengthens the closure.

For a dressier bag I swap the cotton cord for a mercerized cotton or ribbon cord to give a subtle sheen and smoother texture.

I sometimes add short leather straps instead of adjustable handles for a handbag style; attach with the same screws and secure with glue for peace of mind.

I like to embroider a small motif on the outer top rows before attaching the valve for a personalized signature detail.

For a beach-friendly bag, use water-resistant polyester cord and skip the lining for faster drying and simpler construction.

I also experiment with different bottom shapes and pre-made kits to create square, oval, or round bases which change the bag silhouette dramatically.

Finally, dont be afraid to mix materials β€” a canvas lining, faux leather flap, or a woven strap can turn the basic pattern into a signature piece you love to wear.

Common Mistakes & How to Fix Them

βœ— Pulling the working yarn too tightly when crocheting SC creates visible holes between stitches; keep the working thread just above the level of the column and hold the hook at an angle to keep stitches snug but flexible. βœ— Starting the trim with too short a tail will make it hard to finish neatly; leave about 40 inches (1 meter) of thread when you begin so you can join and bind off securely.
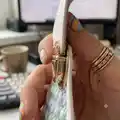
 βœ— Forgetting to count CrSC when matching the valve holes will misalign the valve; count the number of CrSC that equals the holes on the valve and place the valve in the middle before stitching. βœ— Cutting the working thread too soon when binding off will make it difficult to continue rows; bind off with the end of the thread and use the end to pull through the last loop, tightening and hiding it on the wrong side.

Easy Backpack Pattern

Make a stylish, small crochet backpack using t-shirt or braided cotton cord. This beginner-friendly pattern walks you through trimming the leather bottom, crocheting the body with cross single crochet, installing the lock and handles, and sewing a lining. Youll finish a polished, wearable bag in about 3 hours with clear step-by-step instructions and photos.

Beginner Friendly 2-3 Hours

Materials Needed for Easy Backpack Pattern

β€” Main Fabric

  • 01
    Cotton braided cord, 5 mm, approximately 165 yards (150 meters) (or Bobbiny 5 mm cotton cord)
  • 02
    T-shirt yarn 7-9 mm (alternative) or polyester cord 4-5 mm, approximately 175 yards (150 meters)
  • 03
    Backpack bottom kit (leather or faux leather) approximately 10 x 20 cm including bottom, valve with lock, 2 handles and tightening tips
  • 04
    Small amounts of matching cord for tightening and decorative ends

β€” Tools Required

  • 01
    Crochet hook size N4 (4 mm)
  • 02
    Crochet hook size N6 (6 mm)
  • 03
    Backpack kit (bottom 10x20 cm, valve with lock, 2 handles, tightening with tips)
  • 04
    Scissors
  • 05
    Small Phillips screwdriver
  • 06
    Plate and clamp (for installing the lock)
  • 07
    Yarn needle for hiding ends
  • 08
    Superglue or colorless nail polish to secure screws

Progress Tracker

0% Complete

β€” Materials and tools :

Info :

Cotton braided cord, 5 mm, 165 yards (150 meters) (t-shirt yarn 7-9 mm or polyester cord 4-5 mm, 175 yards (150 meters)). In this example, Im using the cotton cord - Bobbiny, 5 mm. Kit for backpack (bottom 10*20 cm, valve with lock, 2 handles, tightening with tips). Hook N4=4 mm and N6=6 mm; Scissors; Small Phillips screwdriver. Finished backpack from the specified materials: length - 9 1/2 inches (24 cm), width - 6 inches (15 cm), height - 11 1/2 inches (29 cm). Gauge: 9 stitches and 8 row = 4*4 inches (10*10cm). Links to kits and video provided in original pattern.

β€” Abbreviations :

Info :

CH - chain stitch; SlSt - slip stitch; SC - single crochet; CrSC - cross stitch single crochet; Inc - increase (2 CrSC in 1).

β€” Trim the bottom :

Info :

Take the hook N4.

Info :

Leave the end of the thread about 40 inches (1 meter) long.

Info :

Insert the hook in the hole of the bottom. Pull out the loop, crochet CH.

Info :

Crochet SC in each hole of the bottom. Crochet the last SC with the end of the thread and pull it out. Insert the hook from the wrong side in the 1st SC of the row, pull the end. Tighten the end back into the last loop of the row. Don’t cut the working thread.

β€” Crochet the wall-side :

Info :

Take the hook N6. Insert the hook on the back loop and jumper only. Pull out the loop and crochet CH.

Round 1 :

Crochet this row on the back loop and jumper only. Crochet row CrSC. Make 6 Inc in the places identified on the photo. I have the bottom with 43 holes. Therefore, there are 49 CrSC in this row. You may have the bottom with a different amount of the holes and therefore another number of CrSC in this row.

Info :

Next, crochet CrSC. For this, yarn over the thread under the hook (see photo reference in original pattern).

Info :

Bind off the row with the end of the thread (and the each subsequent row). Twist the working thread and the end. Insert the hook under last loop of the previous row, pull out the loop, crochet CH to start the next row.

Round 2 :

49 CrSC, CH.

Round 3-16 :

49 CrSC, CH.

Round 17 :

49 CrSC, insert the hook on the back loop only, pull out the loop, CH.

Round 18 :

49 CrSC on the back loop only, CH.

Round 19 :

49 CrSC. Cut the thread, pull out in the loop, bind off the row. Tie the knot both ends on the wrong side. Hide the ends. Fold the sides with your hands.

β€” Crochet in the valve :

Info :

Take the hook N4. Count the number of CrSC that equals the number of holes on the valve on the back side of the backpack, in the middle. Crochet in the 3rd row from the top.

Info :

Start out the thread from the inside. Insert the hook in the 1st hole, pull out the loop. Insert the hook in the next hole, skip 1 CrSC. Pull out the loop, SlSt.

Info :

Next, crochet SlSt in each hole, skipping 1 CrSC. Last SlSt crochet behind the valve. Cut the thread, pull out in the loop, tighten back in the wrong side.

Info :

At the beginning of crocheting, pull out the thread to the front side behind the valve. Insert the hook under the 1st loop, pull out the thread, tighten it back to the wrong side. Strengthen and hide the ends on the wrong side.

β€” Install the lower part of the lock :

Info :

Cut off 3 pieces of cord 8 inches (20 cm) long each. Put the lock on the back side. Press down with a plate and clamp. Cut off the excess with scissors, if the plate sticks out.

Info :

Position the lower part of the lock to where it is supposed to be. Pull out the pieces on the wrong side. Tie 3 knots in pairs. Strengthen, cut and hide the ends.

β€” Assembly :

Info :

Count 3 CrSC from the lock to the right and to the left. Insert the tightening. Put it through 6 CrSC on the front side, through 3 CrSC on the wrong side, then through 6 CrSC on the front side.

Info :

Put the tightening on the other side mirrored. Put on the stopper. Fasten the handles with a small Phillips screwdriver. Adjustable part of handles should be at the bottom. Fix all the screws with a drop of superglue or colorless nail polish.

β€” Sew in the lining :

Info :

The lining should repeat the shape of the backpack. Put the lining inside. Straighten the lining inside with your hands or pins.

Info :

Sew the lining to the bag with hidden stitches. All seams should be hidden inside. Insert the needle over the edge of the lining. Make few strengthening stitches around the perimeter of the seam. Steam the seam with an iron through a damp cloth, if necessary.

β€” Finished :

Info :

Congratulations! Your cute backpack is ready. Follow the original video link or shop links for kit purchases and additional photos.

Assembly Instructions

  • Position and attach the leather bottom by crocheting SC into each hole around the bottom, then join the last SC to the first SC from the wrong side and tighten the tail into the last loop before continuing.
  • Crochet the wall-side onto the bottom using CrSC in the back loop only, increasing 6 times evenly in the first row to match the bottom curvature, then work straight rows to the desired height before binding off.
  • Center and stitch the valve: count CrSC to match the valve holes, crochet SlSt through each hole skipping 1 CrSC, cut and tighten the thread, then hide ends on the wrong side.
  • Install lower lock hardware by threading three 20 cm cord pieces through the lock plate, knotting pairs on the wrong side, trimming and hiding ends, then pressing the lock into place with a plate and clamp.
  • Thread and secure the tightening cord through counted CrSC channels (6 front, 3 wrong side, 6 front), mirror on opposite side, add stopper, then fasten leather handles with the screwdriver and secure screws with superglue.

Important Notes

  • πŸ’‘When crocheting SC so there are no holes in the fabric, pull the working thread just above the level of the column and hold the hook at a slight angle rather than perpendicular.
  • πŸ’‘When working with t-shirt yarn from a bobbin, take the thread from the outside of the bobbin rather than the middle so it unwinds more easily while crocheting.
  • πŸ’‘Do not cut the working thread after trimming the bottom; use the tail to bind off and tighten the first loop of the next row so the join is secure and neat.
  • πŸ’‘Count your CrSC carefully to match the number of holes on your leather valve and bottom; different bottom kits may have different hole counts and you must adapt increases accordingly.

This easy backpack pattern lets you craft a chic, handmade bag with a leather bottom and simple CrSC stitch construction. Its quick to make, beginner-friendly, and uses readily available t-shirt or braided cord for a trendy texture. Perfect for gifts or a weekend project β€” enjoy creating and customizing your own bag! 🧢✨

You ask,

we answer.

FAQs

What size will the finished piece be?

The finished backpack measures approximately 9 1/2 inches (24 cm) long, 6 inches (15 cm) wide, and 11 1/2 inches (29 cm) tall when using the recommended materials and hook sizes.

Can I use different yarn weights for this pattern?

Yes, you can substitute yarn, but the yarn thickness changes the final size and the hole count may need adjustment; use an appropriate hook size and make test rows to ensure gauge and fit with the leather bottom.

Do I need prior crochet experience for this pattern?

This pattern is beginner friendly; however, you should be comfortable with single crochet, slip stitch, and following row counts. The CrSC technique is demonstrated and is easy to learn with the photos and video link.

How long does this project typically take to complete?

Most crocheters complete this project in about 2-3 hours, depending on experience and whether you prepare the lining and hardware in advance.