🧢 Beautiful ✨ Detailed πŸ’ Adorable

Cute Cat Amigurumi Pattern

Cute Cat Amigurumi Pattern
4.6β˜… Rating
5-7 Hours Time Needed
1.9K Made This
βœ‚οΈ

Intermediate Level

Ideal for those with basic crochet experience, featuring slightly more advanced stitches and techniques to expand your skills.

⏱️

Weekend Treat

Takes 5-7 hours, making it an enjoyable project to finish over a couple of days.

🧸

Cute Companion

An adorable friend to cherish, handcrafted with love to bring comfort and joy for years to come.

About This Cute Cat Amigurumi Pattern

This pattern guides you through crocheting a small, sitting cat amigurumi with a sculpted muzzle and curled tail. The design includes separate pieces for ears, legs, hind legs and tail for easy assembly. It uses round-by-round instructions and clear photos to show placement and finishing touches.

Cute Cat Amigurumi Pattern crochet pattern - detailed view of completed project

The finished toy has charming facial details and a tiny bow for personality. Full joining instructions are provided so you can sew parts securely and neatly.

Why You'll Love This Cute Cat Amigurumi Pattern

I absolutely love this pattern because it transforms simple stitches into a characterful little cat with a big personality. I enjoyed designing the sculpted muzzle and little bow which add so much charm. I love that the pattern is modular β€” you make ears, legs and tail separately and then assemble them so you have complete control over placement. I also appreciate the clear step-by-step rounds that helped me keep every stitch consistent while making shaping simple and predictable.

Cute Cat Amigurumi Pattern step 1 - construction progress Cute Cat Amigurumi Pattern step 2 - assembly progress Cute Cat Amigurumi Pattern step 3 - details and accessories Cute Cat Amigurumi Pattern step 4 - final assembly and finishing

Switch Things Up

I love experimenting with colors; you can swap the main grey for cream, brown, or pastel tones to create very different personalities for each cat.

I often change yarn weight and hook size to make mini or large versions; using a thicker yarn and larger hook gives a chunky cuddly cat while finer yarn creates a delicate mini version.

I like to substitute safety eyes with embroidered eyes for a baby-safe toy; embroidering different expressions gives each cat a unique look.

Try adding a small crocheted sweater or tiny scarf for seasonal variation; this pattern pairs well with simple accessory modules you can design yourself.

For a posable version, I sometimes insert a short length of wire in the tail or limbs before stuffing to create a flexible poseable tail and legs.

I enjoy using two-tone yarn for the head or tail to add a subtle striped or shaded effect without switching colors every round.

Embroider whiskers and nose with contrasting thread thickness to change the facial style from cartoonish to realistic.

You can make a set of cats in matching or complementary colors to give as a themed gift set or decorate a nursery shelf with variety.

Change the bow color, add a tiny bell or button, or stitch on little patches to personalize each amigurumi and make it special for the recipient.

I recommend trying different stuffing levels to adjust body firmness β€” firmer stuffing gives a sturdier toy while softer stuffing makes it cuddlier and more pliable.

Common Mistakes & How to Fix Them

βœ— Skipping stitch markers during shaping can make rounds and increases go off-track; place stitch markers at the start of each round and after increases to maintain correct stitch counts. βœ— Not stuffing as you go often creates lumps or flat areas in the head and body; stuff gradually and evenly, adding small amounts frequently while shaping to keep a smooth surface. βœ— Forgetting to count stitches after decreases leads to uneven shaping and mismatched joins; count your stitches at the end of each round especially after rows with multiple changes. βœ— Pulling yarn too tightly on small pieces (ears, muzzle) can distort the shape and make sewing difficult; keep a consistent, relaxed tension for neat, sewable edges.

Cute Cat Amigurumi Pattern

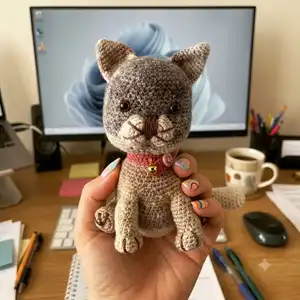
Create an adorable hand-crocheted cat amigurumi with this clear, photo-supported pattern. You will make a cuddly cat with a rounded head, expressive muzzle, ears, four legs, a curled tail and a little bow β€” perfect as a gift or home decor. The pattern includes full round-by-round instructions and assembly notes so you can stitch confidently and finish a charming toy.

Intermediate 5-7 Hours

Materials Needed for Cute Cat Amigurumi Pattern

β€” Main Fabric

  • 01
    Yarn - main: Grey (Mixed Colours)
  • 02
    Main Color: Grey (Mixed Colours)
  • 03
    A: Dark Brown (used for features)
  • 04
    B: Red (used for bow)
  • 05
    Small amounts of cream/white for muzzle and tail tip

β€” Tools Required

  • 01
    Crochet hook size 2.5 mm (or size that fits your yarn)
  • 02
    Scissors
  • 03
    Polyester stuffing
  • 04
    Tapestry/yarn needle for sewing
  • 05
    Stitch markers
  • 06
    Pins for positioning pieces
  • 07
    Safety eyes (place between Rnd-17 and Rnd-18)
  • 08
    Small button for collar (optional)

Progress Tracker

0% Complete

β€” HEAD :

Round 1-6 :

Rnd 1-6 sc in a mr

Round 2 :

Rnd 2-6 sc inc(12)

Round 3 :

Rnd 3-(6 times)1 sc into sc next inc(18)

Round 4 :

Rnd 4-(6 times)2 sc into sc next inc(24)

Round 5 :

Rnd 5-(6 times)3 sc into sc next inc(30)

Round 6 :

Rnd 6-(6 times)4 sc into sc next inc(36)

Round 7 :

Rnd 7-(6 times)5 sc into sc next inc(42)

Round 8 :

Rnd 8-(6 times)6 sc into sc next inc(48)

Round 9 :

Rnd 9-(6 times) 7 sc into sc next inc(54)

Round 10-18 :

Rnd 10-18-(9 ring)sc into sc(54)

Round 19 :

Rnd 19-19 sc into sc (6 sc inc)4 sc into sc(6 sc inc)19 sc into sc(66)

Round 20-25 :

Rnd 20-25-(6 ring)sc into sc(66)

Round 26 :

Rnd 26-(6 times)9 sc into sc next dec(60)

Info :

Place the safe eyes between Rnd-17-18. There will be 8 sc between them.

Round 27 :

Rnd 27-(6 times)8 sc into sc next dec(54)

Round 28 :

Rnd 28-(6 times)7 sc into sc next dec(48)

Round 29 :

Rnd 29-(6 times)6 sc into sc next dec(42)

Info :

Stuff the head tightly. keep filling as you go.

Round 30 :

Rnd 30-(6 times)5 sc into sc next dec(36)

Round 31 :

Rnd 31-(6 times)4 sc into sc next dec(30)

Round 32 :

Rnd 32-(6 times)3 sc into sc next dec(24)

Round 33-36 :

Rnd 33-36-(4 ring)sc into sc(24)

Round 37 :

Rnd 37-24 sc inc(48)

Round 38 :

Rnd 38-(6 times)6 sc into sc next inc(54)

Round 39-40 :

Rnd 39-40-(2 ring)sc into sc(54)

Round 41 :

Rnd 41-(6 times)7 sc into sc next inc(60)

Round 42 :

Rnd 42-(6 times)8 sc into sc next inc(66)

Round 43-46 :

Rnd 43-46-(4 ring)sc into sc(66)

Round 47 :

Rnd 47-30 sc into sc turn (12 sc skip) sink the needle into sc 43

β€” FIRST FRONT LEG & BODY :

Round 1-14 :

Rnd 1-14 sc into sc(14)

Round 2-13 :

Rnd 2-13-(11 ring)sc into sc(14)

Round 14 :

Rnd 14-4 sc into sc(6 sc inc)4 sc into sc(20)

Round 15-17 :

Rnd 15-17-(3 ring)sc into sc(20)

Round 18 :

Rnd 18-4 sc into sc(6 sc dec)4 sc into sc(14)

Round 19 :

Rnd 19-2 sc into sc(6 sc dec)2 sc into sc(8)

Round 20 :

Rnd 20-8 sc dec fo. Switch to body

Round 47 :

Rnd 47-18 sc into sc turn (12 sc skip)sink the needle into sc 13

β€” SECOND FRONT LEG & BODY :

Round 1 :

Rnd 1-sc into sc(12)

Round 2 :

Rnd 2-2 sc inc(14)

Round 3-13 :

Rnd 3-13-(11 ring)sc into sc(14)

Round 14 :

Rnd 14-4 sc into sc(6 sc inc)4 sc into sc(20)

Round 15-17 :

Rnd 15-17-(3 ring)sc into sc(20)

Round 18 :

Rnd 18-4 sc into sc(6 sc dec)4 sc into sc(14)

Round 19 :

Rnd 19-2 sc into sc(6 sc dec)2 sc into sc(8)

Round 20 :

Rnd 20-8 sc dec fo.Stuff the legs. Go to the body. leave the front legs out

Round 48 :

Rnd 48-sc into sc(40)

Round 49 :

Rnd 49-(8 times)6 sc into sc next inc(48)

Round 50 :

Rnd 50-(6 times)7 sc into sc next inc(54)

Round 51-62 :

Rnd 51-62-(12 ring)sc into sc(54)

Round 63 :

Rnd 63-(6 times)6 sc into sc next dec(48)

Round 64 :

Rnd 64-(6 times)5 sc into sc next dec(42)

Round 65 :

Rnd 65-(6 times)4 sc into sc next dec(36)

Round 66 :

Rnd 66-(6 times)3 sc into sc next dec(30)

Round 67 :

Rnd 67-(6 times)2 sc into sc next dec(24)

Info :

Tightly fill the body

Round 68 :

Rnd 68-(6 times)2 sc into sc next dec(18)

Round 69 :

Rnd 69-(6 times)1 sc into sc next dec(12)

Round 70 :

Rnd 70- 6 sc dec fo.

β€” TAIL :

Round 1-6 :

Rnd 1-6 sc in a mr

Round 2 :

Rnd 2-6 sc inc(12)

Round 3 :

Rnd 3-(6 times)1 sc into sc next inc(18)

Round 4-9 :

Rnd 4-9-(6 ring)sc into sc(18)

Round 10 :

Rnd 10-(2 times)8 sc into sc next dec(16)

Round 11-12 :

Rnd 11-12-(2 ring)sc into sc(16)

Round 13 :

Rnd 13-(2 times)7 sc into sc next dec(14)

Info :

Fill the tail. keep filling as you go

Round 14-33 :

Rnd 14-33-(20 ring)sc into sc(14)

Round 34 :

Rnd 34-Straighten it. sink the needle into both layers. 7 sc fo.

β€” EARS :

Item Name (P1) :

MAKE 2

Round 1-6 :

Rnd 1-6 sc in a mr

Round 2 :

Rnd 2-6 sc inc(12)

Round 3 :

Rnd 3-(2 times)3 sc into sc next inc(8)

Round 4 :

Rnd 4-(2 times)4 sc into sc next inc(10)

Round 5 :

Rnd 5-2 times)5 sc into sc next inc(12)

Round 6 :

Rnd 6-(2 times)6 sc into sc next inc(14)

Round 7 :

Rnd 7-(2 times)7 sc into sc next inc(16)

Round 8 :

Rnd 8(2 times)8 sc into sc next inc(18)

Round 9 :

Rnd 9-(2 times)9 sc into sc next inc(20)

Round 10 :

Rnd 10-(2 times)10 sc into sc next inc(22)

Round 11 :

Rnd 11-(2 times)11 sc into sc next inc(24)

Round 12 :

Rnd 12-Straighten it. sink the needle into both layers. 12 sc fo.

β€” HIND LEGS :

Item Name (P1) :

MAKE 2

Round 1-6 :

Rnd 1-6 sc in a mr

Round 2 :

Rnd 2-6 sc inc(12)

Round 3 :

Rnd 3-(6times)1 sc into sc next inc(18)

Round 4-6 :

Rnd 4-6-(3 ring)sc into sc(18)

Round 7 :

Rnd 7-6 sc into sc(4 sc dec)6 sc into sc(14)

Round 8-16 :

Rnd 8-16-(9 ring)sc into sc(14)

Round 17 :

Rnd 17-Straighten it. sink the needle into both layers. 7 sc fo.

Info :

Leave a long thread to sew on.

β€” BOW :

Round 1 :

Rnd 1-40 ch.

Round 2 :

Rnd 2-40 ch into cr(40 cr)fo.

Info :

Burun-Ana color

Round 1-6 :

Rnd 1-6 sc in a mr

Round 2 :

Rnd 2-6 sc inc(12)

Round 3 :

Rnd 3-(6 times)1 sc into sc next inc(18)

Round 4-6 :

Rnd 4-6-(3 ring)sc into sc(18)fo.

Info :

Leave a long thread to sew on. Fill the nose less

β€” JOINING PARTS :

Info :

Sew the ears between the sides (Rnd 6-12)

Info :

Sew the legs between the sides (rnd 24-48)

Info :

Sew the tail from the back to the middle of the body (rnd 24-48) between the legs

Info :

Sew the nose under the two eyes and fill it a little.

Assembly Instructions

  • Sew the ears between the sides (Rnd 6-12) placing each ear symmetrically and securing with hidden stitches.
  • Sew the legs between the sides (Rnd 24-48) aligning the front legs and back legs so the toy sits evenly, then sew firmly.
  • Sew the tail from the back to the middle of the body (Rnd 24-48) positioning it between the hind legs and secure with tight stitches.
  • Sew the nose under the two eyes and fill it a little, using a long thread to embroider details and secure the nose to the head.

Important Notes

  • πŸ’‘Use stitch markers to mark the start of each round, especially when increasing and decreasing, for accurate shaping.
  • πŸ’‘Stuff head, tail and body gradually while crocheting; keeping tension even and stuffing firm but not overstuffed gives the best shape.
  • πŸ’‘Leave long threads on ears, hind legs and bow for sewing; pin pieces in place before final stitching to check symmetry.

This cute cat amigurumi pattern makes a delightful handmade gift or charming shelf buddy. It combines sculpted facial details with a small bow for personality and sweet finishing touches. Happy crocheting and enjoy bringing this little cat to life! 🧢🐱

You ask,

we answer.

FAQs

What size will the finished piece be?

The finished amigurumi measures around 20 cm in circumference and about 10 cm in length as noted in the pattern.

Can I use different yarn weights for this pattern?

Yes, you can use different yarn weights, but the final size and look will change; adjust your hook accordingly to match gauge and desired size.

Do I need safety eyes or can I embroider the eyes instead?

You can use safety eyes placed between rounds 17-18, or substitute embroidered eyes for a softer, child-safe finish; adjust placement before securing permanently.

How long does this project typically take to complete?

Most crocheters finish this project in about 5-7 hours, depending on speed and assembly time; detailed sewing and embroidery may add more time.