About This Clownfish Amigurumi Pattern
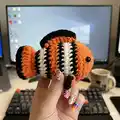
This pattern guides you through crocheting a striped clownfish amigurumi worked from the body up to the tail with no-sew construction. It features simple shaping and color changes to create classic clownfish stripes. Youll pick up yarn for dorsal fins and attach safety eyes for an expressive face.

Includes step-by-step row instructions, dorsal fin construction, and finishing notes. Suitable for crafters who know basic amigurumi stitches and want a quick, adorable make.
Why You'll Love This Clownfish Amigurumi Pattern
I absolutely love this pattern because it turns simple stitches into a vivid little fish that truly pops with color. I enjoy the no-sew construction which makes finishing fast and tidy, so you spend more time crocheting and less time sewing. The striping technique is playful and allows small changes to personalize each fish. Creating the dorsal fins and picking up yarn lines adds a satisfying finishing touch that makes the piece feel complete.
Switch Things Up
I love customizing this clownfish by changing stripe widths and colors to create unique variations and personal touches.
I sometimes swap the orange for pastel shades to make a softer, baby-friendly version that still keeps the stripe pattern.
If I want a larger plush, I use a bulkier yarn and a larger hook, which gives a cuddly, chunky fish perfect for little hands.
I often replace plastic safety eyes with embroidered eyes for a fully handmade, child-safe toy that can be washed easily.
I like experimenting with different fin shapes by adding extra DC rows or scallops to create a more dramatic silhouette.
I will occasionally add a loop at the top of the head to turn the fish into a keychain or ornament for quick gifting.
I recommend trying contrast edging on the fins using black to make the fin details pop and match the stripes.
I sometimes embroider small details like cheek blush or tiny bubbles to give the fish a bit more personality and story.
For a mobile or nursery set, I make multiple fish in coordinated colorways and vary sizes by changing yarn weight and hook to create depth and interest.
I encourage you to experiment with yarn textures too; a plush chenille yarn gives a soft, velvety fish that is irresistible to touch.
I like to assemble multiple small accessories like tiny seaweed or shells crocheted in complementary colors to create a themed display.
Common Mistakes & How to Fix Them
✗ Skipping stitch count checks during rounds leads to uneven shaping; count your stitches at the end of each round and correct mistakes immediately.
✗ Changing colors without securing the yarn can cause loose ends and gaps; carry yarn neatly or weave in ends as you go to keep stripes tidy.
✗ Forgetting to stuff before closing the body creates lumps and poor shaping; stuff gradually starting after round 17 and before final decreases.
✗ Not attaching eyes at the correct rounds will change the face placement; attach safety eyes at R5-R6 apart 8 stitches as instructed.
✗ Working with inconsistent tension will distort the fishs shape and striping; maintain an even tension and consistent hook placement throughout the project.