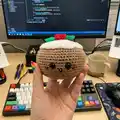
About This Christmas Pudding Amigurumi Pattern
This pattern creates a small, adorable Christmas Pudding amigurumi complete with a white icing topper, green leaves, and red berry details. The design uses simple amigurumi techniques and worked-in rounds to shape a plump, pancake-like pudding. You will sew on the little details and finish with glue-secured brads for the cheeks.

Includes a full materials list, stitch abbreviations, and clear round-by-round instructions for each piece. Perfect for holiday gifts or a festive handmade decoration.
Why You'll Love This Christmas Pudding Amigurumi Pattern
I absolutely love this pattern because it turns a simple motif into a character full of charm and personality. I enjoy how quickly it comes together, making it a satisfying project to complete in an afternoon. The small details like the icing, leaves, and berry brads bring so much character with very little extra time. I also love that it uses minimal materials but yields a polished, gift-ready amigurumi that people smile at immediately. Working on tiny decorative accessories for the top is one of my favorite relaxing steps.
Switch Things Up
I love experimenting with colorways, so try swapping Soft Fudge for a darker chocolate brown for a richer pudding look.
You can make a mini version by using thinner yarn and a smaller hook, perfect for keychains or ornaments.
Use a bulkier yarn and a larger hook to create a chunky, squishy plush suitable for little hands.
I often embroider different facial expressions to give each pudding its own personality — try a surprised or sleepy face.
Instead of brads, consider embroidering rosy cheeks with pink yarn for a fully handmade finish.
Add tiny crocheted bows or a small bell to the leaves for extra holiday charm and a festive sound.
If you want a removable topper, sew the icing only at a few strategic points so it can be taken off and put back on.
I sometimes stitch a small loop on the top so the pudding can hang as a Christmas tree decoration.
For a natural look, use slightly variegated or heathered yarns for the body to give subtle texture without extra stitches.
I recommend trying different berry arrangements — cluster three or use a single larger crocheted berry for variety.
For gifting, attach a tiny tag or add a small crocheted gift next to the pudding to make the presentation special.
Remember: changing yarn or hook will alter size, so swatching helps you plan the perfect finished piece.
Common Mistakes & How to Fix Them
✗ Placing safety eyes too low can ruin facial proportions; position eyes between rounds R14-15 and 3-4 stitches above the embroidered smile to maintain the intended expression.
✗ Forgetting to stuff as you go leads to lumps or gaps in shaping; stuff semi-firmly while working decreases so the body holds a smooth pancake shape.
✗ Skipping stitch counts during increases and decreases causes uneven shaping; count stitches after each round, especially during R1-R10 increases and R21-R29 decreases.
✗ Using too large a hook will make the stuffing show through; use the recommended 3.25mm hook to keep stitches tight and the surface neat.
✗ Not securing brads properly causes them to fall off later; add the red brads between R13-14 next to the eyes and secure them with a small amount of glue.