About This Caro-The Coral Girl Amigurumi Pattern
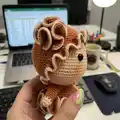
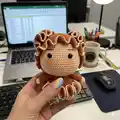
This pattern creates Caro, the Coral Girl — a charming amigurumi with ruffled hair and a flared dress. You will crochet the head, body, arms, hat and decorative coral buns, then assemble with basic sewing techniques. The pattern uses YarnArt Jeans yarn and 10mm safety eyes for a polished finish.

Round-by-round instructions and assembly photos help you place parts accurately. Techniques include magic ring, increases, decreases, BLO/FLO and joining pieces.
Why You'll Love This Caro-The Coral Girl Amigurumi Pattern
I absolutely love this pattern because it balances simple amigurumi fundamentals with playful details like ruffled buns and a layered dress that really bring the character to life. The shaping is satisfying and the ruffles add whimsical movement that I always enjoy crocheting. It’s versatile — you can swap colors to match your style or holiday themes. I also love that the assembly is straightforward, so the finished doll looks neat and professional.
Switch Things Up
I love how versatile this pattern is for customization; you can easily swap Color B for a pastel or bold shade to change the whole mood.
Try making the ruffles with a contrasting color for a pop of detail or use a variegated yarn for soft stripes.
To make a mini keychain, use thinner yarn and a smaller hook; conversely, use bulky yarn and a larger hook to make a chunky cuddle version.
I often add embroidered freckles or use different eye sizes to change personality—bigger eyes look younger and cuter.
If you want to make the buns extra curly, add more increase rounds when you make the bun base and tighten the ruffle edges.
Swap safety eyes for embroidered eyes if you make a toy for a baby to keep it totally safe.
Try adding tiny accessories like a crocheted flower, bow, or little scarf to personalize each doll as a gift.
You can change the dress length by adding or removing increase rounds in the dress section to create a longer gown or a shorter skirt.
I sometimes use metallic or sparkly yarn for the ruffle edge to make a special occasion version — it catches the light beautifully.
If you like posing options, sew a small piece of wire into each arm before closing to make lightly poseable limbs.
Common Mistakes & How to Fix Them
✗ Skipping stitch markers at the start of rounds leads to lost stitch counts; place a marker at the first stitch of every round and move it after completing each round.
✗ Not stuffing gradually causes lumps or misshapen sections; add small amounts of stuffing as you go, especially when shaping head and body areas.
✗ Using inconsistent tension between colors or sections makes ruffles and seams uneven; keep your tension steady and practice a few rounds on scrap yarn first.
✗ Forgetting to count after increases/decreases results in wrong stitch totals and poor shaping; always count stitches at the end of each increase/decrease round.